




- sales/support
Google Chat:---
- sales
+86-0755-88291180
- sales01
sales@spotpear.com
- sales02
dragon_manager@163.com
- support
tech-support@spotpear.com
- CEO-Complaints
zhoujie@spotpear.com
- Only Tech-Support
WhatsApp:13246739196
- Purchase/Shipping/Refund
WhatsApp:13424403025
Raspberry Pi 1.3inch LCD Mini Pi TFT 240x240 User Guide
RPI 1.3inch LCD Mini Pi TFT 240x240
There's two ways you can use the 1.3" 240x240 display.
- Be aware that you can only choose to do one way at a time. If you choose the hard way, it will install the kernel driver, which will prevent you from doing it the easy way.
- The easy way is to use 'pure Python 3' and Pillow library to draw to the display from within Python. This is great for showing text, stats, images etc that you design yourself. If you want to do that, skip this page and go to the Python install/usage page
- The hard way is to install a kernel module to add support for the TFT display that will make the console appear on the display. This is cute because you can have any program print text or draw to the framebuffer (or, say, with pygame) and Linux will take care of displaying it for you. If you don't need the console or direct framebuffer access, please consider using the 'pure Python' technique instead as it is not as delicate.
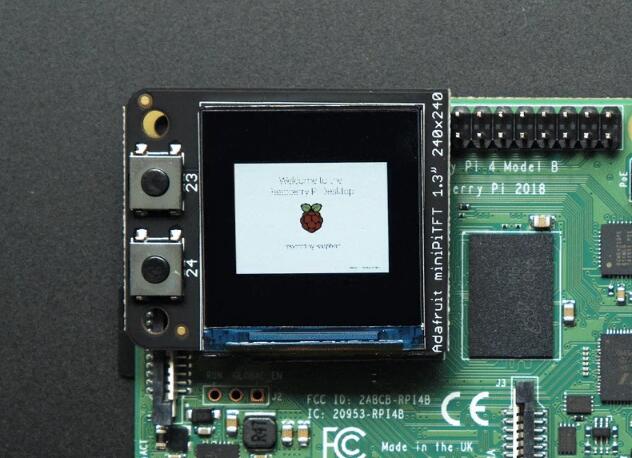
- We don't recommend using the 240x240 display for GUI/PIXEL desktop, this is only for text console usage. The display is waaay too small for a desktop
Prepare the Pi!
- Before you begin, its a good idea to get your Pi completely updated and upgraded. We assume you have burned an SD card and can log into the console to install stuff.
Run
Download: file
- sudo apt update -y
- sudo apt-get update -y
- sudo apt-get upgrade -y
- To fully update and upgrade your Pi!
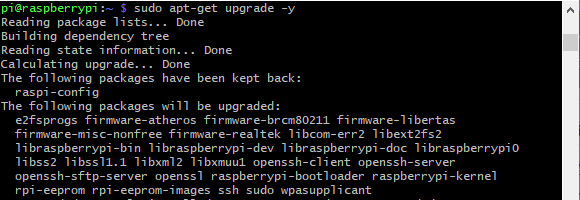
- After that is complete run
- sudo shutdown -h now
- to shutdown the Pi safely. Remove power and attach the miniPiTFT. Watch that the pins plug into the first 2x12 headers! The rounded corner and mounting hole should line up.
- Attach power to the Pi and re-log in. The PiTFT should be lit but nothing on the screen.
- Run the following at the terminal
Download: file
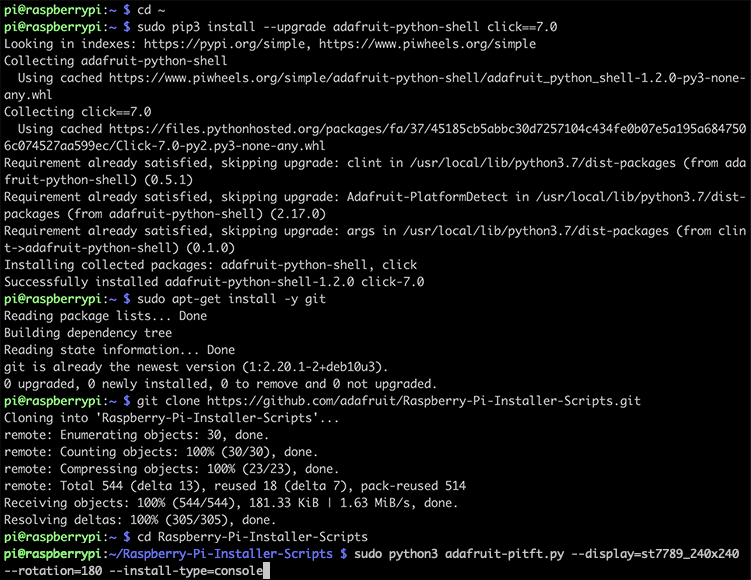
- cd ~
- sudo pip3 install --upgrade adafruit-python-shell click==7.0
- sudo apt-get install -y git
- git clone https://github.com/adafruit/Raspberry-Pi-Installer-Scripts.git
- cd Raspberry-Pi-Installer-Scripts
- sudo python3 adafruit-pitft.py --display=st7789_240x240 --rotation=0 --install-type=console
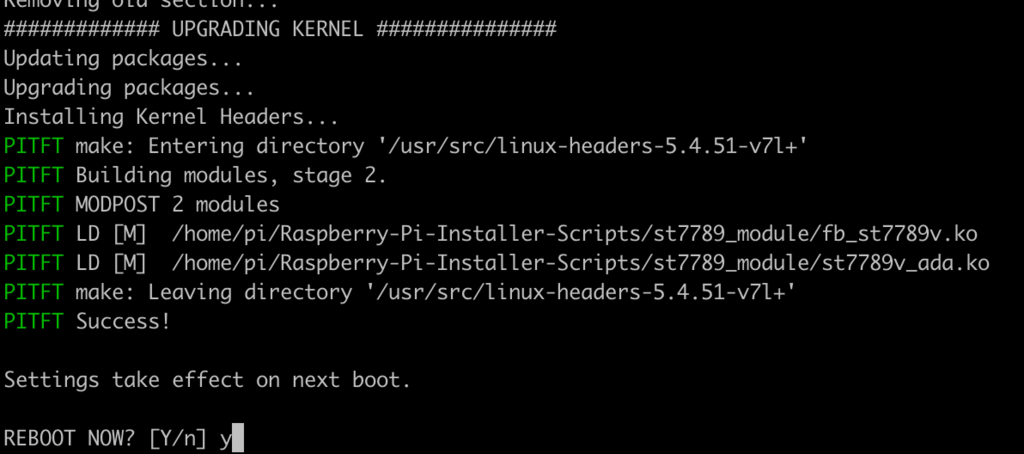
- When you get asked to reboot, reboot!
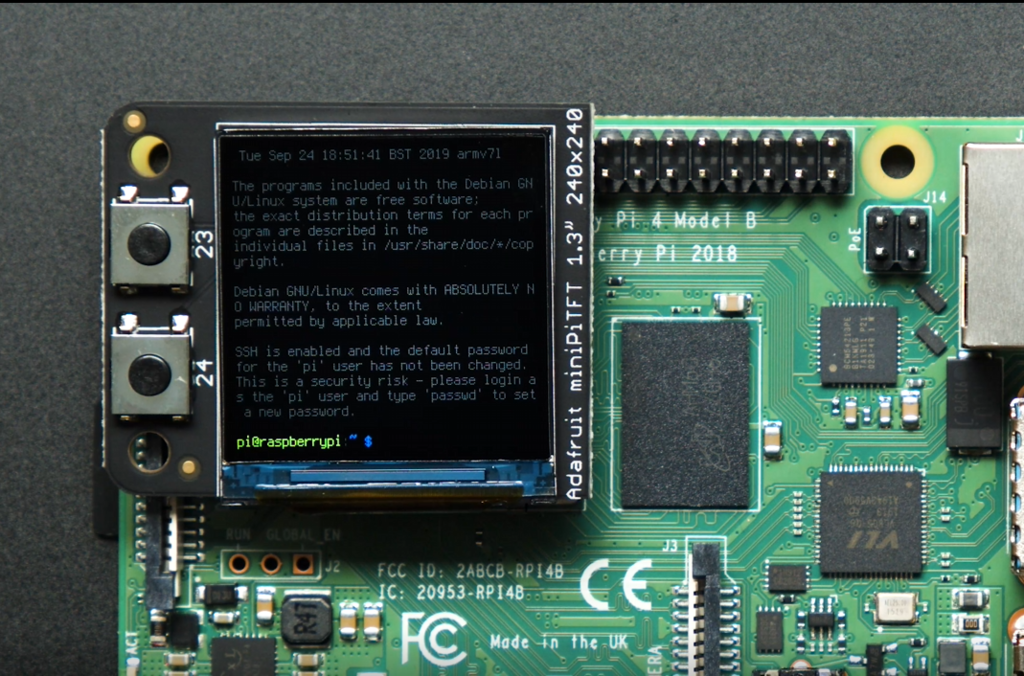
- Zat's it! You will now have the miniPiTFT with a console display on it
TAG:
2.13 inch Passive NFC e-Paper ink (G) RYBW Display Screen No Need Battery Wireless Power & Data Transfer
Industrial CAN FD RS232/RS485 bidirectional converter CAN2.0A/B
Raspberry Pi PICO
Pi5-Active-Cooler-C
Sipeed NanoKVM Cube KVM HDMI Remote OS Control Manager Install /Power Control /Remote Desktop Server UART
Screen
Raspberry Pi Pico 2 RP2350-Matrix Development Board 8×8 RGB LED Matrix QMI8658 6-Axis Sensor
ESP32 P4 Development Board 7inch Display 7 inch TouchScreen Onboard ESP32-C6 Camera 1024×600
Jetson Orin
Milk V Duo
ESP32 Thermal imaging camera
Raspberry Pi 5
IPS
Raspberry Pi Pico 2 RP2350B RP2350-PiZero Development Board PSRAM DVI For HDMI
Raspberry Pi Pico 2 RP2350 1.28 inch Round LCD TouchScreen Development Board 240x240 Display QMI8658 6-Axis $17.9
DeepSeek AI Voice Chat ESP32-S3 Box N16R8 AUDIO Board Support External LCD/Camera AI deepseek
CAN FD
ESP32-C6 Geek 1.14inch Development Board with 1.14 inch 65K Color LCD
Sensor Development Board
AV to LVDS
TAG:
RP2040 LoRa-HF
ESP32-P4 Pico Development Board DB C5 MIPI DSI 10.1-inch Display /CSI Camera /Audio Speaker Mic AI Deepseek
Jetson Nano Cooler
XIAO-ESP32S3 Sense Camera S3R8 Arduino MicroPython SeeedStudio
Jetson Orin Nano 4 8GB AI 20 40Tops Lower Power Autonomous Machines For NVIDIA
ESP32-S3/C6/C3 Zero Starter Learning Kit Diy School Kit Arduino /MicroPython /ESP-IDF
OPS Computer
GC9A01
Raspberry Pi
Pi5 Case
Raspberry-Pi -GPIO-Audio-amplification-PWM-Sound-Card-Speaker-Buzzer
ESP32 Thermal imaging
3.52 inch e Paper HAT B E Ink 360x240 Screen Display Arduino Raspberry Pi Jetson Nano STM32
LuckFox
ESP32-S3 IR Infrared Thermal Imaging Camera B
SpeedyBee BLS 50A ESC Controller Motor Driver Board DJI FPV Drone
Raspberry Pi 5 Pure-Copper Cooler
MPTPU Raspberry Pi 5 TPU AI Kit PCIe Google Coral Edge
Milk V Duo
25mm Telephoto CS Lens Raspberry Pi High Quality Camera Global Shutter Camera