- sales/support
Google Chat:---
- sales
+86-0755-88291180
- sales01
sales@spotpear.com
- sales02
dragon_manager@163.com
- support
tech-support@spotpear.com
- CEO-Complaints
zhoujie@spotpear.com
- Only Tech-Support
WhatsApp:13246739196
- Purchase/Shipping/Refund
WhatsApp:13424403025
- HOME
- >
- ARTICLES
- >
- Common Moudle
- >
- Sensors
Raspberry Pi Gesture recognition module - Gesture control fan User Guide
Gesture control fan
1. Purpose
In this course, we mainly learn to use Micro:bit, gesture recognition module, Micro:bit alligator clip expansion board, building block servo, motor drive module, DC motor realize gesture remote control fan.
2.Programming method
Mode 1 online programming:
First, we need to connect the micro:bit to the computer by USB cable. The computer will pop up a USB flash drive and click on the URL in the USB flash drive: http://microbit.org/ to enter the programming interface. Add the Yahboom package: https://github.com/YahboomTechnology/GR and https://github.com/lzty634158/Croco-Kit to start programming.
Mode 2 offline programming:
We need to open the offline programming software. After the installation is complete, enter the programming interface, click [New Project]. Add Yahboom package: https://github.com/YahboomTechnology/GR and https://github.com/lzty634158/Croco-Kit, you can start programming.
3.About wiring
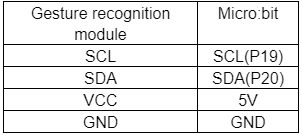
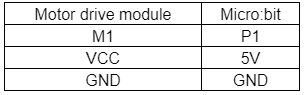
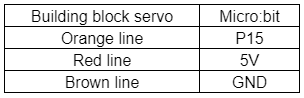
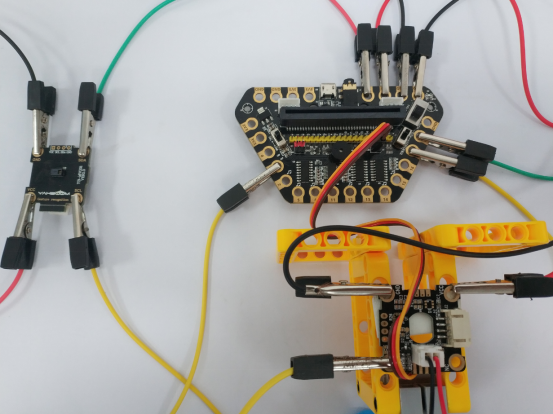
4.Combine building blocks
We need to use the following programming building blocks. 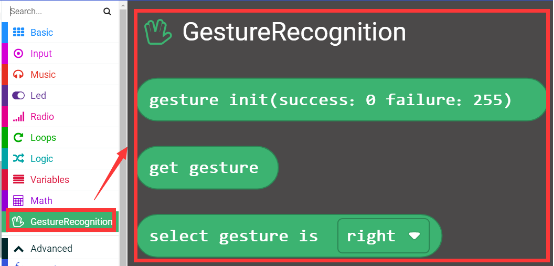
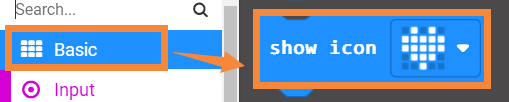

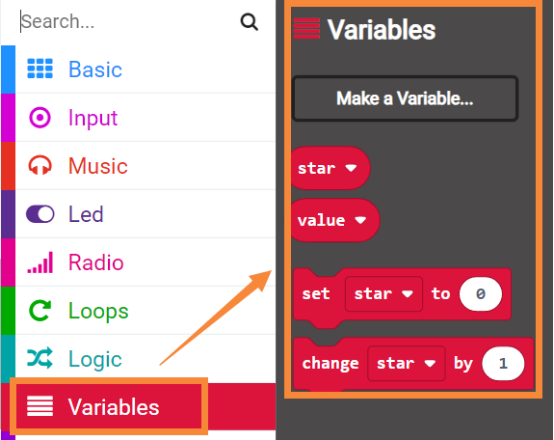
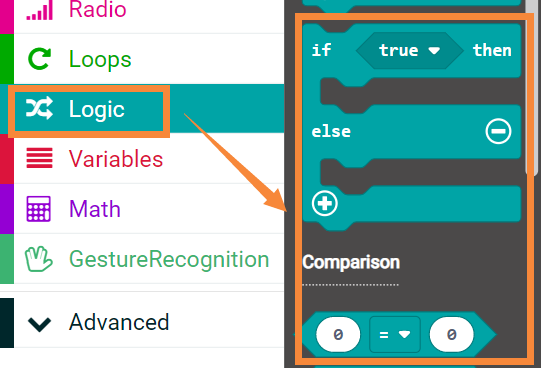
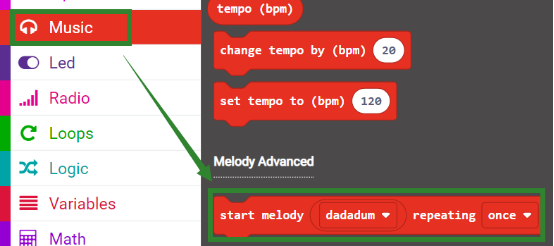
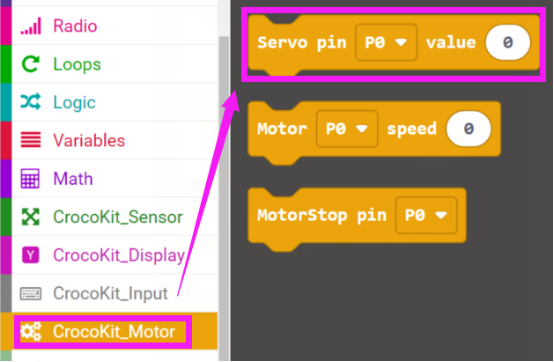
Summary procedure as shown below.
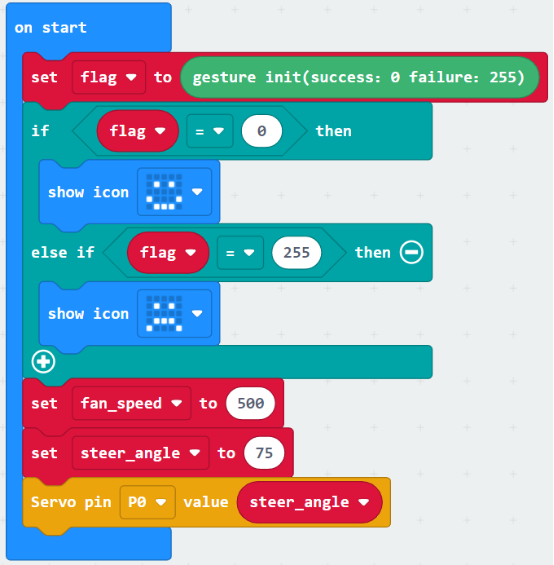
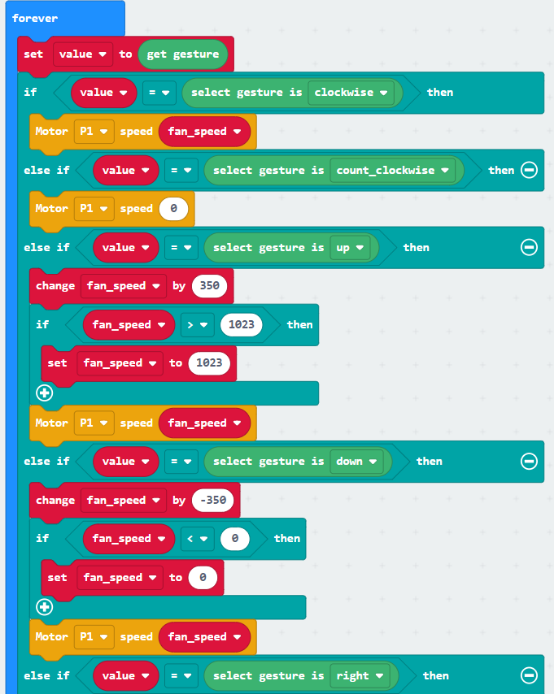
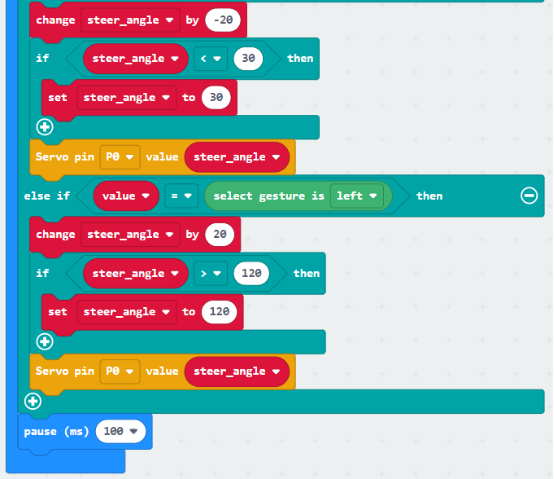
Gesture recognition module needs to be initialized by initializing the recognition block. If the initialization is successful, it will return 0. If the recognition is fail, it will return 255, we can restart the program by pressing the reset button of the micro:bit.
Store the recognition result in the value variable, and compare the value of the value with the selection gesture as a building block. If the two are equal, it is the corresponding gesture.
5. Phenomenon
After the program is downloaded successfully, if the initialization is successful, the micro:bit dot matrix will be a smile face, and if it fails, it will be a cry face.
You can press the micro:bit reset button to restart the program to initialize.
Put the gesture recognition module in the vertical direction, open your palm to face the module.
Swing over your palm from left to right in front of the module, fan shake its head to the left;
Swing over your palm from right to left in front of the module, fan shake its head to the right;
Swing over your palm from bottom to top in front of the module, increase speed of fan;
Swing over your palm from top to bottom in front of the module, decrease speed of fan;
Make a fist and stretch out two or three fingers to point to the front of the module, then circle it clockwise for a while, fan rotation clockwise for a while;
Make a fist and stretch out two or three fingers to point to the front of the module, then circle it counterclockwise for a while, fan will rotate counterclockwise for a while.
Arduino
Micro:bit
Jetson NANO
Raspberry Pi