- sales/support
Google Chat: zj734465502@gmail.com
- sales
+86-0755-88291180
- sales01
sales01@spotpear.com
- sales02
dragon_manager@163.com
- support
services01@spotpear.com
- CEO-Complaints
manager01@spotpear.com
- sales/support
WhatsApp:13246739196
- HOME
- >
- ARTICLES
- >
- Common Moudle
- >
- ESP
ESP32 C3 0.42LCD display Hello world
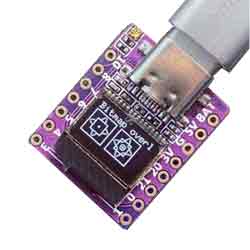
1, Hardware connection:
Directly connect the Type C USB port to the computer, and the serial port will be automatically recognized after connecting to the hub
2, Software burning:
2.1. Copy the following code to the Arduino IDE
#include<Arduino.h>
#include<U8g2lib.h>
#ifdefU8X8_HAVE_HW_SPI
#include<SPI.h>
#endif
#ifdefU8X8_HAVE_HW_I2C
#include<Wire.h>
#endif
#defineSDA_PIN5
#defineSCL_PIN6
U8G2_SSD1306_72X40_ER_F_HW_I2Cu8g2(U8G2_R0,/* reset=*/U8X8_PIN_NONE);//
voidsetup(void){
Wire.begin(SDA_PIN, SCL_PIN);
u8g2.begin();
}
voidloop(void){
u8g2.clearBuffer();// clear the internal memory
u8g2.setFont(u8g2_font_ncenB08_tr);// choose a suitable font
u8g2.drawStr(0,10,"Hello World!");// write something to the internal memory
u8g2.sendBuffer();// transfer internal memory to the display
delay(1000);
}
Note: The text characters in parentheses of 'Hello World!' can only be English letters and cannot be in Chinese
2.2. Use a type-c cable to connect the computer to the ESP 32-c3 development board. After successful connection, the serial port will be displayed in the computer management window
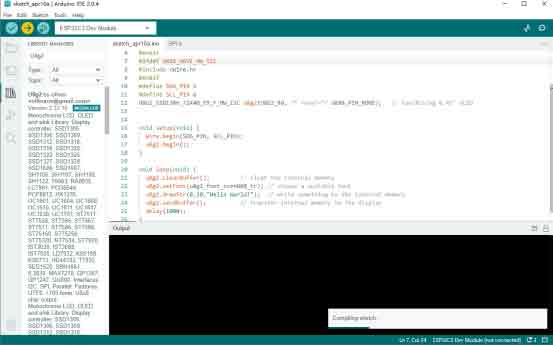
2.3. Click on Tools in the Arduino IDE, then click on Port and select the serial port Adafruit QT ESP32-C3
2.4 Click to Verfy
2.5 Click to upload
2.6 6. Waiting for upload
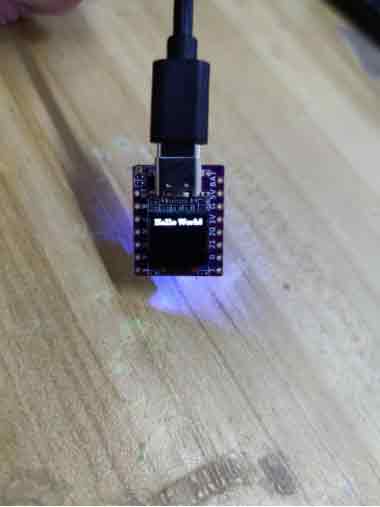
After successful upload
The display effect of the development board is as follows