- sales/support
Google Chat:---
- sales
+86-0755-88291180
- sales01
sales@spotpear.com
- sales02
dragon_manager@163.com
- support
tech-support@spotpear.com
- CEO-Complaints
zhoujie@spotpear.com
- Only Tech-Support
WhatsApp:13246739196
- Purchase/Shipping/Refund
WhatsApp:13424403025
- HOME
- >
- ARTICLES
- >
- LuckFox
- >
- LuckFox Pico
Luckfox Pico RV1103【Connect to SC3336-camera for network streaming】
1] Make sure the camera is properly connected to the hardware, and then power on the device:
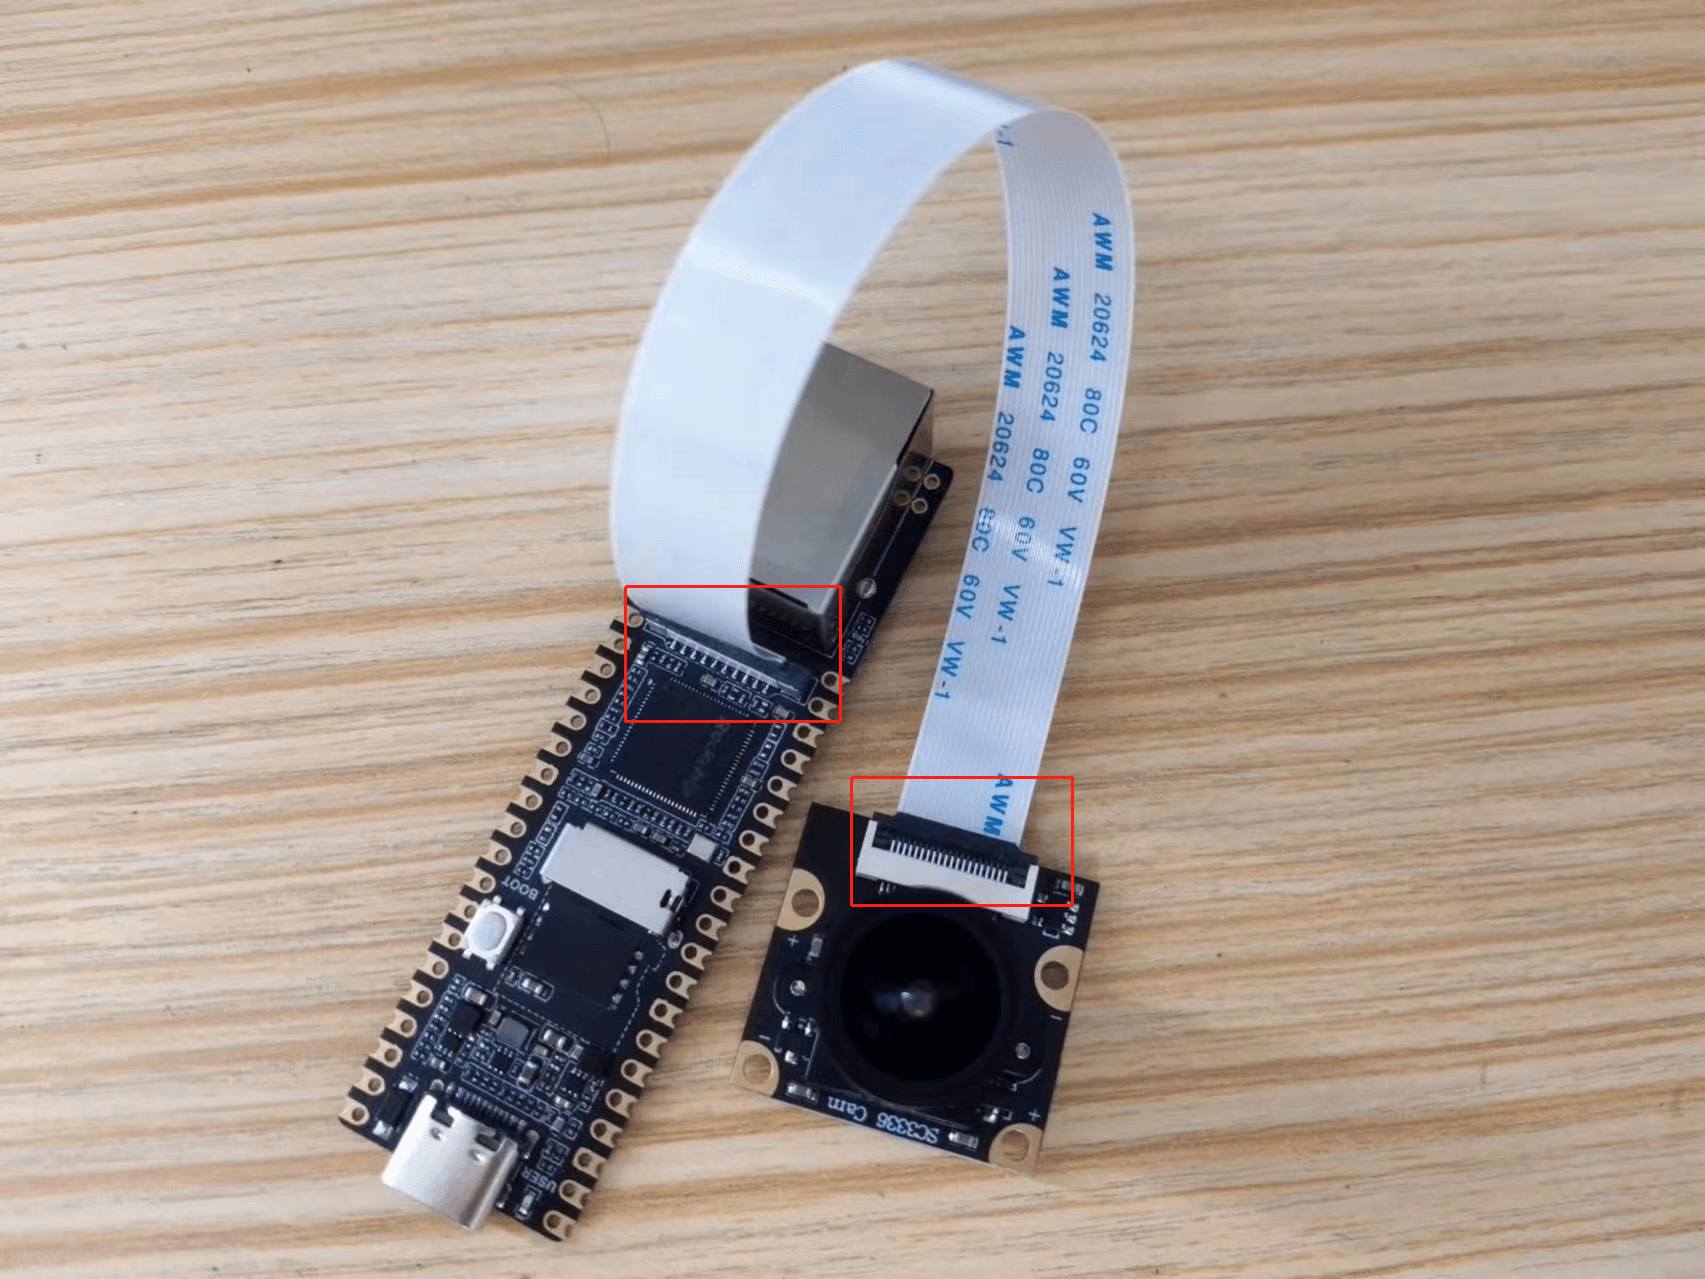
The system will automatically detect the camera. If you are unable to connect to the camera during the following operations, you will need to log in to the system terminal and use the command "ls /userdata" to check if the system recognizes it. If the camera is recognized, there will be an "rkipc.ini" file; otherwise, the file will not exist;


2] Get device IP:
(Translation: The Plus-Pico can use Ethernet and RNDIS, while the Pico uses RNDIS to connect to the camera.)
Translation: After logging into the system terminal using either serial port or ADB, you can use the “ifconfig” command to view the IP address.
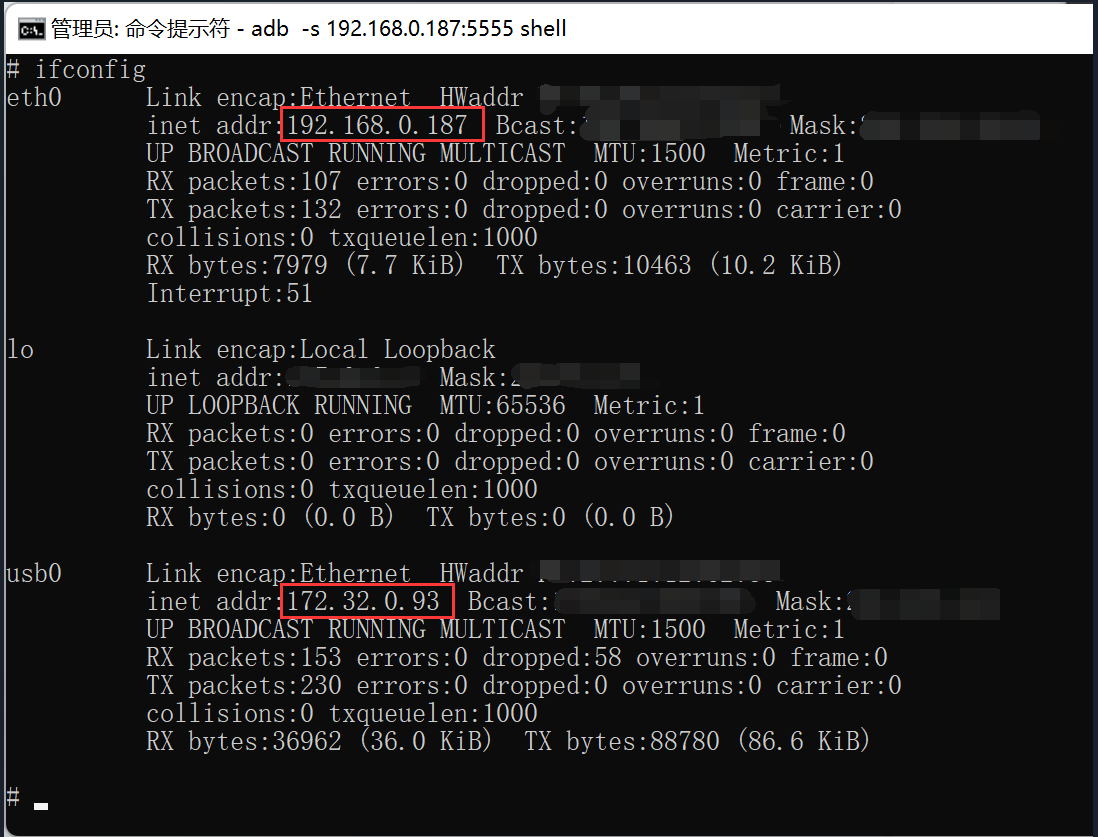
Translation: The IP address displayed by “eth0” is for the Plus-Pico network interface, while the IP address displayed by “usb0” is for RNDIS.
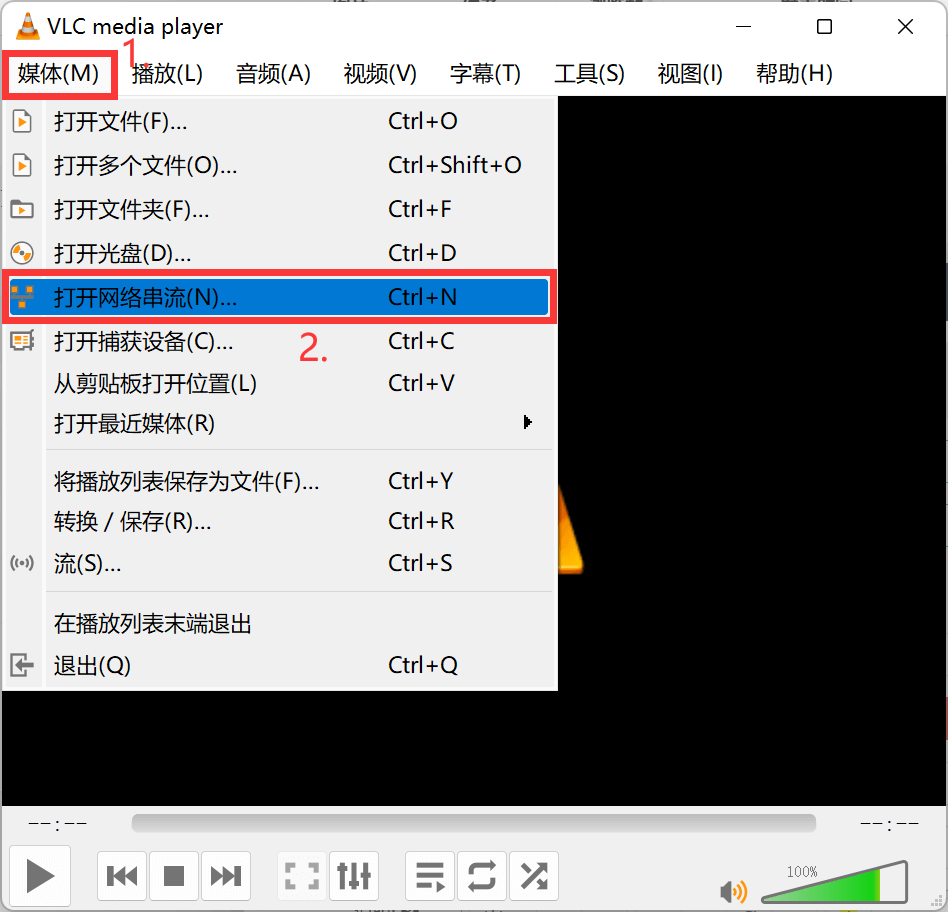
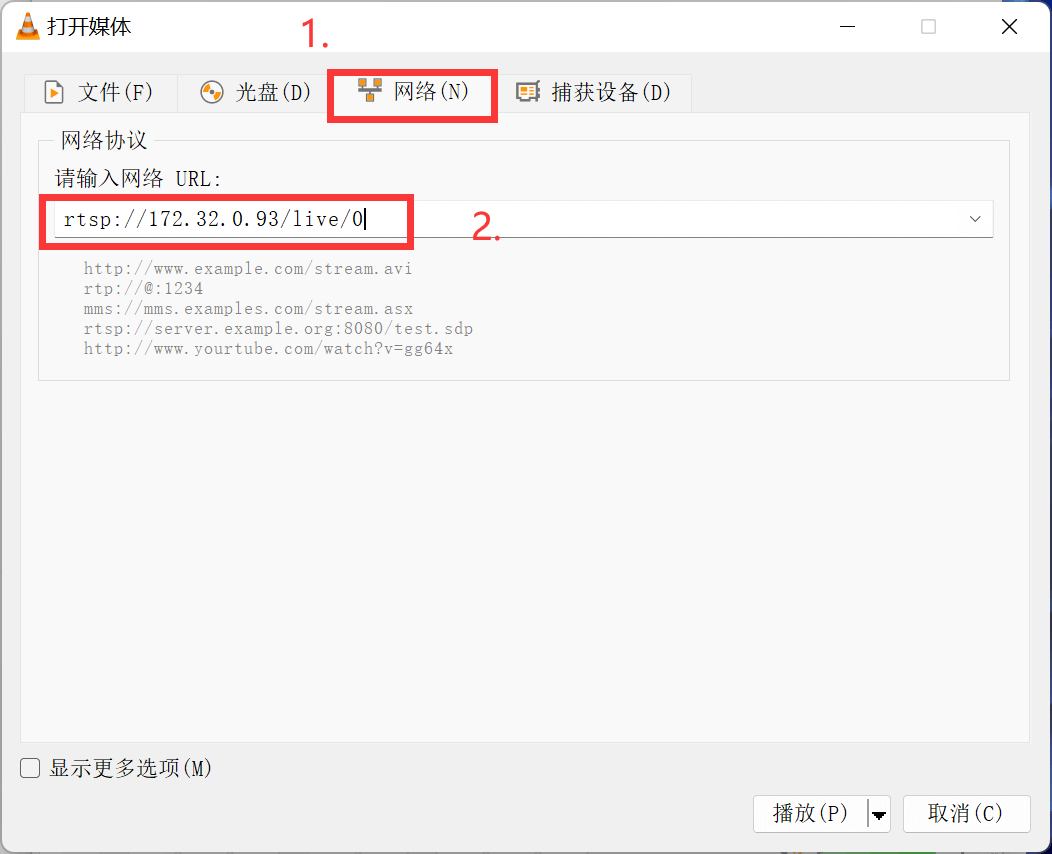
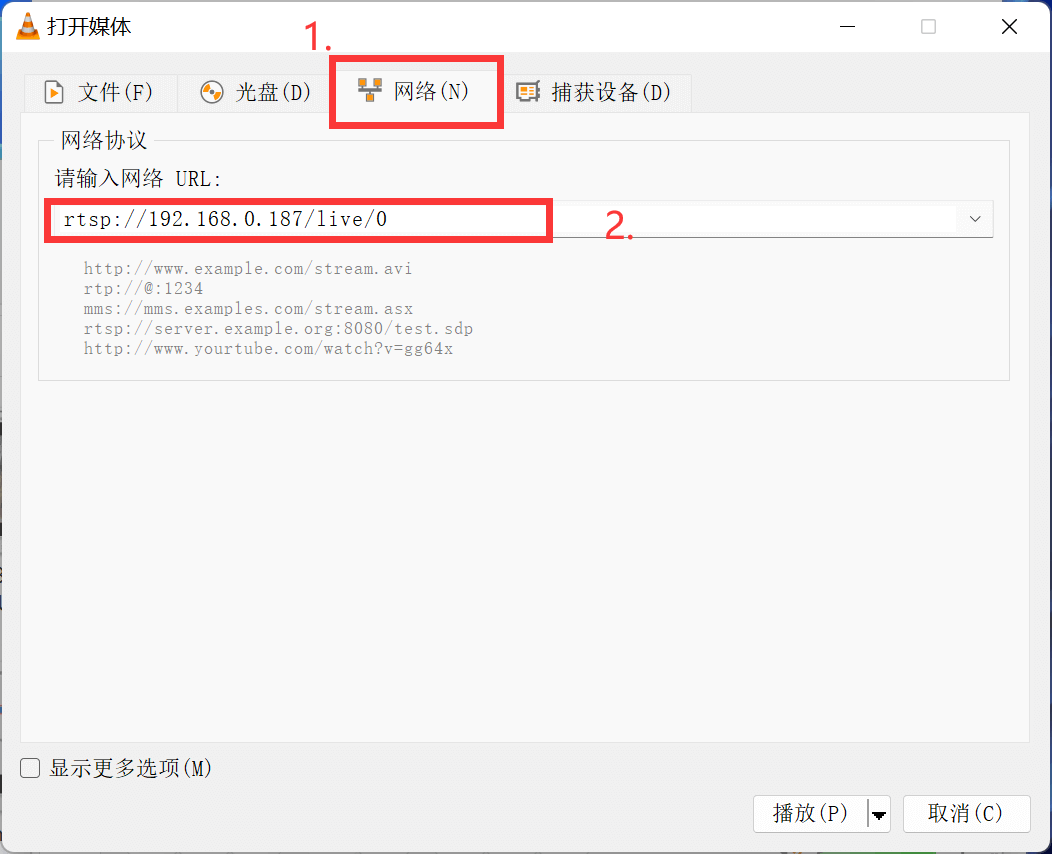
3] Open the network streaming function in VLC:
4] Connect the camera using RNDIS:
5] Connect the camera using an Ethernet port:
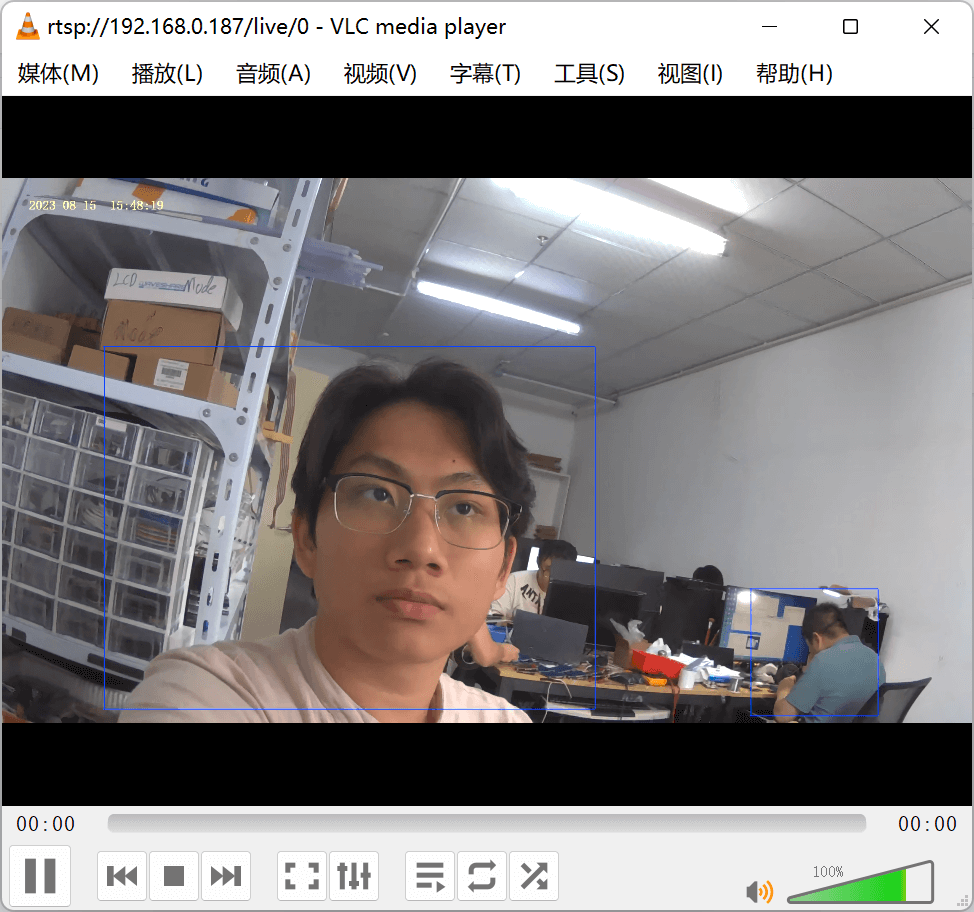
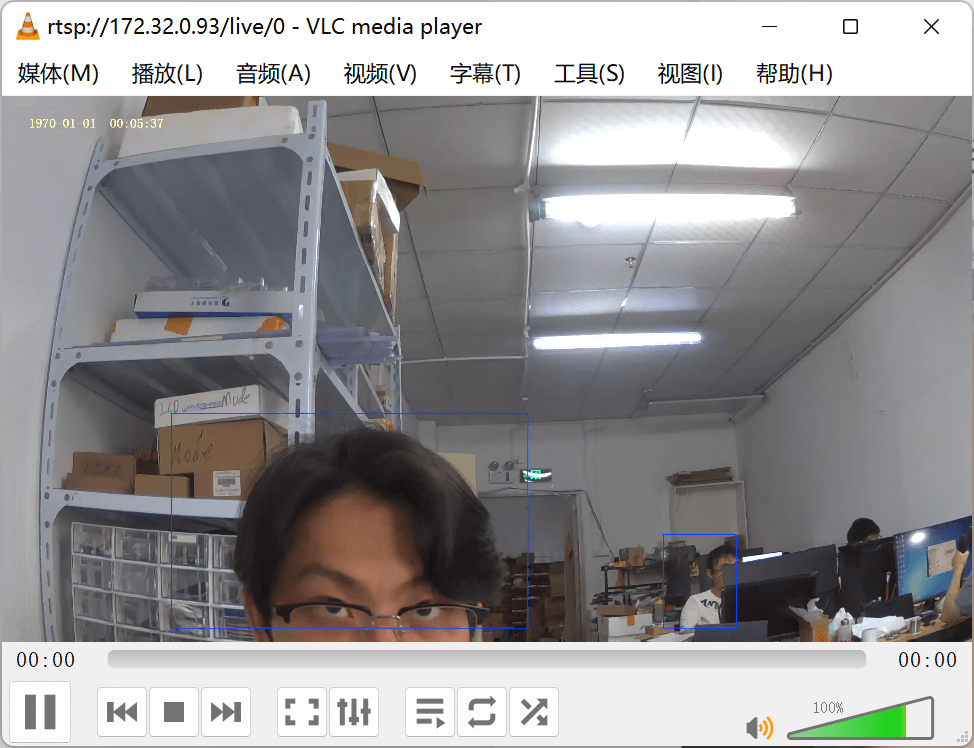
When testing the camera, you can try to have a person’s face appear in the frame. This board supports facial recognition functionality.