


- sales/support
Google Chat: zj734465502@gmail.com
- sales
+86-0755-88291180
- sales01
sales01@spotpear.com
- sales02
dragon_manager@163.com
- support
services01@spotpear.com
- CEO-Complaints
manager01@spotpear.com
- sales/support
WhatsApp:13246739196
7inch-Side-Monitor-B User Guide
Features
- 7-inch IPS display with a hardware resolution of 1024x600.
- All-metal CNC alloy case and the side monitor with a brightness of up to 500cd/m².
- USB2.0 display signal, support power supply and display with one cable.
- Support Windows 11/10/8.1/8/7.
- Software configuration only is required for the first time and supports plug-and-play for subsequent usage.
Parameters
| Item | Description | Unit |
|---|---|---|
| Model | 7inch Side Monitor | / |
| Dimensions | 7.0 | Inch |
| Viewing Angle | 170 | Deg |
| Resolution | 1024x600 | Pixels |
| Overall Dimensions | 170.90(H)×106.60(V)×11.14(D) | mm |
| Display Area | 154.60(H)×86.32(V) | mm |
| Color Gamut | 58% | NTSC |
| Default Brightness | 500 | cd/m² |
| Contrast | 800:1 | / |
| Refresh Rate | 60 | Hz |
| Power & Display Interface | USB2.0 | / |
| Default Power Consumption | 2.7 | Watt |
Electrical Specification
| Parameter | Min. Value | Standard Value | Max. Value | Unit | Note |
|---|---|---|---|---|---|
| Input Voltage | 4.7 | 5.00 | 5.25 | V | Note 1 |
| Input Current | 550 | 600 | TBD | mA | Note 2 |
| Operating Temperature | 0 | 25 | 60 | ℃ | Note 3 |
| Storage Temperature | -10 | 25 | 70 | ℃ | Note 3 |
- Note 1: Input voltage exceeding the maximum value or improper operation may cause permanent damage to the device.
- Note 2: The input current must be ≥550mA, otherwise, it will cause startup failure or abnormal display, and it may cause permanent damage to the device if it is in an abnormal state for a long time.
- Note 3: Please do not store the display in a high-temperature and high-humidity storage environment for a long time. The display must work within the limited value range, otherwise, the display may be damaged.
Usage Tutorial
Hardware Connection
Method 1: USB Type-C Connection
Note: Please ensure the USB interface provides sufficient power!! It is recommended to use the USB interface on the board first.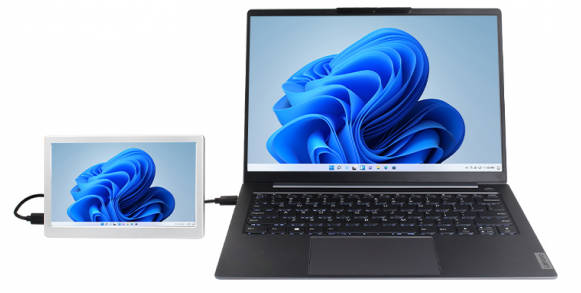
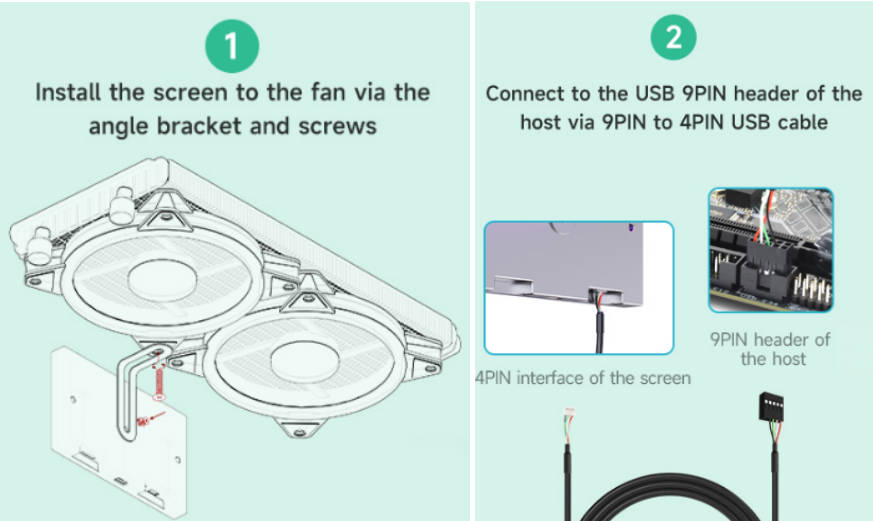
Mthod 2: USB 4PIN Port Connection
Software Setting
Install Win USB Display Driver
- 1. Download WinUSBDisplay driver program.
- 2. Unzip it and run "WinUSBDisplay_Windows.exe".
① Please keep the default installation path "C:\Program Files\Win USB Display", and select "Next".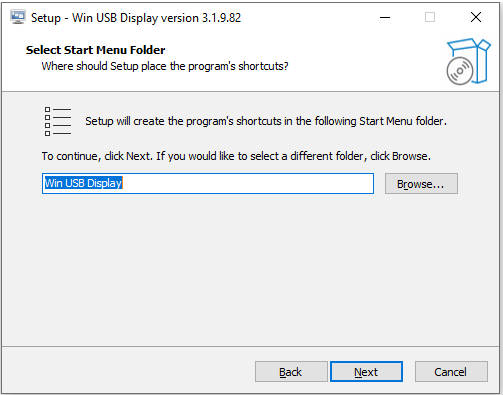
② Click on "Install".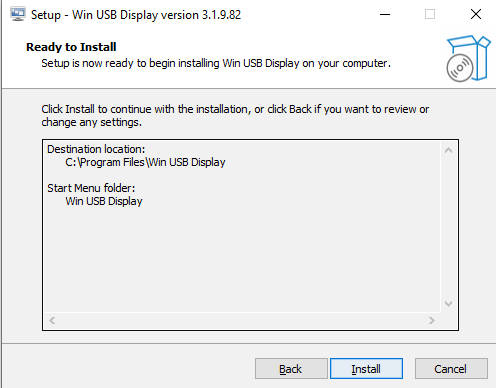
③ NOTE! HERE SELECTS "NO" MANUALLY AND THEN CLICK ON ④ "FINISH".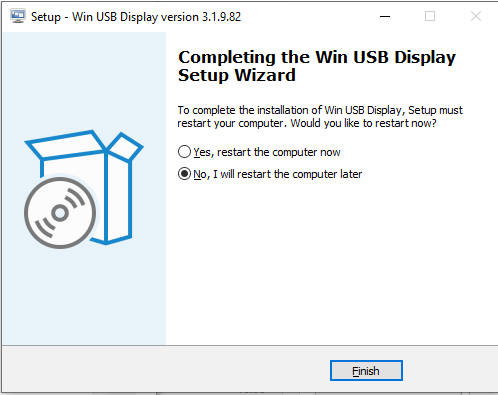
④ Click to download and unzip config.ini, copy the "config.ini" file the default installation path "C:\Program Files\Win USB Display" in Step ①.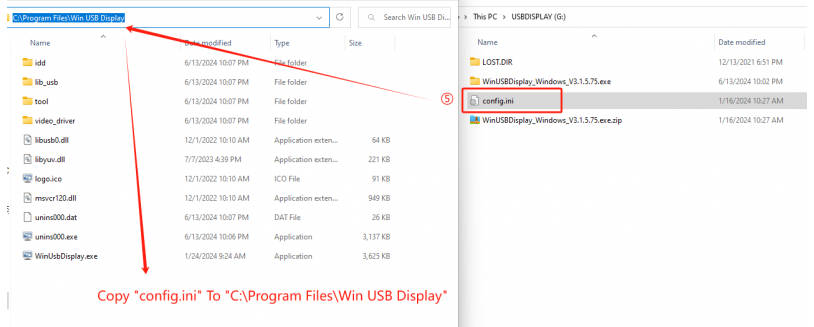
⑤ Now the software setting is finished, please restart the Windows system.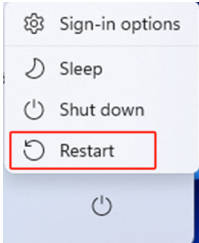
⑥ Restart to enter the system, wait for 30s, and then the 7-inch Side Monitor can be normally recognized and displays.
As shown in the figure below, enter "Display setting", set the side monitor as "Extended these displays", and select "1024 x 600 (Recommended)".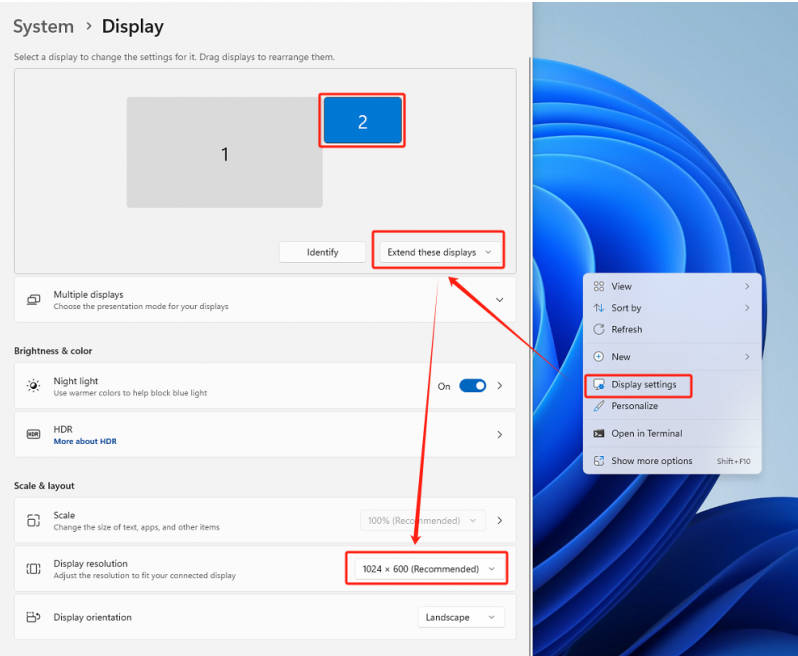
FAQ
Question:What is the brightness and power consumption of this product?
The brightness is 500cd/m², and the power consumption is 5V 0.6A.
Question:Why the resolution of the screen is 800x600 after rebooting? Isn't it 1024x600?
Please download and unzip config.ini. Copy "config.ini" to the default installation path "C:\Program Files\Win USB Display", reboot the system, and then the resolution is 1024x600.
Question:Why does my screen keep black? I have operated it following the steps on WiKi, why does it still fail to display?
1. Check Hardware Connection:
<1> Please ensure that the USB 2.0 interface provides sufficient power. Avoid using USB hubs or other extension devices whenever possible, as insufficient power supply may cause screen flickering or blackouts.
<2> It is recommended to connect the side monitor to the USB interface on the PC, or you can try to use the USB3.0 interface.
2. Check Software Setting:
<1> After rebooting the system, open "Display" setting, and click on "Detect" to check whether the side monitor is recognized.
<2> If it is recognized, please set the side monitor as "Extend these displays".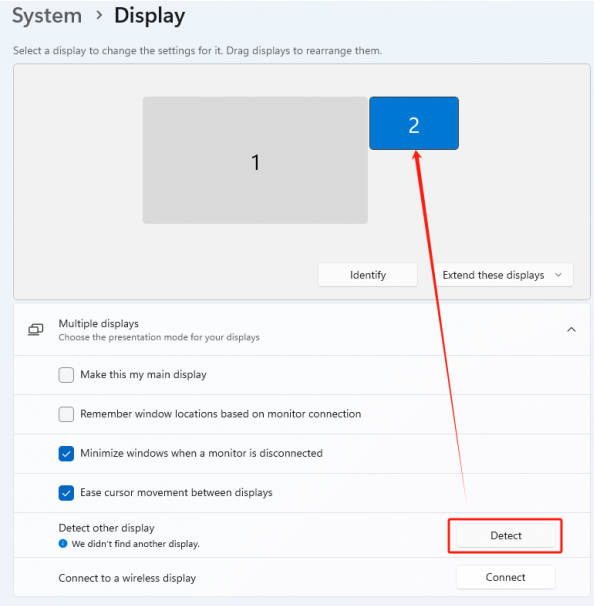
<3> If the side monitor is not recognized, please enter "Device Manager" to check whether the "MS USB Display" driver is correctly loaded.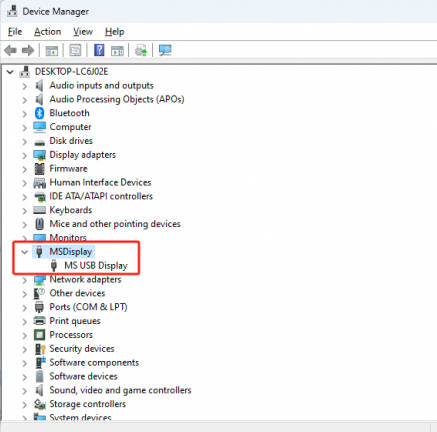
<4> Enter "C:\Program Files", and check whether the "Win USB Display" folder exists;
<5> Open the file folder and select View -> Show -> Hidden items; enter "C:\Users\UserName\AppData\Roaming\WinUsbDisplay", package all ".log" files and send them to our support team for help.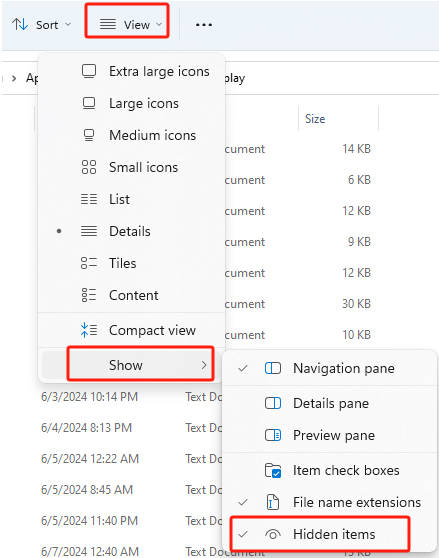
Support
Monday-Friday (9:30-6:30) Saturday (9:30-5:30)
Mobile: +86 13434470212
Email: services01@spotpear.com

[Tutorial Navigation]
- Features
- Parameters
- Electrical Specification
- Usage Tutorial
- FAQ
- Question:What is the brightness and power consumption of this product?
- Question:Why the resolution of the screen is 800x600 after rebooting? Isn't it 1024x600?
- Question:Why does my screen keep black? I have operated it following the steps on WiKi, why does it still fail to display?
- Support