- sales/support
Google Chat:---
- sales
+86-0755-88291180
- sales01
sales@spotpear.com
- sales02
dragon_manager@163.com
- support
tech-support@spotpear.com
- CEO-Complaints
zhoujie@spotpear.com
- Only Tech-Support
WhatsApp:13246739196
- Purchase/Shipping/Refund
WhatsApp:13424403025
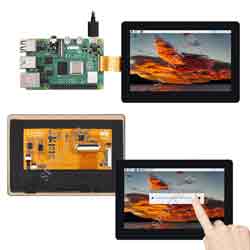
Raspberry Pi 50H-800480-IPS-CT User Guide
Overview
50H-800480 series display, produced by the Waveshare team, is designed for users who need a lightweight DSI display. Compared with the traditional DSI screen, it is lighter and more convenient for secondary development.
Features
- 5-inch IPS screen, 800 x 480 hardware resolution.
- 5-point capacitive touch control, toughened glass panel, hardness up to 6H (this function is only for the touch version).
- Support Pi4B/3B+/3A+/3B/2B/B+/A+, and some CM3/3+/4 expansion board need a DSI Cable 15cm.
- Directly drive the LCD via the DSI port of the Raspberry Pi, and the refreshing rate is up to 60Hz.
- When working with the Raspberry Pi, it supports Raspberry Pi OS/Ubuntu/Kali and Retropie, and is driver-free.
- Support adjusting the backlight via the software and saving more power.
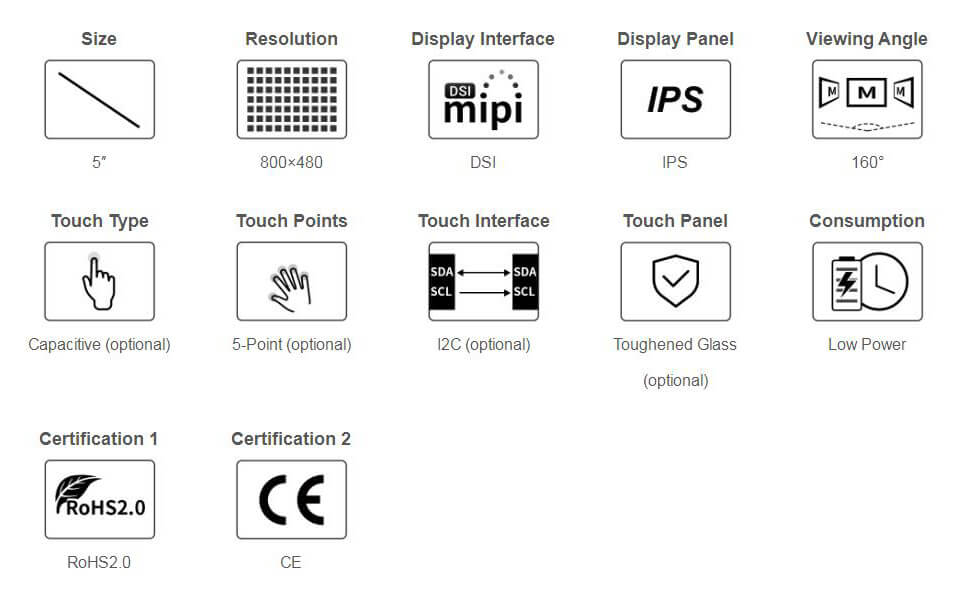
Parameters
| Item | Description | Unit |
|---|---|---|
| Model | 50H-800480 Series | |
| Dimensions | 5.0 | Inch |
| Viewing Angle | 160 | Deg |
| Resolution | 800 (RGB) × 480 | Pixels |
| Touch Screen Dimensions | 127.7 (H) × 87.45 (V) × 4.9 (D) | mm |
| Display Screen Dimensions | 120.7 (H) × 75.8 (V) × 2.8 (D) | mm |
| Display Area | 108.0 (W) × 64.8 (H) | mm |
| IPS Color Gamut | 50%NTSC | |
| Brightness | 300 | cd/m² |
| Backlight Adjustment | Software | |
| Contrast | 1000:1 | |
| Color Depth | 16.7M | |
| Refresh Rate | 60 | Hz |
| Driver Port | DSI Port |
Interface Definition
| PIN | Label |
|---|---|
| 1 | GND |
| 2 | DSI1_DN1 |
| 3 | DSI1_DP1 |
| 4 | GND |
| 5 | DSI1_CN |
| 6 | DSI1_CP |
| 7 | GND |
| 8 | DSI1_DN0 |
| 9 | DSI1_DP0 |
| 10 | GND |
| 11 | SCL0 |
| 12 | SDA0 |
| 13 | GND |
| 14 | 3V3 |
| 15 | 3V3 |
Working With Raspberry Pi
Hardware Connection
With FFC cable, you can connect 50H-800480 to the DSI port of the Raspberry Pi, as shown below: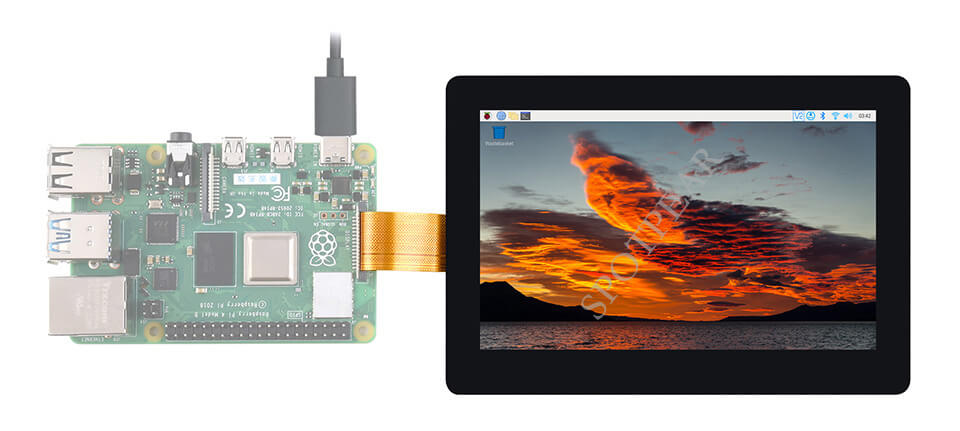
Software Setting
For Raspberry Pi OS/Ubuntu/Kali/Retropie systems:
- 1. Please download the newest image from the official Raspberry Pi website. Download the compressed file to the PC and unzip it to get the ".img" file.
- 2. Connect the TF card to the PC and use the SDFormatter to format the TF card.
- 3. Open Win32DiskImager software, choose the system image prepared in the first step, and click write to write the system image.
- 4. After writing, open the config.txt file on the root directory of the TF card. Add the following codes at the end of config.txt, save it and then safely remove the TF card.
dtoverlay=vc4-kms-v3d
dtoverlay=vc4-kms-dsi-7inch- 5. Insert the TF card into the Raspberry Pi, power on it, and then enter the display after waiting for a few seconds. It can be normally touched after booting the system.
Backlight Control
Input the following commands on the terminal to adjust the brightness.
echo X > /sys/class/backlight/10-0045/brightness
X means any number in 0~255, 0 means the darkest, and 255 means the brightest.
echo 100 > /sys/class/backlight/10-0045/brightness
echo 0 > /sys/class/backlight/10-0045/brightness
echo 255 > /sys/class/backlight/10-0045/brightness
In addition, Waveshare provides the corresponding demo (the demo is only for Raspberry Pi OS), and users can download to install in the following ways:
wget https://www.waveshare.com/w/upload/f/f4/Brightness.zip
unzip Brightness.zip
cd Brightness
sudo chmod +x install.sh
./install.sh
After installing, you can open the demo in Menu -> Accessories -> Brightness, as shown below:
Screen Sleep Mode
The display enters sleep mode after inputting the following commands:
xset dpms force off
Disable Touch
Add the following commands to disable the touch at the end of the "config.txt" file. (config file is in the TF card root directory, which can also be accessed by the command: sudo nano /boot/config.txt.)
disable_touchscreen=1
Note: After adding the commands, you need to reboot it to take effect.
Dimensions