- sales/support
Google Chat:---
- sales
+86-0755-88291180
- sales01
sales@spotpear.com
- sales02
dragon_manager@163.com
- support
tech-support@spotpear.com
- CEO-Complaints
zhoujie@spotpear.com
- Only Tech-Support
WhatsApp:13246739196
- Purchase/Shipping/Refund
WhatsApp:13424403025
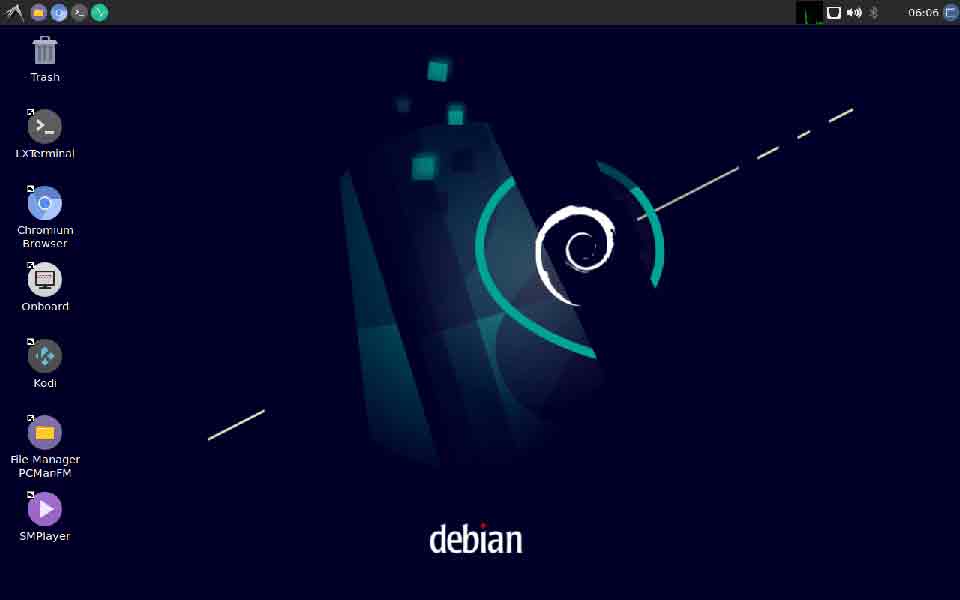
Debian Buster Desktop
1 Work with Debian10 Desktop
1.1 Introduction to Debian10 Desktop
Debian10 Desktop is a light-weighted debian desktop system,it has the following features:
- Uses LXDE as default desktop;
- Mali GPU-based OpenGL support;
- Support Rockhip MPP video hard coding and hard decoding;
- Pre-installed mpv and smplayer, both support 4K video hardware decoding;
- Pre-installed Chromium browser, support vpu/gpu hardware acceleration (video hard decoding limited to h264/mp4 format);
- Compatible with Plex Server and Docker;
1.2 Account & Password
Regular Account:
User Name: pi
Password: pi
Root:
the root user account is disabled by default, you may configure the root password through the 'sudo passwd root' command.
1.3 View IP address
Since the Debian Buster hostname is the hardware model by default, you can use the ping command to get the IP address:ping NanoPi-R5S
1.4 Connect to Debian via SSH
Run the following commandssh pi@NanoPi-R5S
The default password is: pi
1.5 Update Software Packages
$ sudo apt-get update
1.6 Install x11vnc Server on Debian for Remote Access
1.6.1 Install x11vnc server
The following command to install x11vnc server:
sudo apt-get install x11vnc
1.6.2 Set your password
sudo x11vnc -storepasswd /etc/x11vnc.pwd
1.6.3 Setup x11vnc server with systemd auto start up
Create service configuration file:
sudo vi /lib/systemd/system/x11vnc.service
Let’s copy and paste the following configuration into our newly create service file:
[Unit]
Description=Start x11vnc at startup.
Requires=display-manager.service
After=syslog.target network-online.target
Wants=syslog.target network-online.target

[Service]
Type=simple
ExecStart=/usr/bin/x11vnc -display :0 -forever -loop -noxdamage -repeat -rfbauth /etc/x11vnc.pwd -rfbport 5900 -shared -capslock -nomodtweak
ExecStop=/usr/bin/x11vnc -R stop
Restart=on-failure

[Install]
WantedBy=multi-user.target
The following commands to reload the systmd system and to enable and start the x11vnc service:
sudo systemctl daemon-reload
sudo systemctl enable x11vnc.service
sudo systemctl start x11vnc
1.6.4 Testing remote access
Start the VNC client software, input IP:5900 to connect: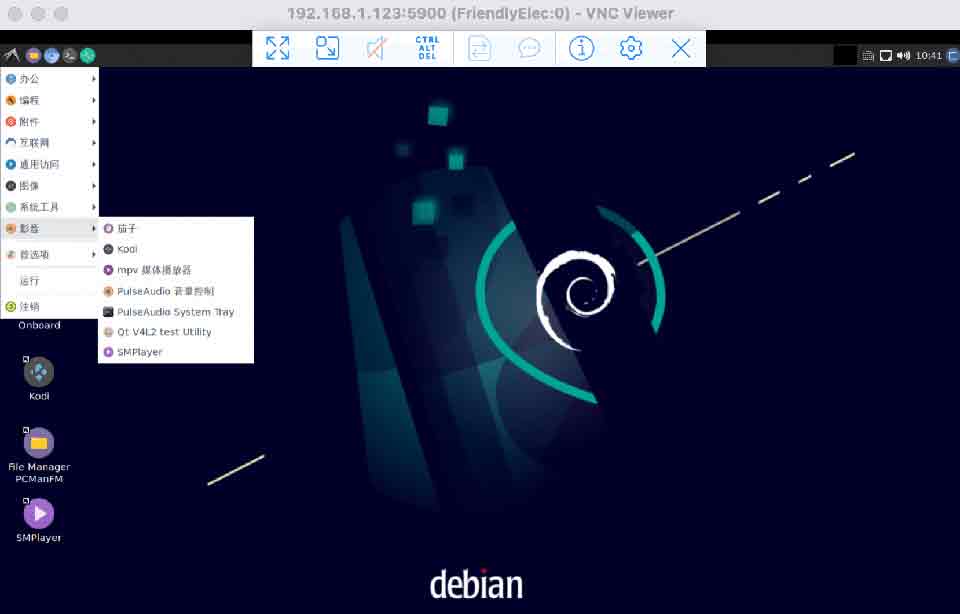
1.7 Install the kernel-header package
sudo dpkg -i /opt/linux-headers-*.deb
try to compile a kernel module:
sudo apt update
sudo apt install git gcc make bc
git clone https://github.com/RinCat/RTL88x2BU-Linux-Driver.git
cd RTL88x2BU-Linux-Driver
make -j$(nproc)
sudo make install
sudo modprobe 88x2bu
1.8 Change time zone
1.8.1 Check the current time zone
timedatectl
1.8.2 List all available time zones
timedatectl list-timezones
1.8.3 Set the time zone (e.g. Shanghai)
sudo timedatectl set-timezone Asia/Shanghai
1.9 Change startup LOGO and Wallpaper
1.9.1 Change startup LOGO
Replace the following two files in the kernel source code directory and recompile the kernel:
kernel/logo.bmp
kernel/logo_kernel.bmp
Or use the script to operate, as shown below:
- Download scripts:
git clone https://github.com/friendlyarm/sd-fuse_rk3568.git -b master --single-branch
cd sd-fuse_rk3568
- Compile kernel and repackage firmware
convert files/logo.jpg -type truecolor /tmp/logo.bmp
convert files/logo.jpg -type truecolor /tmp/logo_kernel.bmp
LOGO=/tmp/logo.bmp KERNEL_LOGO=/tmp/logo_kernel.bmp ./build-kernel.sh debian-buster-desktop-arm64
sudo ./mk-sd-image.sh debian-buster-desktop-arm64
./mk-emmc-image.sh debian-buster-desktop-arm64
Note: If your system is not debian-buster-desktop-arm64, please specify according to the actual situation
1.9.2 Change Wallpaper
Modify the following configuration file:
/home/pi/.config/pcmanfm/LXDE/desktop-items-0.conf
1.10 Soft Factory Reset
Execute the following command in a terminal:
sudo firstboot && sudo reboot
1.11 Start the program automatically at startup(For example Kodi)
Put the desktop file in the ~/.config/autostart/ directory, for example:
mkdir ~/.config/autostart/
cp /usr/share/applications/kodi.desktop ~/.config/autostart/
1.12 Disable auto-mounting
sudo systemctl mask udisks2
sudo reboot
1.13 Setup Chinese language and Input method
1.13.1 Setup Chinese language
Enter the following command and select 'zh_CN.UTF-8':
sudo dpkg-reconfigure localesAdd environment variables to .bashrc:
echo "export LC_ALL=zh_CN.UTF-8" >> ~/.bashrc
echo "export LANG=zh_CN.UTF-8" >> ~/.bashrc
echo "export LANGUAGE=zh_CN.UTF-8" >> ~/.bashrc
Reboot device:
sudo reboot1.13.2 Installing Chinese input method
Enter the following command to install fcitx and Pinyin input method:
sudo apt update
sudo apt-get install fcitx fcitx-pinyin
sudo apt-get install im-config
sudo apt-get install fcitx-table*
sudo apt-get install fcitx-ui-classic fcitx-ui-light
sudo apt-get install fcitx-frontend-gtk2 fcitx-frontend-gtk3 fcitx-frontend-qt4
sudo apt-get remove --purge scim* ibus*
sudo reboot
After reboot, press Ctrl+Space to switch between Chinese and English input methods, and the input method icon will appear in the upper right corner, right-click the input method icon in the upper right corner to switch input methods in the pop-up menu, as shown below: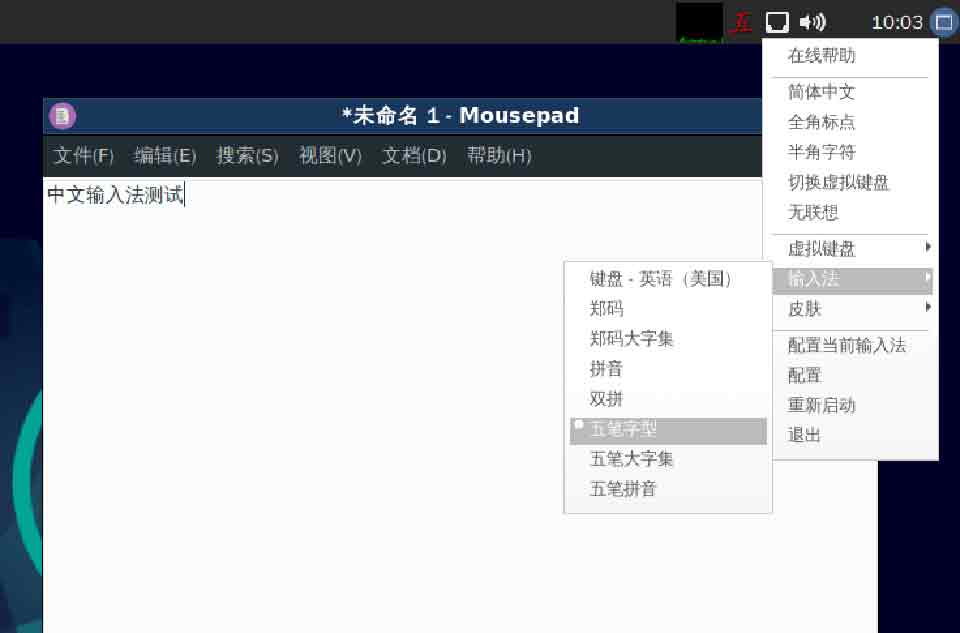
1.14 Installing Plex Multimedia Server
Visit the Plex website: https://www.plex.tv/media-server-downloads/
On the download page, select the category "Plex Media Server", choose "Linux" for the platform and "Ubuntu(16.04+)/Debian(8+) - ARMv8" for the version,
After downloading the deb package, use the dpkg command to install the package:
sudo dpkg -i plexmediaserver_1.31.0.6654-02189b09f_arm64.deb
After installation, login to the Plex server by typing the following URL into your computer browser: http://IP地址:32400/web/
1.15 Install Docker on Debian
Please refer to: How to Install Docker on Debian
1.16 WiFi Connection
1.16.1 Gui
Click on the icon on the top right in the Debian's main window, select your wanted WiFi hotspot and proceed with prompts
1.16.2 Console
Please visit: Use NetworkManager to configure network settings
1.17 Test OpenGL ES
You can test it by clicking on the Terminator icon to start a commandline utility in the System Tools and run the following commands:
glmark2-es2
1.18 HDMI/DP LCD Resolution
Open the system's menu and go to Perferences -> Monitor Settings to customize your settings.
Recommended resolution: 1920x1080@60Hz
1.19 Adjust HDMI overscan
Open the command line terminal and enter the command to operate, Note:
1) You need to login to the desktop;
2) If you are using ssh terminal, please use the same username as the desktop login. The default is pi. You cannot use the root user. you also need to assign the DISPLAY variable:
export DISPLAY=:0.0
1.19.1 Query which resolutions the display supports
xrandr -q1.19.2 Set resolution
For example set to 1920X1080@60Hz:
xrandr --output HDMI-1 --mode 1920x1080 --refresh 60
1.19.3 Adjust the HDMI overscan
For example, the transformation scaling horizontal coordinates by 0.8, vertical coordinates by 1.04 and moving the screen by 35 pixels right and 19 pixels down:
xrandr --output HDMI-1 --transform 0.80,0,-35,0,1.04,-19,0,0,1
1.19.4 Automatic adjustment at boot
Edit ~/.config/autostart/lxrandr-autostart.desktop,Write the full xrandr command to the key at the beginning of "Exec= as shown below:
[Desktop Entry]
Type=Application
Name=LXRandR autostart
Comment=Start xrandr with settings done in LXRandR
Exec=sh -c 'xrandr --output HDMI-1 --mode 1920x1080 --refresh 50 --transform 1.04,0,-35,0,1.05,-30,0,0,1'
OnlyShowIn=LXDE
1.20 Chromium web browser
1.20.1 GPU
Chromium web browser has enabled hardware acceleration by default, supports WebGL, and can view hardware acceleration details by entering the URL chrome://gpu, as shown below:
1.20.2 VPU
Play a video in the browser, then use fuser on the command line to view the mpp device node to confirm that the vpu interface is being called:
pi@FriendlyElec:~$ fuser /dev/mpp_service
/dev/mpp_service:     3258
If there is no content output from the fuser command, it means software decoding.