


- sales/support
Google Chat: zj734465502@gmail.com
- sales
+86-0755-88291180
- sales01
sales01@spotpear.com
- sales02
dragon_manager@163.com
- support
services01@spotpear.com
- CEO-Complaints
manager01@spotpear.com
- sales/support
WhatsApp:13246739196
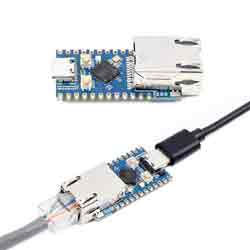
Raspberry Pi RP2040-ETH User Guide
Introduction
RP2040-ETH is a mini RP2040-ETH development board, which integrates TCP/IP protocol stack for network communication. 14 × multi-function GPIO pins and the castellated holes on its PCB edges allow easy and quick integration into projects.
Features
- Adopts RP2040 micro-controller chip designed by the official Raspberry Pi.
- Dual-core Arm Cortex M0+ processor, flexible clock running up to 133 MHz.
- 264KB of SRAM, and 4MB of onboard Flash memory.
- Onboard CH9120 with integrated TCP/IP protocol stack.
- With the host software and serial commands, you can set the network parameters such as chip operating mode, port, and IP.
- The castellated module allows soldering directly to carrier boards.
- Drag-and-drop programming using mass storage over USB.
- 14 × multi-function GPIO pins, compatible with some Pico HATs.
- More hardware peripherals:
- 1x SPI (SPI0)
- 2x I2C
- 2x UART
- 13x Controllable PWM channels
- Temperature sensor.
- 8 × Programmable I/O (PIO) state machines for custom peripheral support.
Pinout Definition
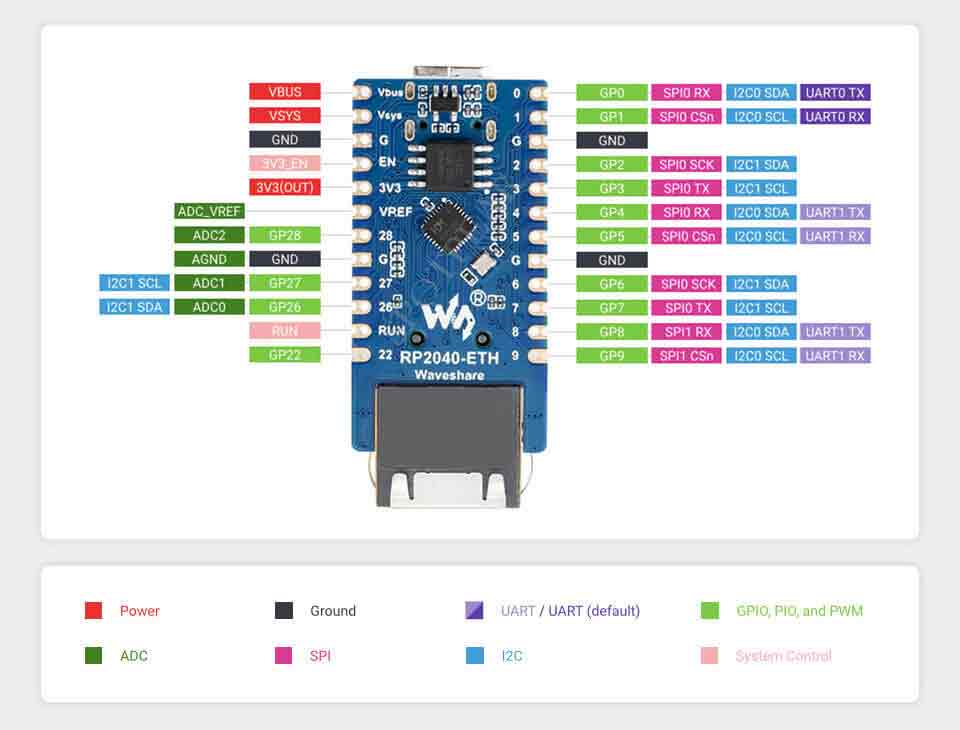
RP2040-ETH User Manual
Environment Building
- C/C++ Development Environment Installation
- MicroPython Development Environment Installation:
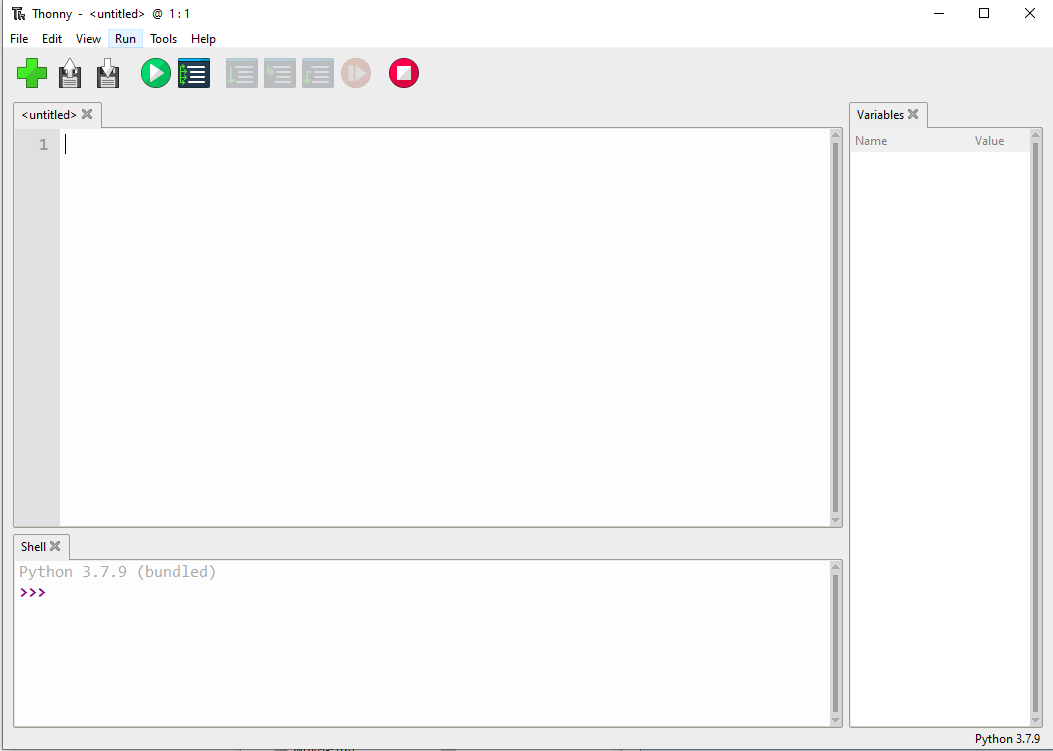
- Download the software according to your system from Thonny.
- *After installing, please configure the language and the environment for the first time. Note that we should choose the Raspberry Pi option in the board environment.
- Configure the Micrpython environment and select the Pico port.
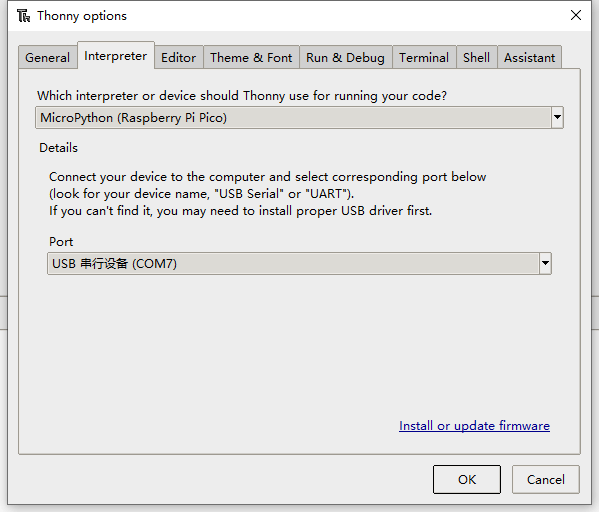
- First connect the Raspberry Pi Pico to the computer, left-click on the configuration environment option in the lower right corner of Thonny --> select configure an interpreter.
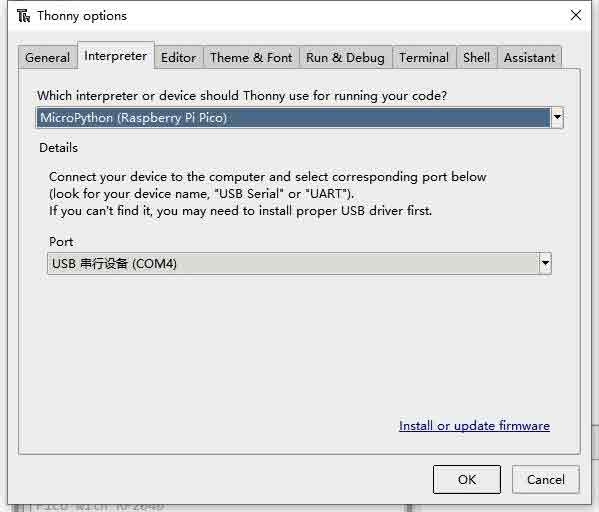
- In the pop-up window bar, select MicroPython (Raspberry Pi Pico), and select the corresponding port.
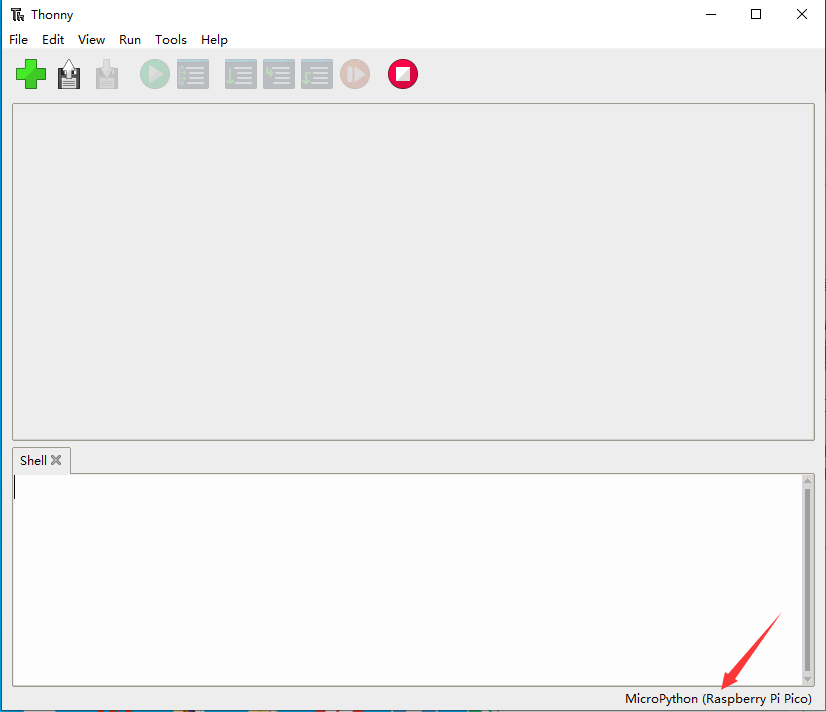
- Click OK to return to the main interface of Thonny, download the firmware library to Pico, and then click the stop button to display the currently used environment in the Shell window.
- Pico download firmware library method in Windows: Press and hold the BOOT button and connect to the computer, release the BOOT button, and a removable disk will appear on the computer and copy the firmware library into it.
- The Raspberry Pi system is similar to the Windows system, the Raspberry Pi needs to install the latest version of the system with the desktop.
- Arduino IDE Development Environment Installation:
- Open Arduino IDE, enter File -> Preferences
- In the pop-up dialog box, enter the following URL in the "Additional Boards Manager URLs" field:
https://github.com/earlephilhower/arduino-pico/releases/download/global/package_rp2040_index.json
- Click "OK" to close the dialog box.
- Go to Tools -> Board Manager in IDE.
- Type "pico" in the search box and select "Add".
Hardware Connection
- The internal connection between CH9120 and RP2040 as shown below:
| CH9120 | RP2040 | Function |
| RXD | GP21 | UART data input |
| TXD | GP20 | UART data output |
| TCPCS | GP17 | In TCP client mode, indicates connection status, low level for successful connection |
| CFG0 | GP18 | Network configuration enabled pin, low level for serial debugging mode |
| RSTI | GP19 | Reset, active LOW |
Demo Usage
Demo Introduction
- In CH9120.c or CH9120.cpp file, you can configure C/C++ parameters such as the IP, gateway, subnet mask, port number, and UART baud rate according to your needs.
UCHAR CH9120_LOCAL_IP[4] = {192, 168, 1, 200};    // LOCAL IP
UCHAR CH9120_GATEWAY[4] = {192, 168, 1, 1};      // GATEWAY
UCHAR CH9120_SUBNET_MASK[4] = {255, 255, 255, 0}; // SUBNET MASK
UCHAR CH9120_TARGET_IP[4] = {192, 168, 1, 10};   // TARGET_IP
UWORD CH9120_PORT1 = 1000;                        // LOCAL PORT1
UWORD CH9120_TARGET_PORT = 2000;                  // TARGET PORT
UDOUBLE CH9120_BAUD_RATE = 115200;                // BAUD RATE
#Set the CH9120 operating mode in the void CH9120_init(void) function, combined with the modes defined in the header file, and select the desired one:
CH9120_TX_4_bytes(TCP_CLIENT, Mode1); //Select the mode: 0x00:TCP server 0x01:TCP client 0x02:UDP server 0x03:UDP client
#the header file is defined, you can directly use
#define TCP_SERVER 0
#define TCP_CLIENT 1
#define UDP_SERVER 2
#define UDP_CLIENT 3
- In the py file, you can configure micro python parameters such as the operating mode, IP, gateway, subnet mask, port number, and UART baud rate.
MODE = 1  #0:TCP server 1:TCP client 2:UDP server 3:UDP client
GATEWAY = (192, 168, 1, 1)   # GATEWAY
TARGET_IP = (192, 168, 1, 1)# TARGET_IP
LOCAL_IP = (192, 168, 1,200)    # LOCAL_IP
SUBNET_MASK = (255,255,255,0) # SUBNET_MASK
LOCAL_PORT1 = 1000             # LOCAL_PORT1
TARGET_PORT = 2000            # TARGET_PORT
BAUD_RATE = 115200            # BAUD_RATE
- After the first step is set, it will enter the send and receive mode, and the CH9120 will send back the received information (Acsll code string only).
In Raspberry Pi
- Open the Raspberry Pi terminal, and run:
cd ~
sudo wget https://www.waveshare.com/w/upload/8/88/RP2040_ETH_CODE.zip
unzip RP2040_ETH_CODE.zip
cd ~/RP2040_ETH_CODE
C
- The following guide is operated in the Raspberry Pi. As CMake is multi-platform and portable, it can also be compiled on the PC. But the operation steps are different, you can explore it by yourselves.
- Before compiling, you should make sure it is in C/RP2040-ETH-Demo/build directory:
- Enter the build directory and add SDK:
- .../.../pico -sdk is your SDK directory.
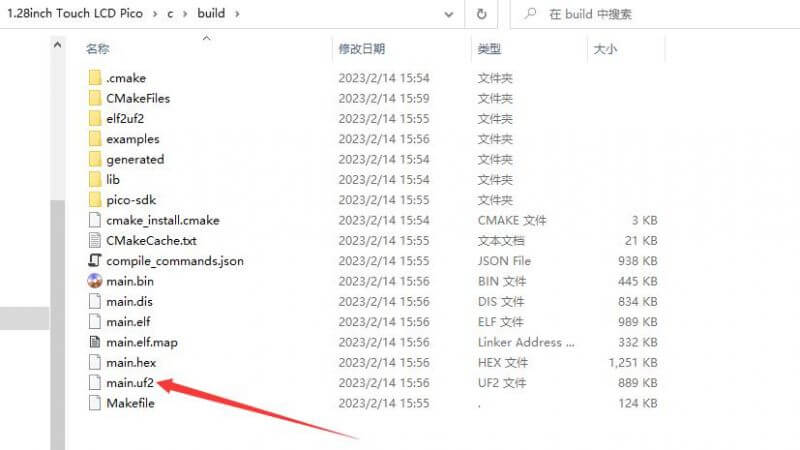
cd C/RP2040-ETH-Demo/build/
export PICO_SDK_PATH=../../pico-sdk
#Note: write the correct SDK path
cmake ..
#Execute make to generate the executable file and it takes a long time to compile for the first time
make -j9
#Compilatio is finished, uf2 file is created.
- After connecting RP2040-ETH to the Raspberry Pi, you should press the BOOT and RESET keys at the same time. Release the RESET key first, and then the BOOT key. A portable disk will appear on the computer, and you can copy the firmware to it.
cp main.uf2 /media/pi/RPI-RP2/
Python
- After connecting the RP2040-ETH to the Raspberry Pi, press the BOOT key and the RESET key at the same time. Release the RESET key, then the BOOT key and a removable disk are shown on the computer.
- Copy ~/RP2040_ETH_CODE/Python/rp2-pico-20230209-unstable-v1.19.1.uf2 file to the RP2040.
- Open the Thonny IDE on your Raspberry Pi (click on the Raspberry logo -> Programming -> Thonny Python IDE), you can check the version information in Help -> About Thonny.
- To make sure your version has the Pico support package, also you can click on Tools -> Options... -> Interpreter to select MicroPico -> Interpreter to select MicroPython (Raspberry Pi Pico and ttyACM0 port).
As shown below: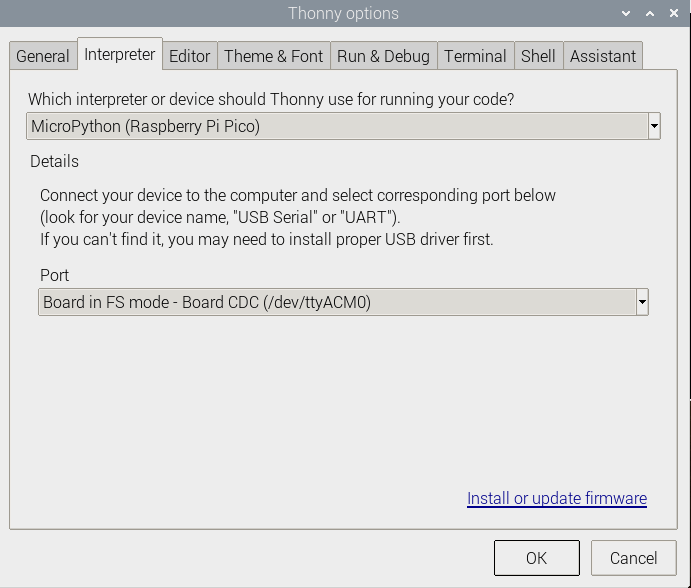
If your current Thonny version has no Pico support package, you can enter the following commands to update Thonny IDE.
sudo apt upgrade thonny
3. Click File -> Open... -> RP2040_ETH_CODE/Python/RP2040-ETH-Demo.py, run the demo.
In Windows Environment
C
- Firstly, install Visual Studio Code.
- After installing, open the Visual Studio Code expansion interface (Ctrl + Shift + X).
- Type CMake Tools and install.
- Press F1 and type open settings UI to open the settings UI screen.
- Search for CMake.configureEnvironment.
- Click Add item.
| Item | Value |
| PICO_SDK_PATH | [storage PICO-SDK path]\pico-sdk |
- "[storage PICO-SDK path]\pico-sdk" is the path you store SDK, and it can not be compiled when the path is wrong.
- Search cmake.generator, and fill in:
NMake Makefiles
#Ctrl+S to save the setting, clear the build file folder, reboot Visual Studio Code, and compile again.
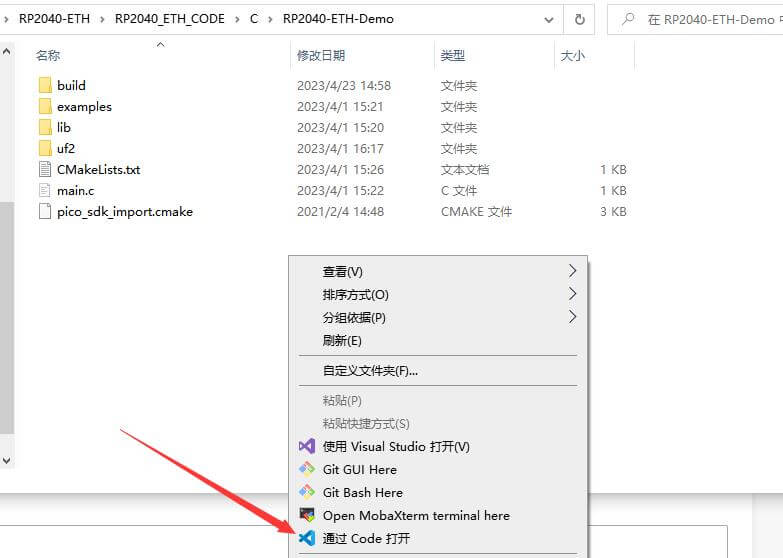
- Click to download the demo, unzip and then enter the RP2040_ETH_CODE file folder.
- After entering RP2040_ETH_CODE\C\RP2040-ETH-Demo, open the project with vs code.
- Choose the Compiler.
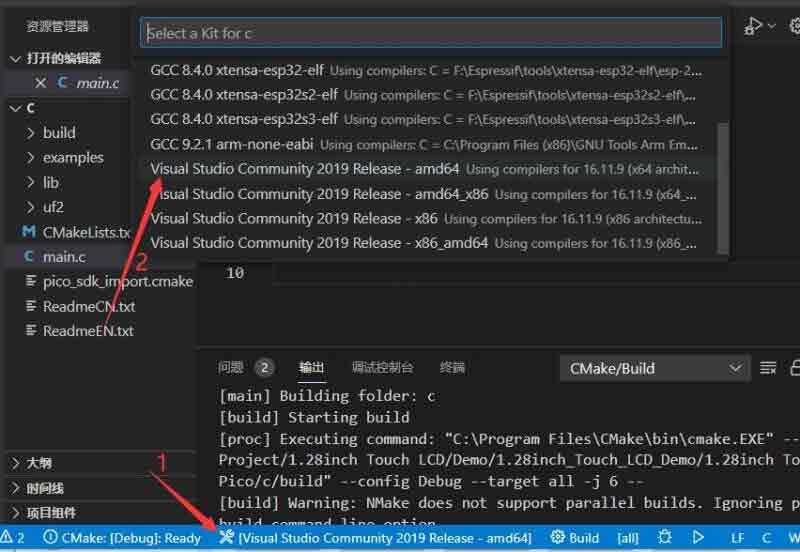
- Start to compile.
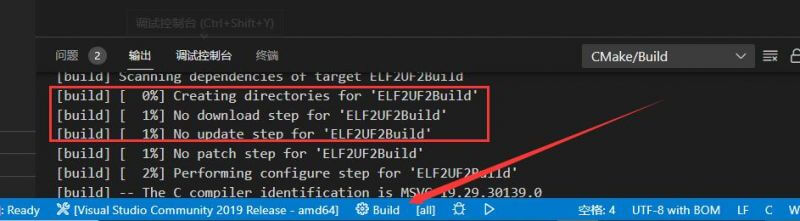
- Finish.
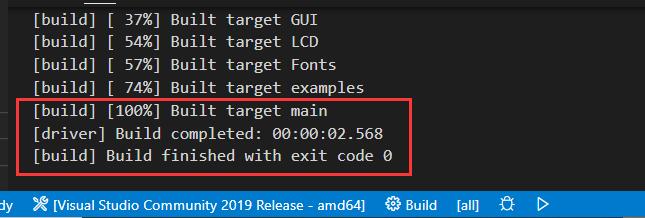
- Copy the main.uf2 file in build to Pico, and then it can automatically run the demo.
Python
- Press the BOOTSET button on the Pico and connect the Pico to the USB port of the computer with a Micro USB cable. Release the button when the computer identifies a movable disk (RPI-RP2).
- Copy the rp2-pico-20230209-unstable-v1.19.1.uf2 file in the Python directory to the recognizable movable disk(RPI-RP2).
- Open Thonny IDE (Note: please use the latest version of Thonny, otherwise there is no Pico supporting package. Currently, the newest version in Windows is v3.3.3.)
- Click Tool -> Setting -> Explainer. select the Pico and the corresponding port as shown below:
- File -> Open -> RP2040-ETH-Demo.py, click to run, the effect is shown below.

We provide a simple demo for you...
Host Debugging
- If you want to control with the host configuration rather than the serial commands, you can refer to the following method, and this method is only for Windows systems.
- Download Network configuration tool.
- Power on RP2040-ETH and the Ethernet.
- Open the network debugging tool.
- Search the device -> double click the searched device -> set the information you required -> Configure the device parameters -> wait for rebooting.
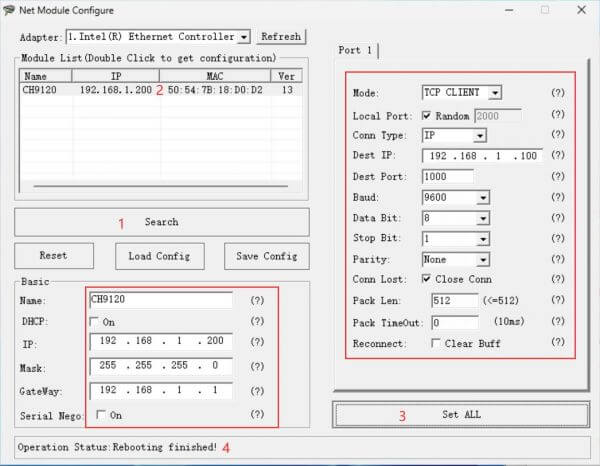
- Follows steps 1 and 2 in the above figure, and configure the parameters in the red block. Please wait for 4 after step 3.
Pico Quick Start
Download Firmware
- MicroPython Firmware Download

- C_Blink Firmware Download

MicroPython Series
- 【MicroPython】 machine.Pin Function
- 【MicroPython】 machine.PWM Function
- 【MicroPython】 machine.ADC Function
- 【MicroPython】 machine.UART Function
- 【MicroPython】 machine.I2C Function
- 【MicroPython】 machine.SPI Function
- 【MicroPython】 rp2.StateMachine
C/C++ Series
Arduino IDE Series
Environment Building
- Open Arduino IDE, and enter File -> Preferences.
- In the pop-up dialog box, enter the following URL in the "Additional Boards Manager URLs" field:
https://github.com/earlephilhower/arduino-pico/releases/download/global/package_rp2040_index.json
- Click "OK" to close the dialog box.
- Enter IDE Tool -> Dev Board Manager.
- Type "pico" in the search box and select "Add".
Pico-W Series Tutorial (To be continued...)
Open Source Demo
- MicroPython Demo (GitHub)
- MicroPython Firmware/Blink Demo (C)
- Official Raspberry Pi C/C++ Demo
- Official Raspberry Pi MicroPython Demo
- Arduino Official C/C++ Demo
Resource
Document
Demo
Tool
Raspberry Pi
- Raspberry Pi Pico Get Started with MicroPython on Raspberry Pi Pico
- Official website of Pico
- Getting started with Pico
- Pico C SDK
- Pico Python SDK
- Pico Pinout
- Pico Datasheet
- RP2040 Datasheet
- RP2040 Hardware design
Examples
Software
TAG:
Raspberry Pi 5
RP2040 LoRa
Raspberry Pi LCD display screen 1.3inch ST7789 with Game Button A
Information
ESP32 C3
EVAL-ADXL354CZ EVAL BOARD
RS485 to RJ45
RV1103
Raspberry Pi 4 USB Audio
Raspberry Pi 5
Mobile Robot
RP2040
Tutorial
0.96inch RGB OLED
Luckfox Pico SPI LCD
LuckFox
64MP
RS232 to RS485
Cortex-A7
Raspberry Pi 3 LCD HAT
Price:
$11.89
Part Number:
RP2040-ETH
Brand:
Spotpear
SKU:
0201162
TAG:
Raspberry Pi 5 PCIe TO M.2 H
Raspberry Pi Camera Case
Arduino IR Thermal Imaging Camera
ESP32 Thermal imaging
Raspberry Pi 4 Sound Card
5033S
SpotPear
White
SpotPear
Circular LCD Screen
Pi5
For Arduino
UPS HAT D
LCD Screen
Computer USB Secondary Screen
First-level Agency
Raspberry Pi Camera Case
USB Monitor
Raspberry Pi Camera
Raspberry Pi 5 PCIe WIFI7 Google TPU BE200 AX210 AI