- sales/support
Google Chat: zj734465502@gmail.com
- sales
+86-0755-88291180
- sales01
sales01@spotpear.com
- sales02
dragon_manager@163.com
- support
services01@spotpear.com
- CEO-Complaints
manager01@spotpear.com
- sales/support
WhatsApp:13246739196
- HOME
- >
- ARTICLES
- >
- Common Moudle
- >
- ESP
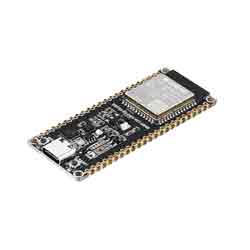
ESP32-S3-DEV-KIT-N8R8 User Guide
Introduction
The ESP32-S3-DEV-KIT-N8R8 is a compact microcontroller development board with multiple interfaces.
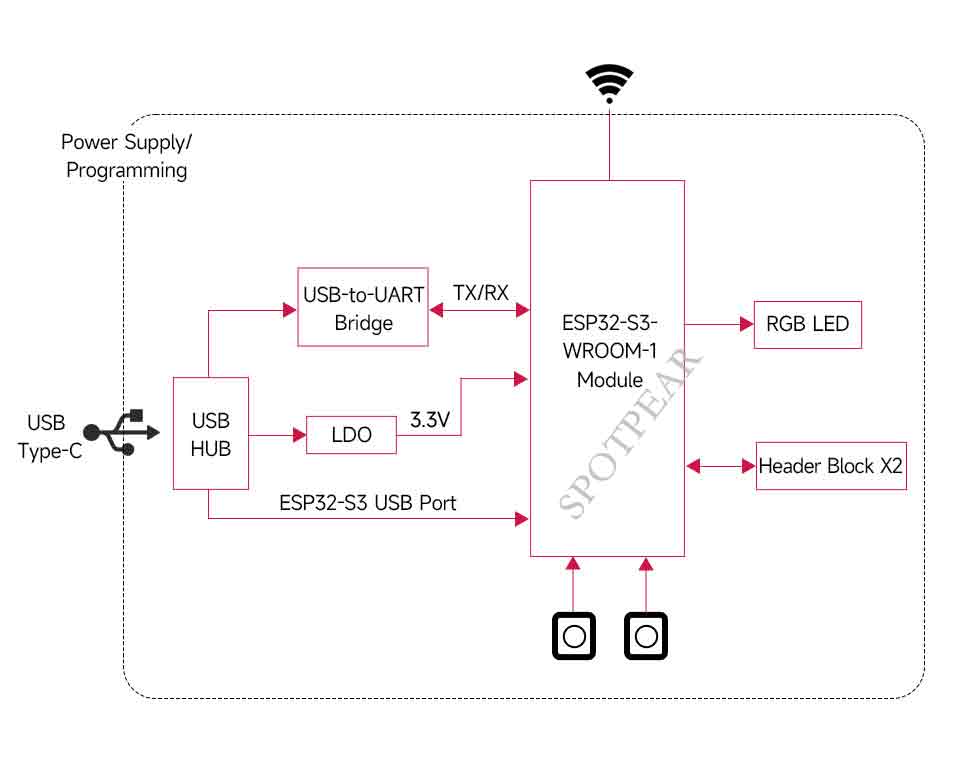
In terms of hardware, the ESP32-S3-WROOM-1-N8R8 module is equipped with an Xtensa 32-bit LX7 dual-core processor with a main frequency of up to 240MHz, 512KB SRAM (TCM) and 8MB PSRAM, and a CH343 serial port and CH334 USB HUB dual chip on board, allowing simultaneous USB and UART use and development via a USB-C interface. The pin is compatible with the ESP32-S3-DevKitC-1 development board, which is compatible with the expansion of a variety of peripherals, making it more convenient to use.
In terms of software, development environments such as ESP-IDF, Arduino, and MicroPython can be selected for development, making it easy to get started quickly and apply them to products.
Feature
- Adopts ESP32-S3-WROOM-1-N8R8 module with Xtensa 32-bit LX7 dual-core processor, capable of running at 240 MHz.
- Integrated 512KB SRAM, 384KB ROM, 8MB PSRAM, and 8MB Flash memory.
- Integrated 2.4GHz Wi-Fi and Bluetooth LE dual-mode wireless communication, with superior RF performance.
- Type-C connector, easier to use.
- Onboard CH343 and CH334 chips can meet the needs of USB and UART development via a Type-C interface.
- Rich peripheral interfaces, pin compatible with ESP32-S3-DevKitC-1 development board, high compatibility and expandability.
- Castellated module allows soldering directly to carrier boards.
- Supports multiple low-power operating states, the adjustable balance between communication distance, data rate, and power consumption to meet the power requirements of various application scenarios.
Function Diagram
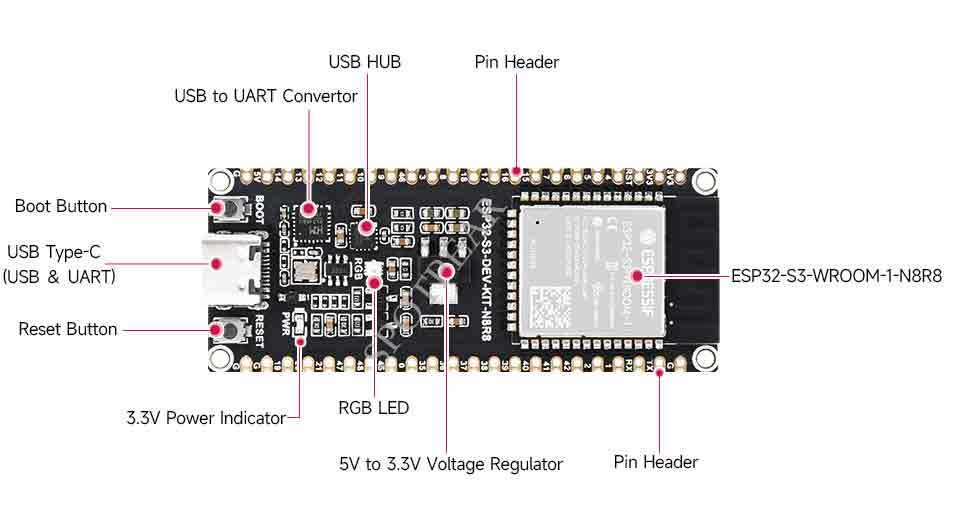
Onboard Resource
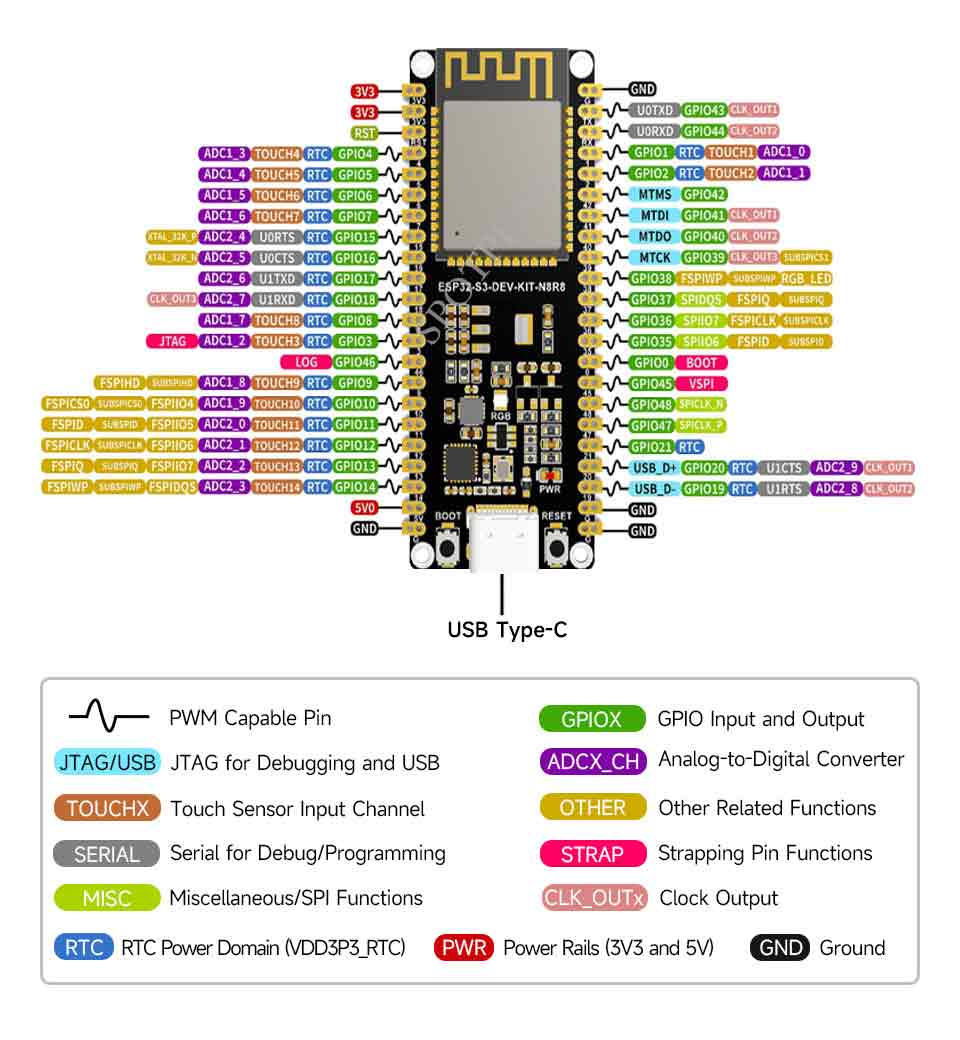
Pinout
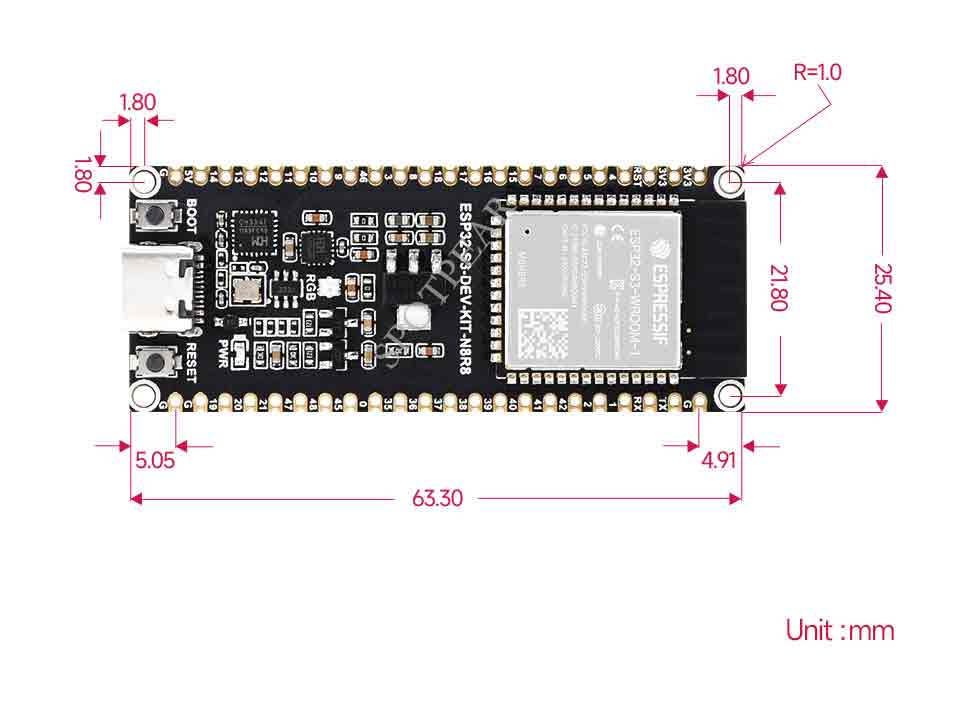
Outline Dimensions
Development Environment Configuration
- The following development system is Windows by default.
ESP-IDF
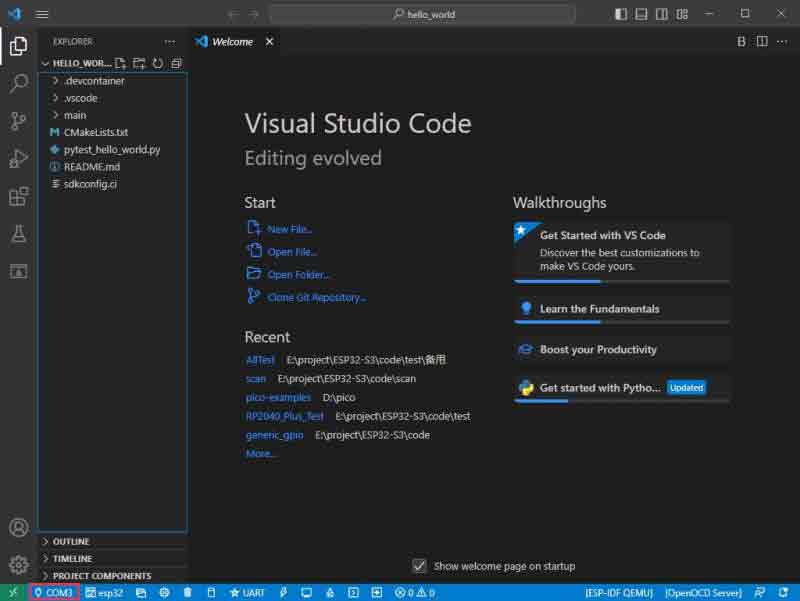
- It is recommended to develop with the VSC plug-in.
Develop with VSCode
Install VSCode
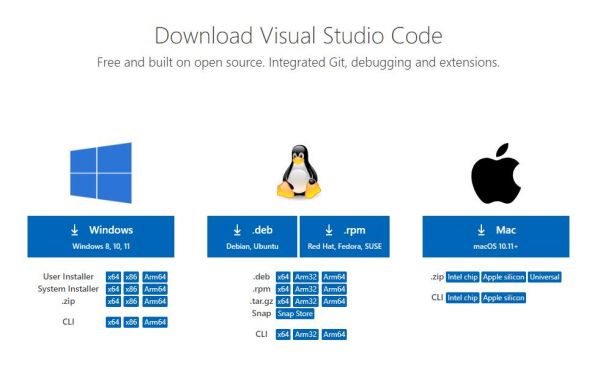
- 1. Open the download page of the official VSCode website, and select the corresponding system and system bit to download.
- 2. After running the installation package, the rest can be installed by default, but here for the subsequent experience is recommended, it is recommended to check boxes 1, 2, and 3 here.
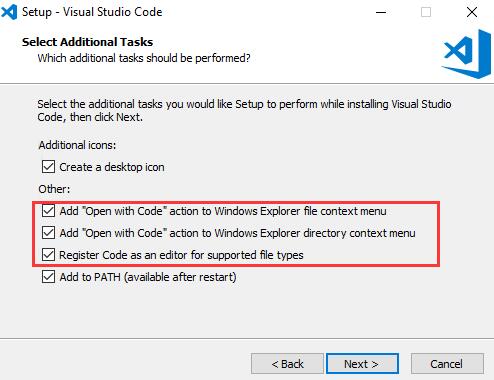
- After the first two items are enabled, you can open VSCode directly by right-clicking files or directories, which can improve the subsequent user experience.
- After the third item is enabled, you can select VSCode directly when you choose how to open it.
Install Espressif IDF Plug-in
- Note: The latest version of the current plug-in is V1.6.0, for a consistent experience, users can choose the same version as us.
- 1. Open VSCode and use the shortcut key Shift + Ctrl + X to enter the plugin manager.
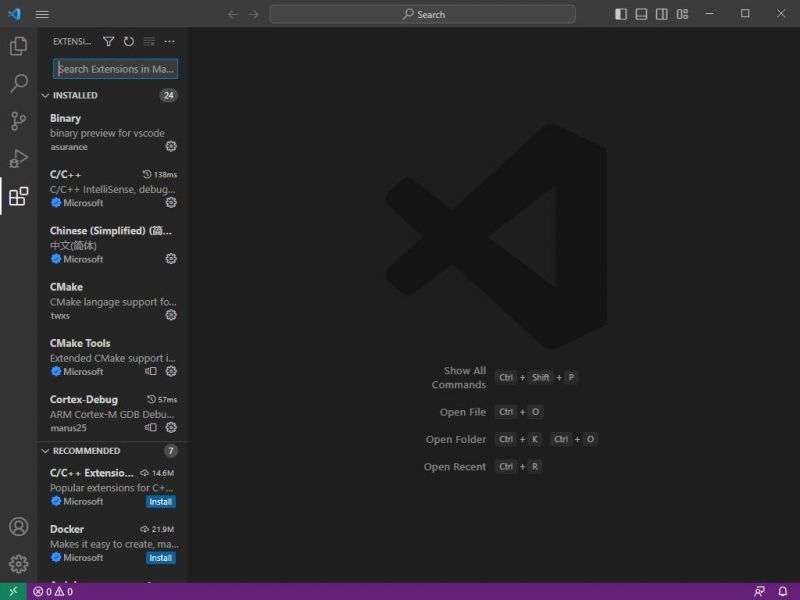
- 2. In the search bar, type Espressif IDF, select the corresponding plug-in, and click install.
- 3. Press F1 to enter:
esp-idf: configure esp-idf extension
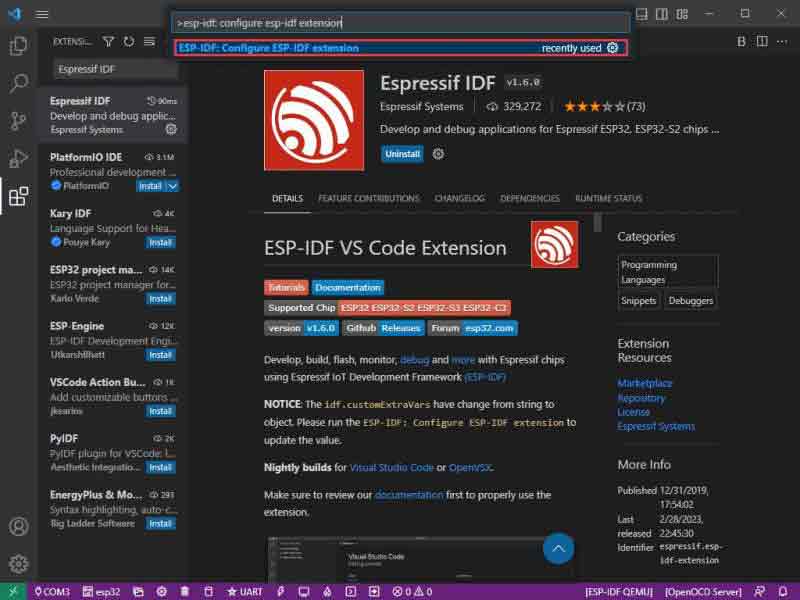
- 4. Choose express (This tutorial is for users who install it for the first time, so only the first general installation tutorial is covered.)
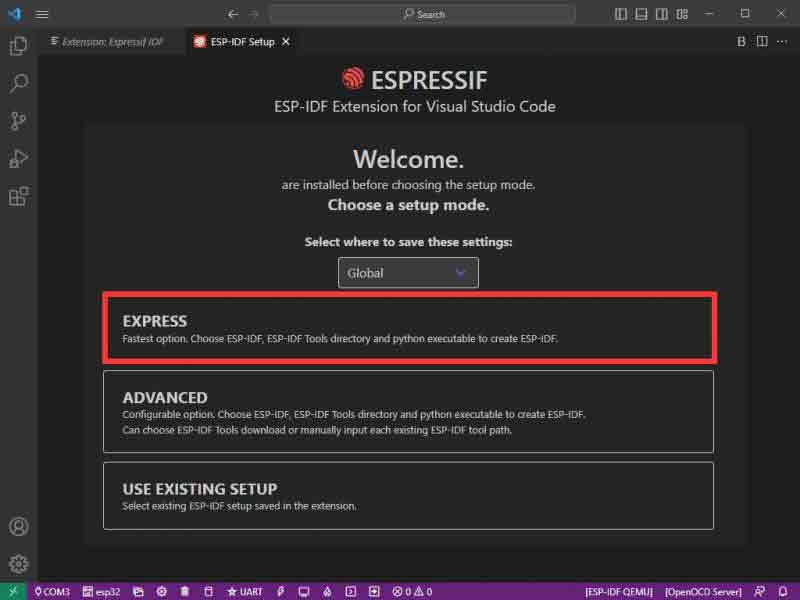
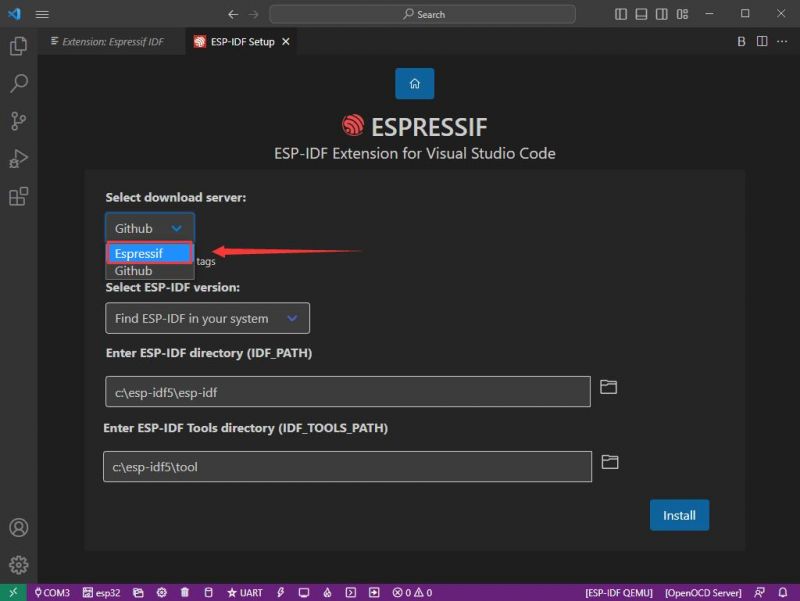
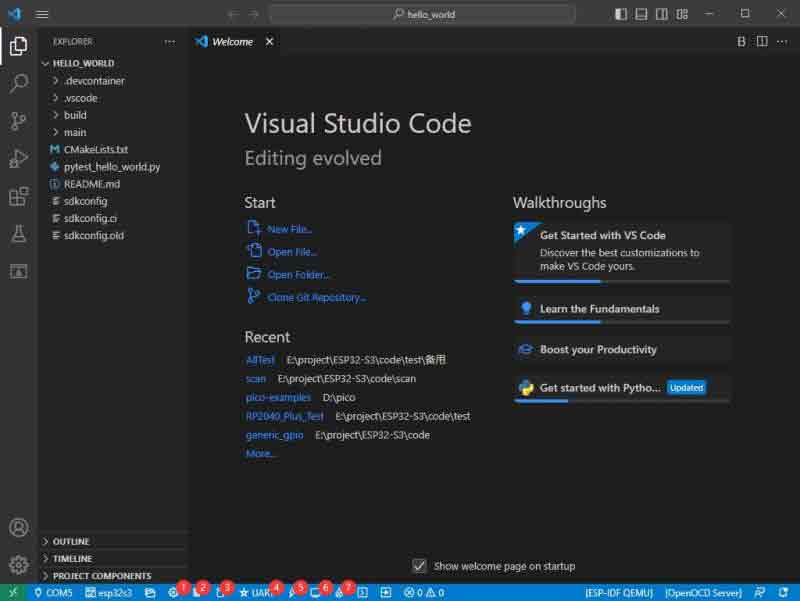
- 5. Open and display this screen.
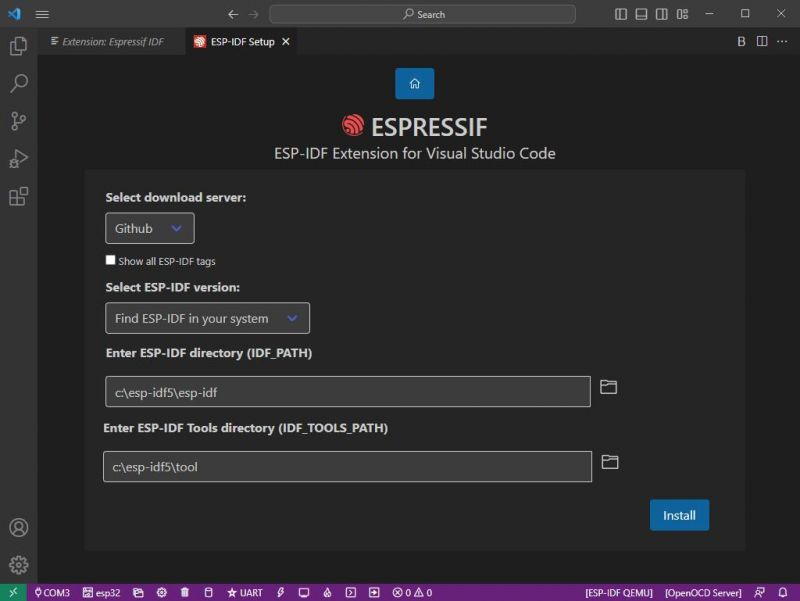
- 6. Choose a server to download.
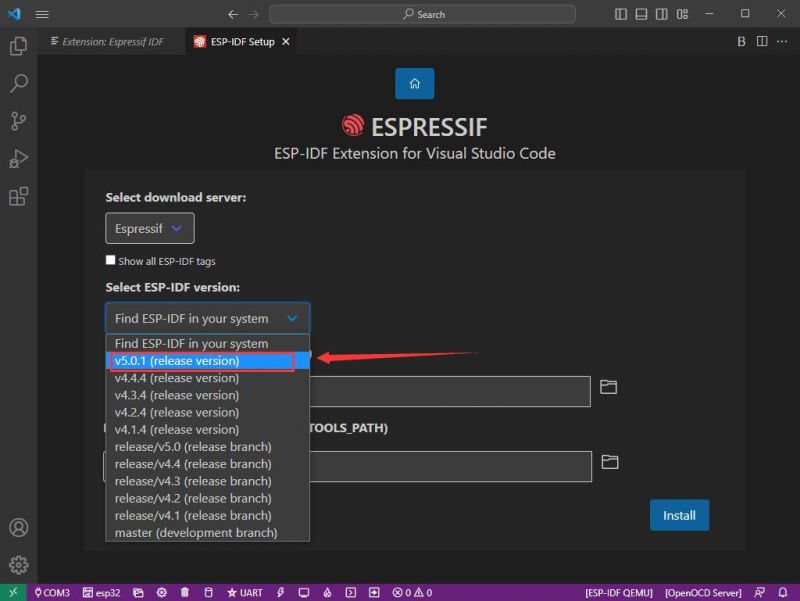
- 7. Select the ESP-IDF version you want now, we choose the latest V5.0.1 (note that ESP-IDF started to support ESP32-S3 only after V4.4).
- 8. The following two are the ESP-IDF directory installation address and the ESP-IDF required tools installation address respectively.
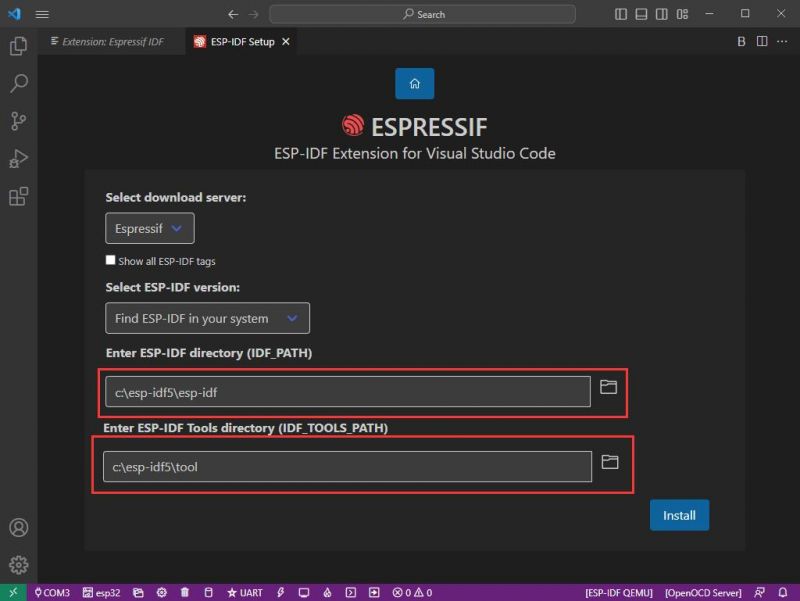
- Note: If you have installed ESP-IDF before, or if it has failed, please make sure to delete the file completely or create a new path.
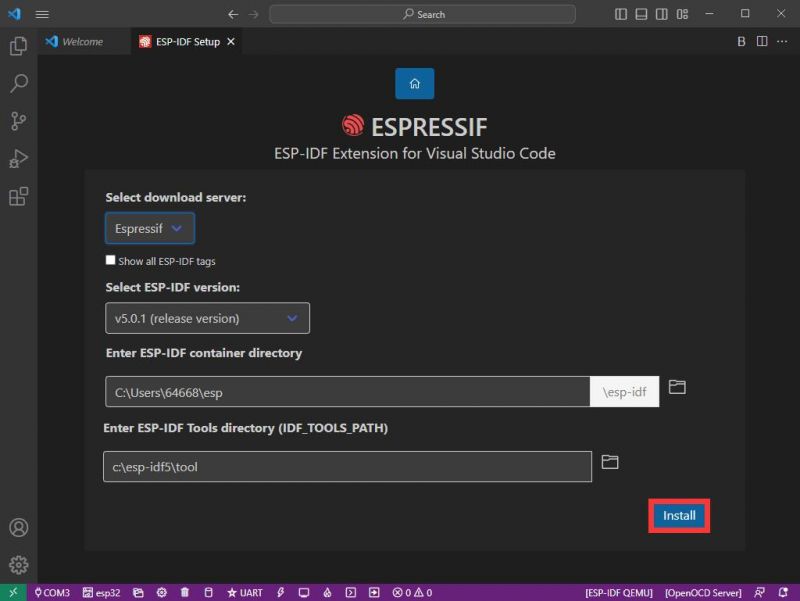
- 9. Once the configuration is finished, click "install" to download.
- 10. Enter the download page, it will automatically install the corresponding tools and environment, just wait a moment.

- 11. After the installation is completed, it will enter the following screen, indicating that the installation is finished.
Official Demo Usage
Creating a Demo
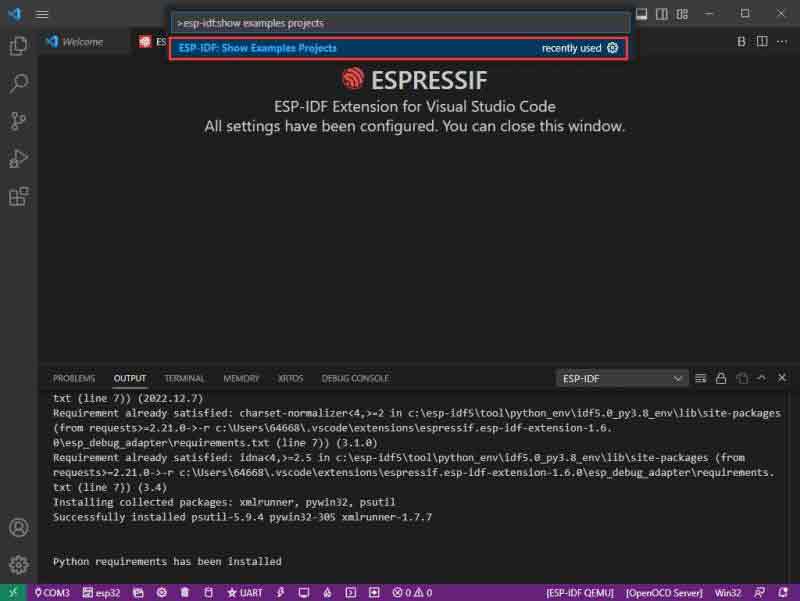
- 1. Using the shortcut F1, type:
esp-idf:show examples projects
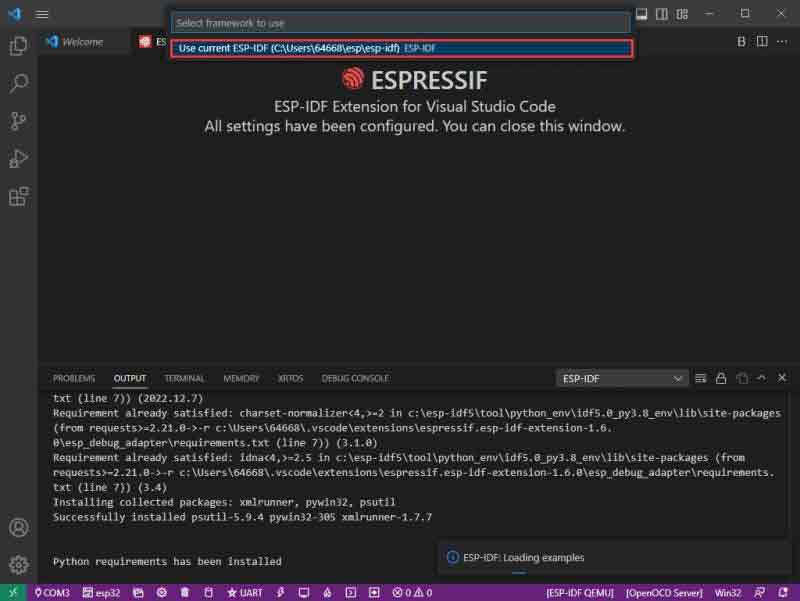
- 2. Choose your current IDF version:
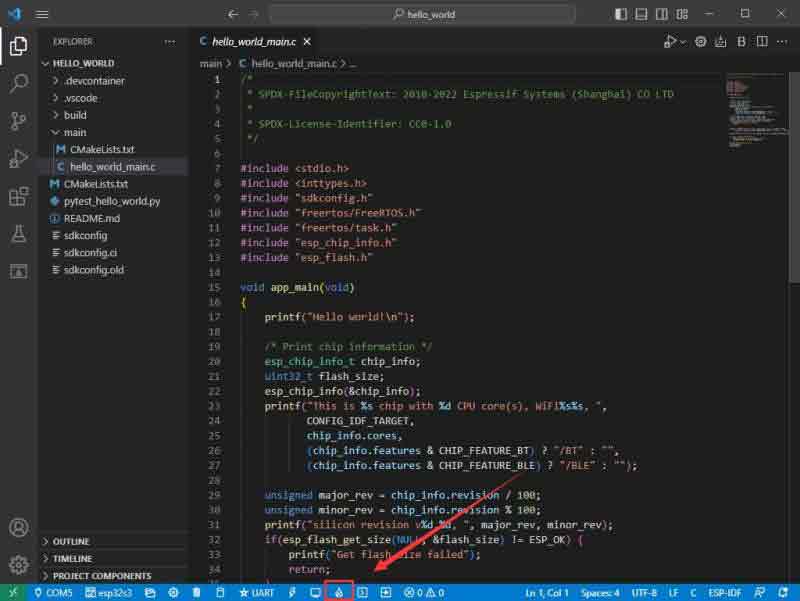
- 3. Take "Hello World" as an example:
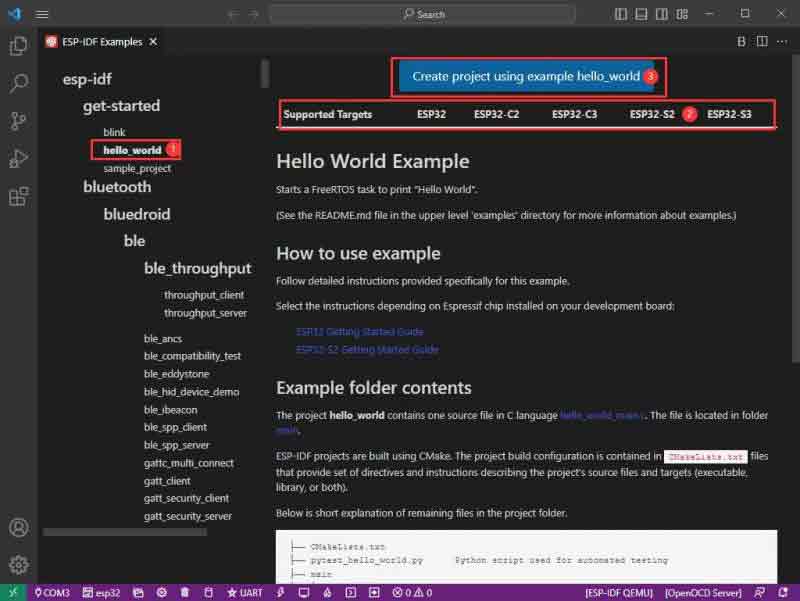
- 4. ① Choose the corresponding demo.
- 5. ② The readme file will explain which chip the demo is suitable for (the following section will introduce how to use the demo and its file structure, which is omitted here).
- 6. ③ Click to create the demo.
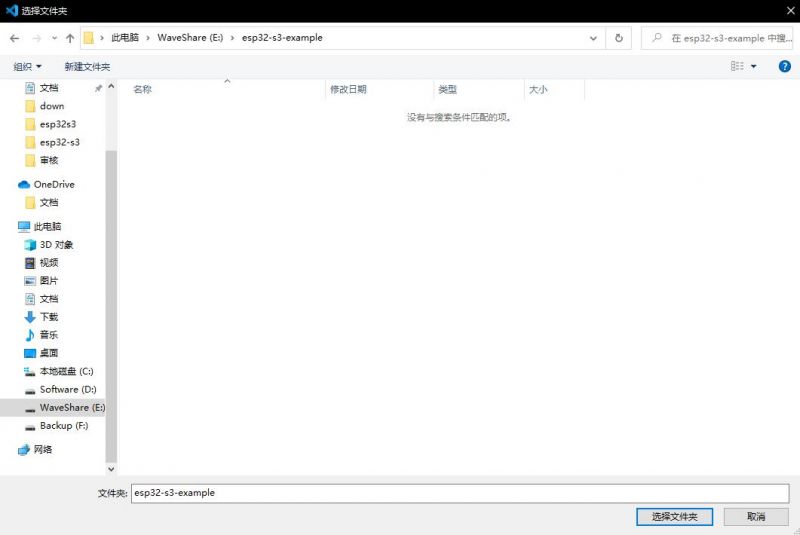
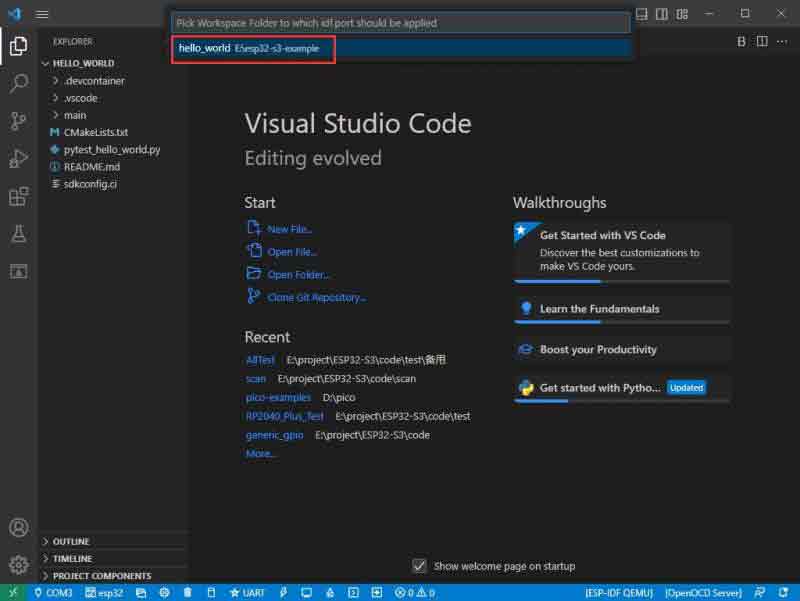
- 7. Choose the path to place the demo and ensure that there is no folder with the same name as the demo.
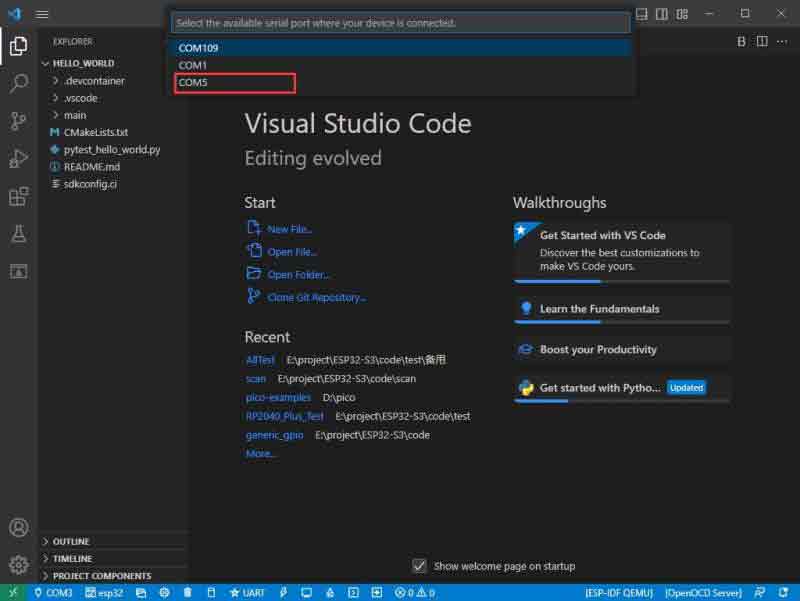
Modify COM Port
- 1. The corresponding COM port is displayed here, click on it to modify.
- 2. The COM port of our CH343 is COM5, so we choose COM5, please choose the COM port according to your CH343.
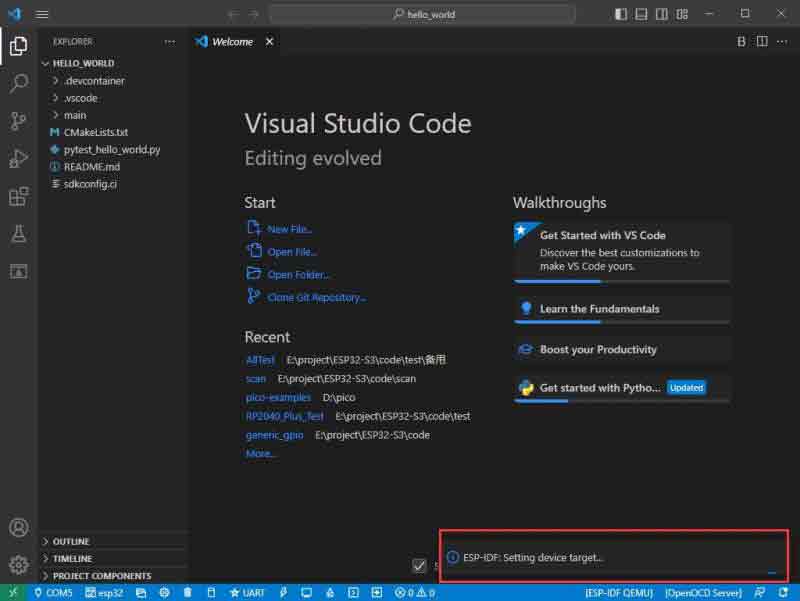
- 3. Choose the project and demo.

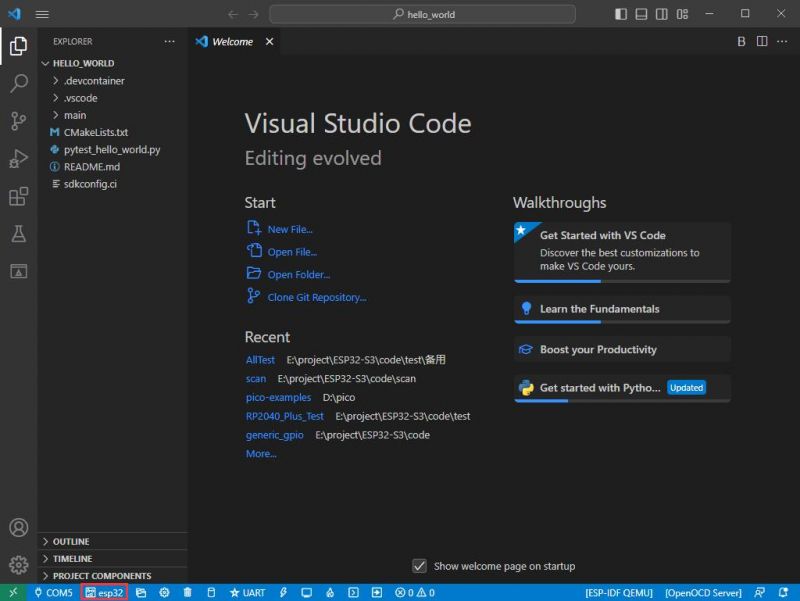
- 4. Then the COM port is modified.
Modify the Driver
- 1. Here shows the driver used, click here to modify the corresponding driver:
- 2. Choose the project or demo:
- 3. Wait for a few seconds after clicking.
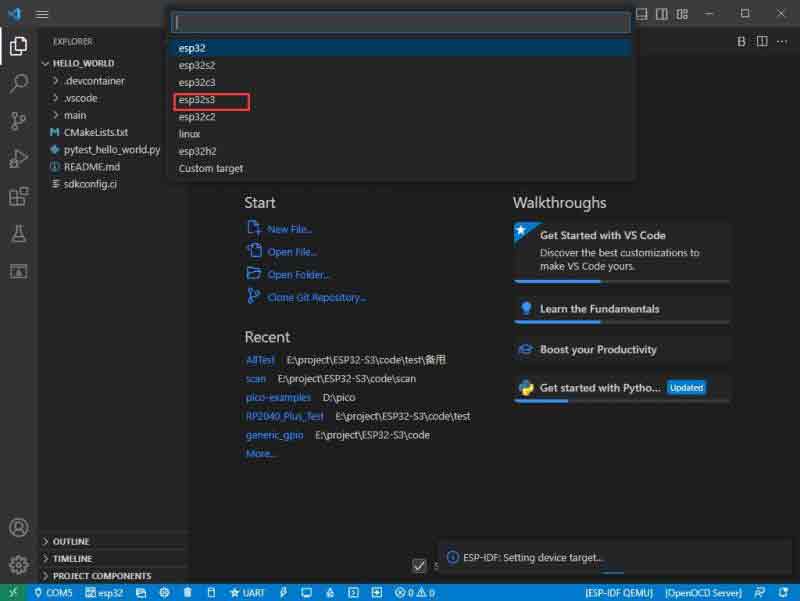
- 4. Choose the driver we need, that is, the main chip ESP32S3.
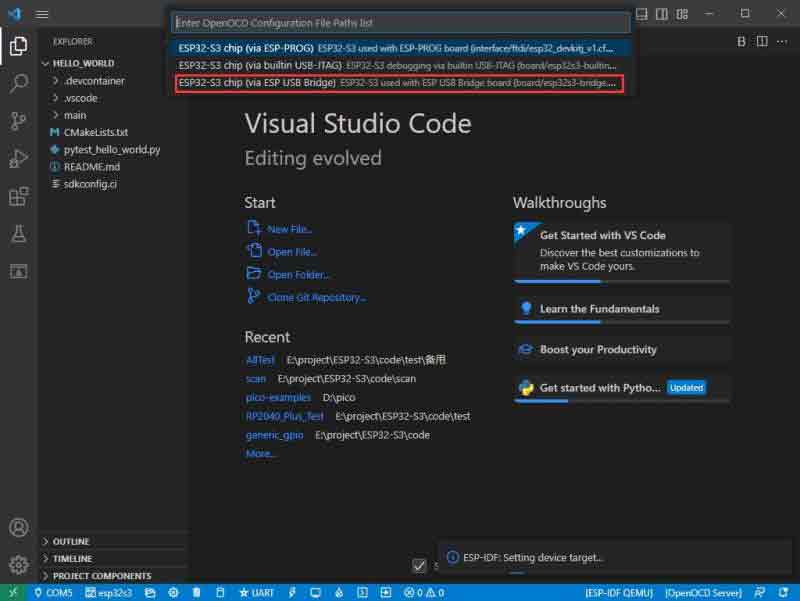
- 5. Choose the openocd path, we can just choose one as it doesn't matter.
The Rest of the Status Bar Introduction
- ① SDK configuration editor: many functions and configurations of ESP-IDF can be modified within it.
- ② Clean up everything and delete all compiled files.
- ③ Compile.
- ④ Current download method, default is UART.
- ⑤ Program the current firmware, please do it after compiling.
- ⑥ Open the serial monitor to view serial information.
- ⑦ Combined button for compiling, programming, and opening the serial monitor (most commonly used during debugging).
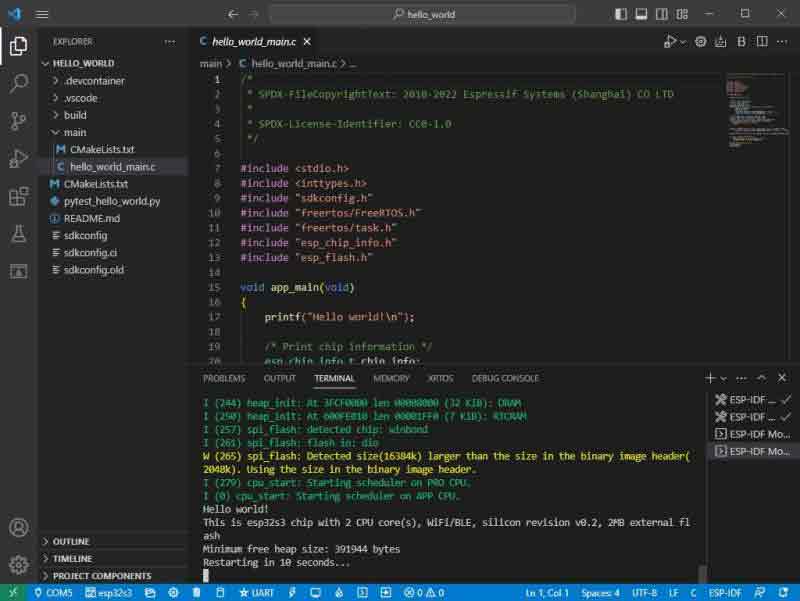
Compile, Program, and Serial Port Monitoring
- 1. Click on the Compile, Program, and Open Serial Monitor buttons we described earlier.
- 2. It may take a long time to compile, especially for the first time.
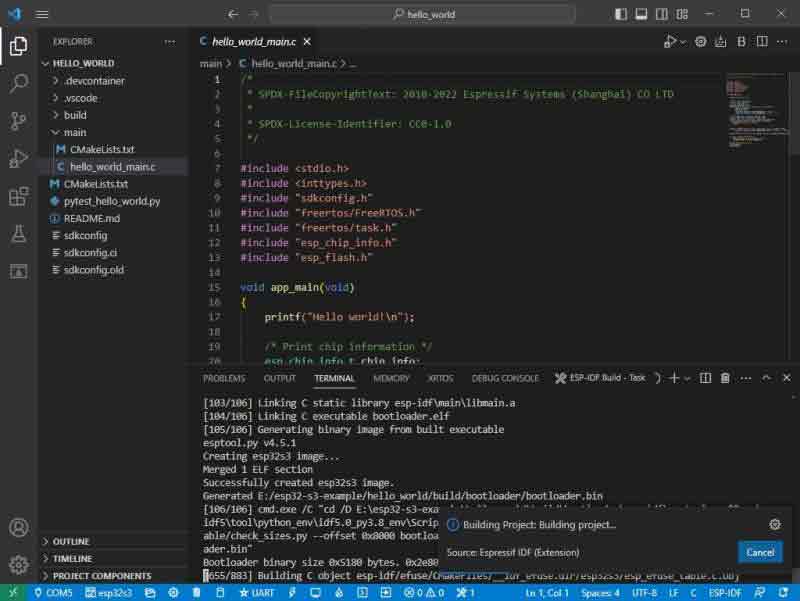
- During this process, ESP-IDF may take up a lot of CPU resources and therefore may cause system lag.
- 3. Because we use CH343 as the USB to serial chip, and the onboard auto-download circuit, it can download automatically without manual operation.
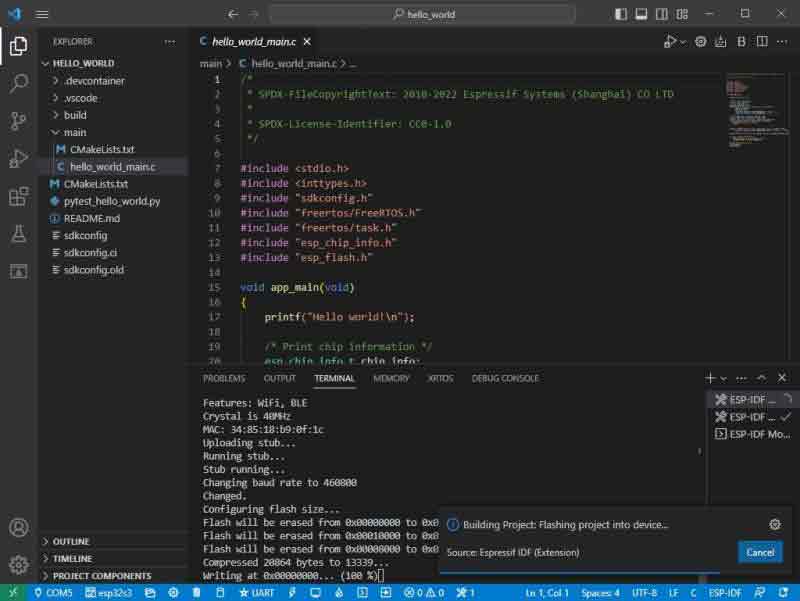
- 4. After successful download, it will automatically enter the serial monitor, you can see the corresponding information output from the chip and prompt to reboot after 10s.
Arduino
Install Arduino
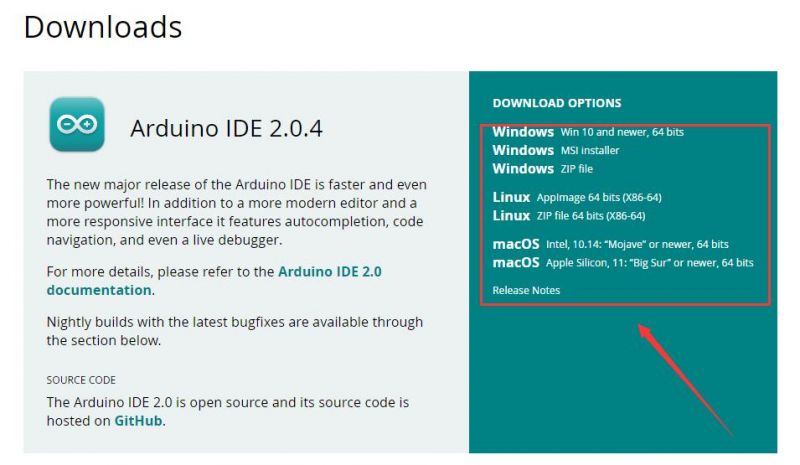
- 1. Open the official software download webpage, and choose the corresponding system and system bits to download.
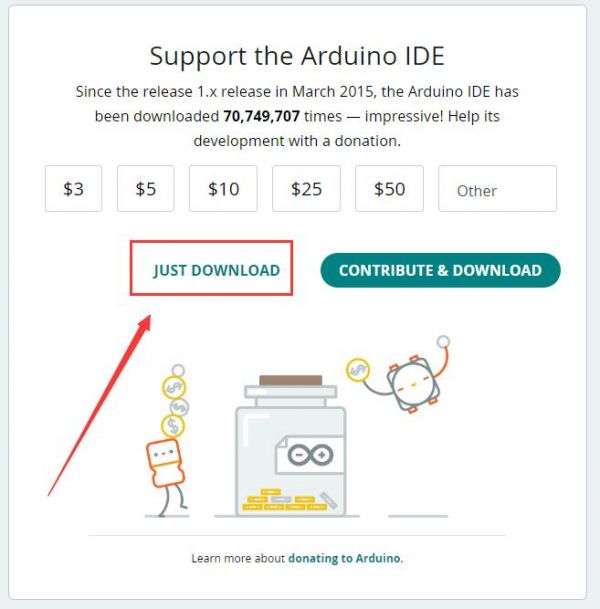
- 2. You can choose "Just Download", or "Contribute & Download".
- 3. Run to install the program and install it all by default.
Install arduino-esp32
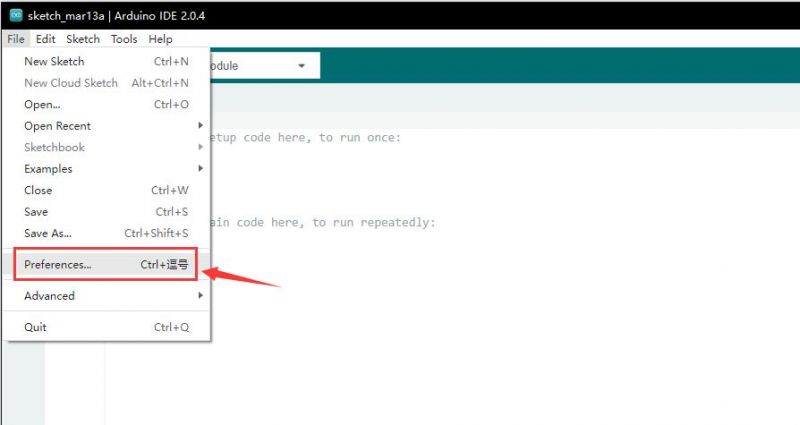
- 1. Open Preferences.
- 2. Add the corresponding board manager URLs and click it.
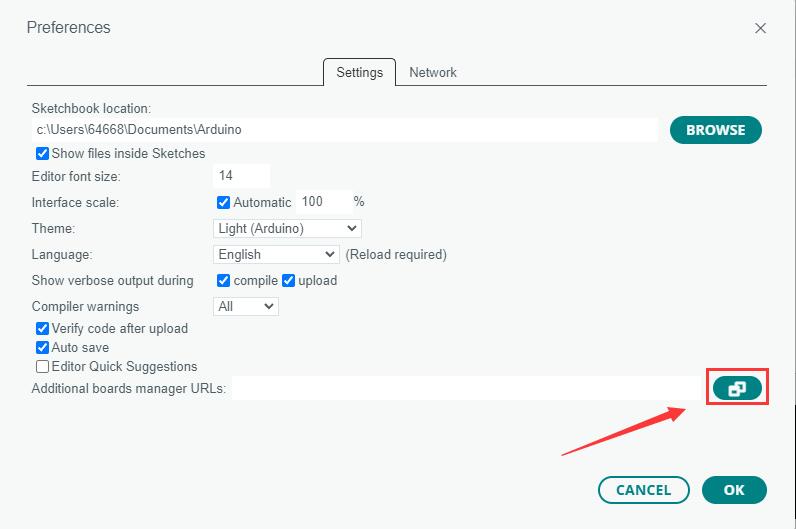
- 3. Add the following content in the blank.
https://raw.githubusercontent.com/espressif/arduino-esp32/gh-pages/package_esp32_index.json
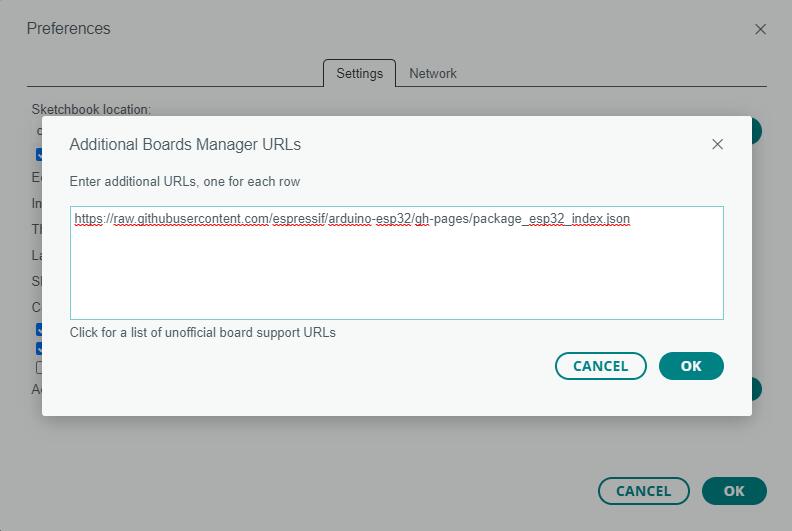
- 4. Save the setting.
- 5. Open the board manager and enter ESP32 in the search bar.
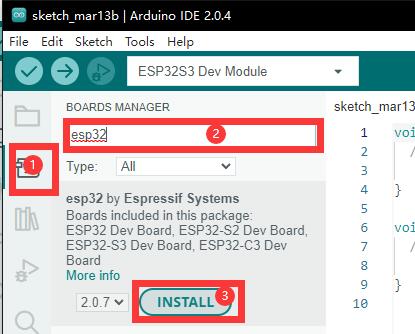
- 6. Wait for downloading.
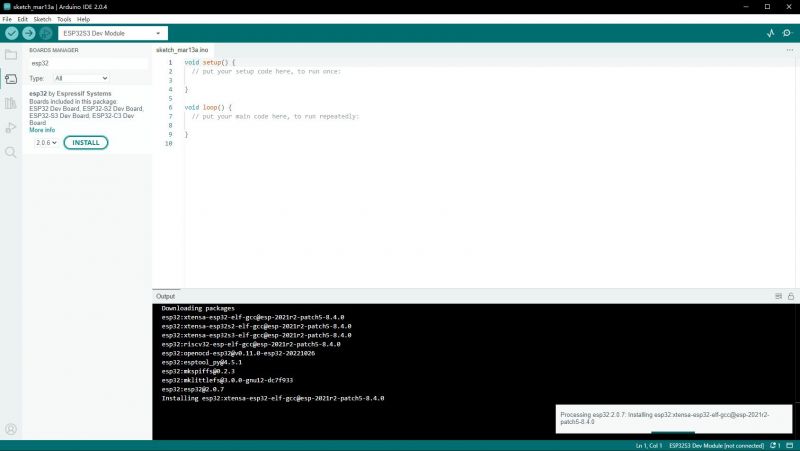
- 7. arduino-esp32 is downloaded.
Use Arduino Demo
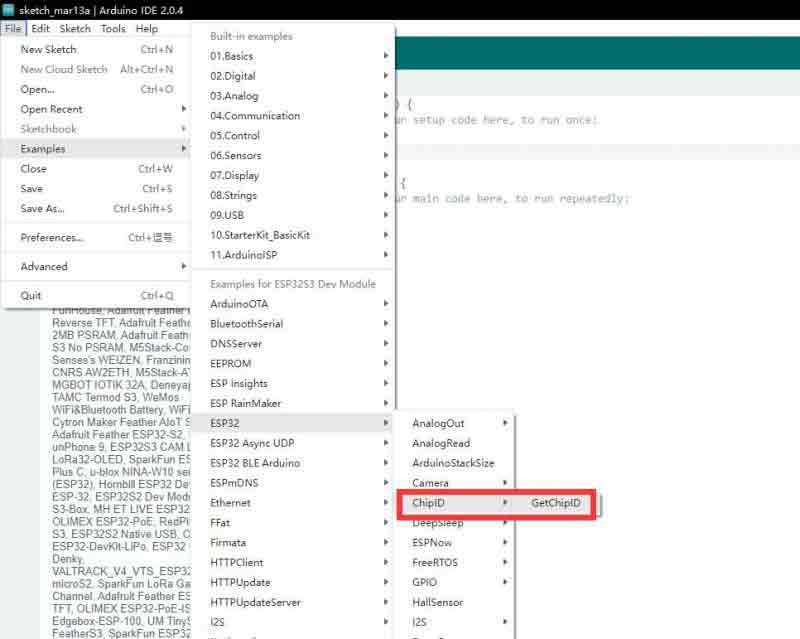
- 1. Select the demo, here we choose the demo to get the chip ID.
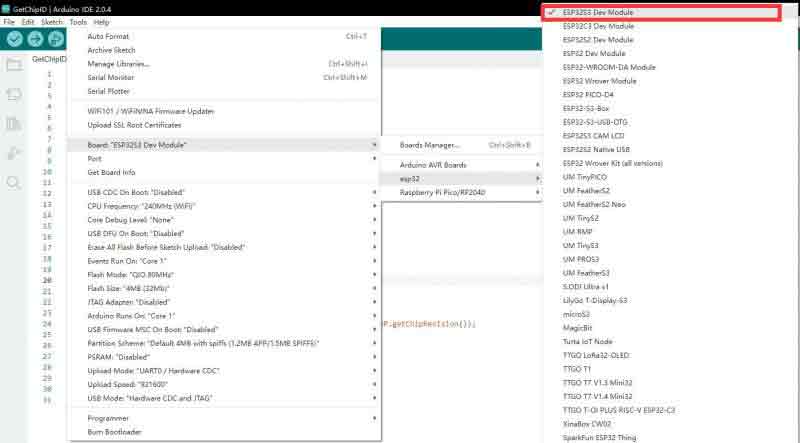
- 2. Select the board as ESP32S3 Dev Module.
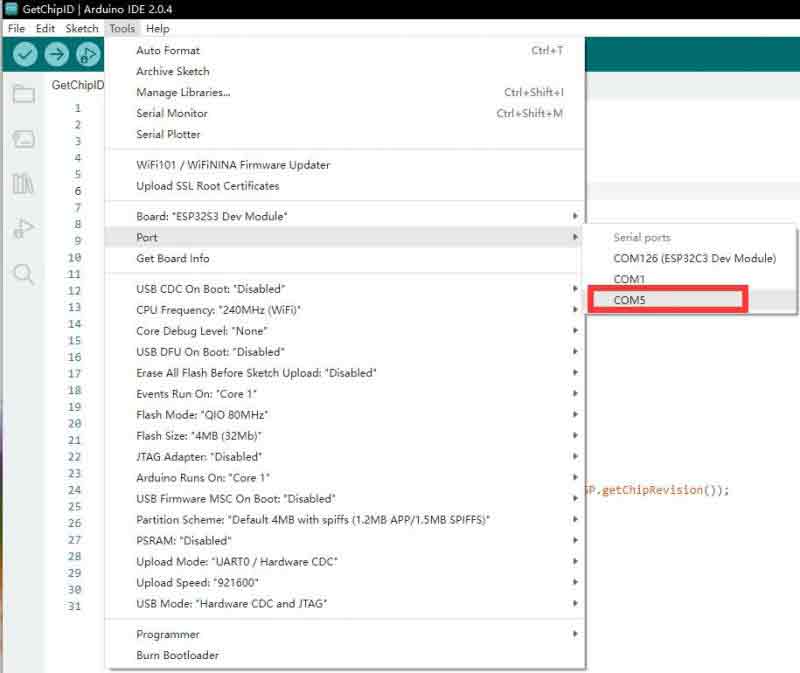
- 3. Choose the COM5 port of CH343.
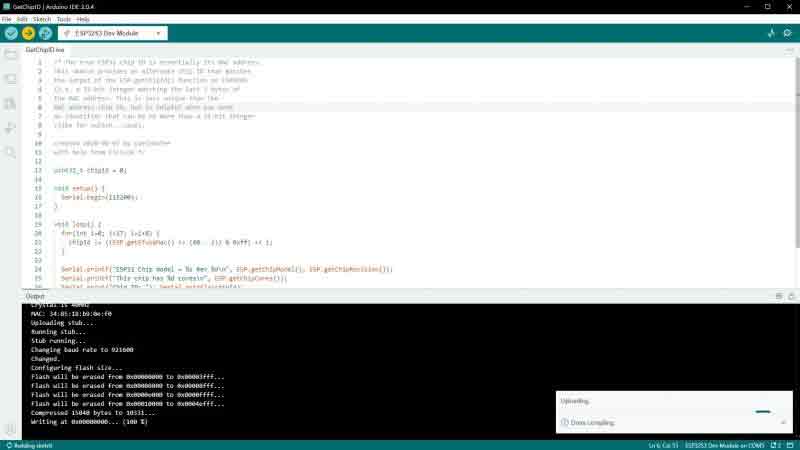
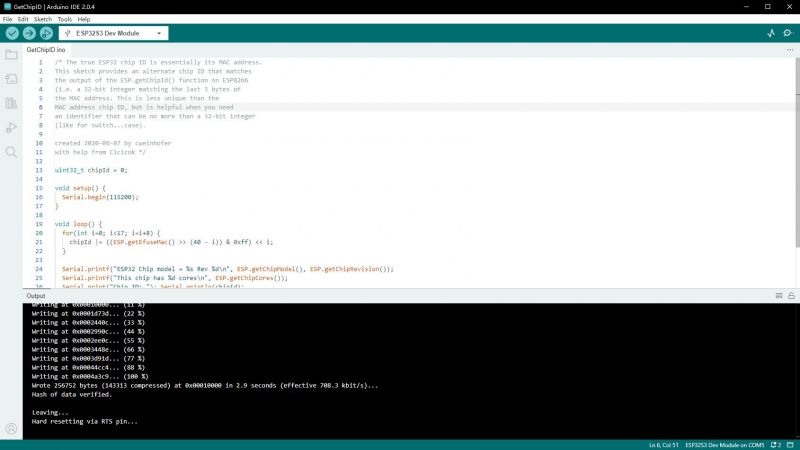
- 4. Click the download button, then it compiles and downloads automatically.
- 5. Finish.
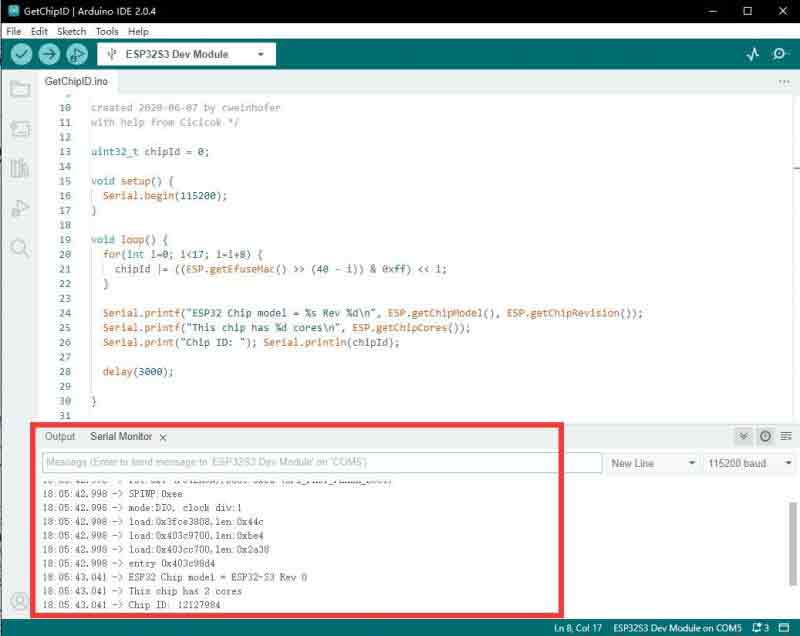
- 6. Open the Serial Port Monitor.
- 7. See the chip ID of the loop output.
MicroPython
Flash Firmware
- 1. Click here to download the burner and firmware.
- 2. Unzip the package downloaded before and enter.

- 3. Enter flash_download_tool_3.9.4 folder and open flash_download_tool_3.9.4.exe.
- 4. Choose the corresponding chip, choose ESP32-S3.

- 5. Choose the corresponding COM port, we have configured it and you just click Start to download.
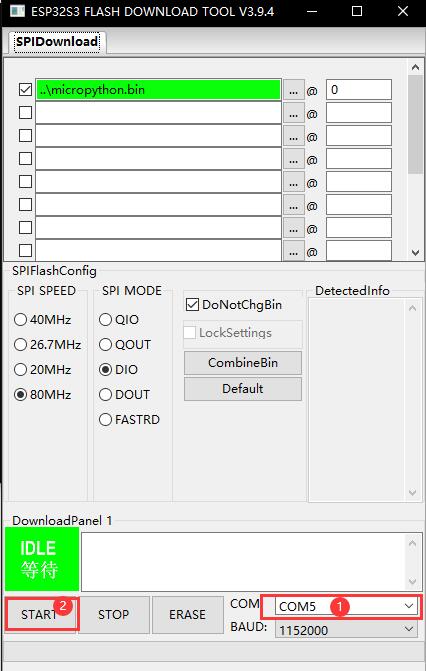
- ①Choose the COM port.
- ②Download key.
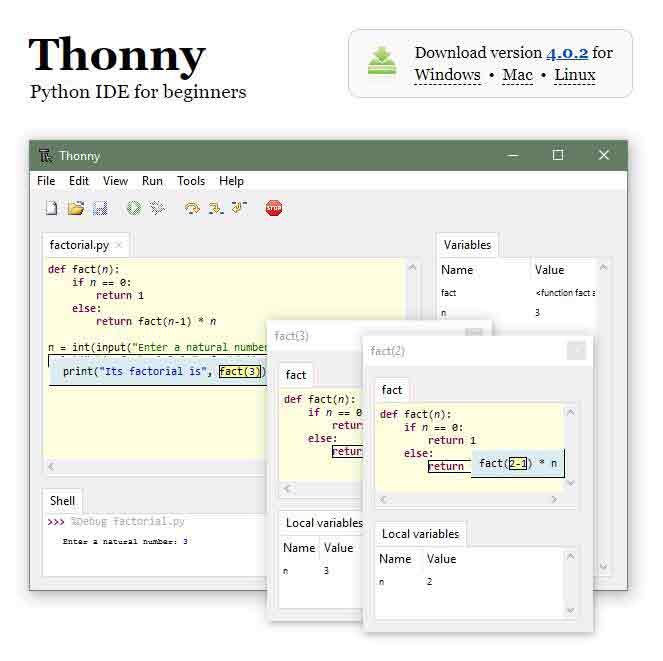
Install Thonny
- 1. Open official Thonny website.
- 2. Select the corresponding system and version, here I choose "Windows", and the mouse has to move to Windows, only then will the corresponding information be displayed.
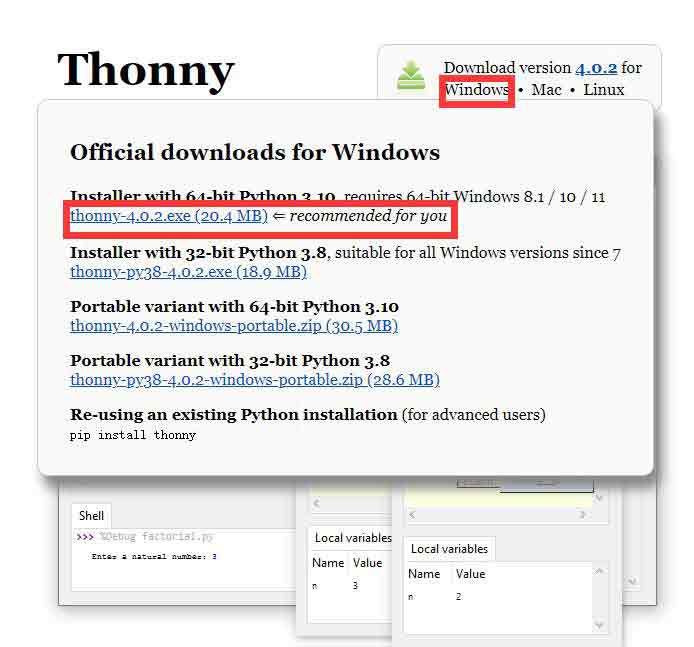
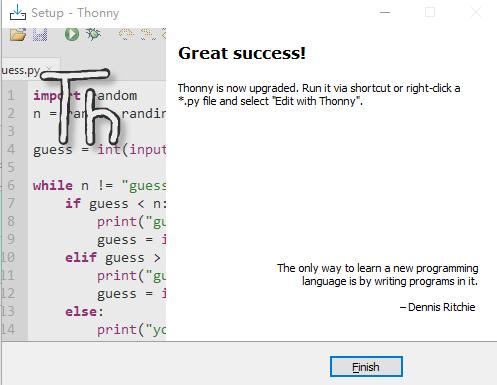
- 3. Just install it all the way by default.
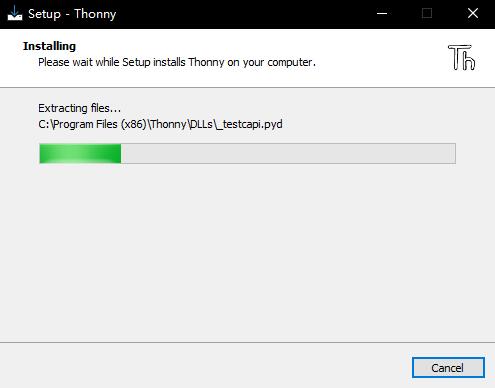
- 4. Finish.
Get the Demo
- 1. Click here to download the demo.
- 2. Unzip the demo zip file.

Run the Demo
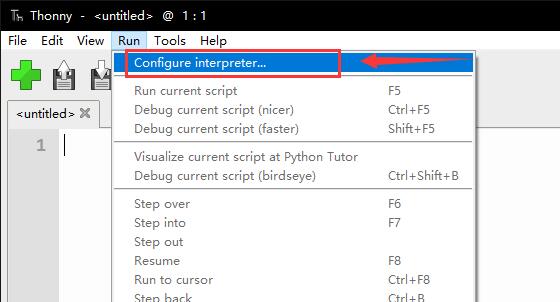
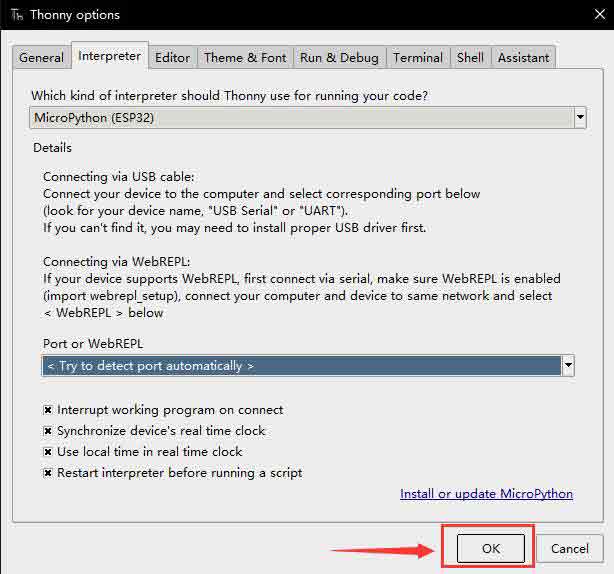
- 1. Open Thonny and choose Configure Interpreter.
- 2. Choose MicroPython (ESP32) as the Interpreter.
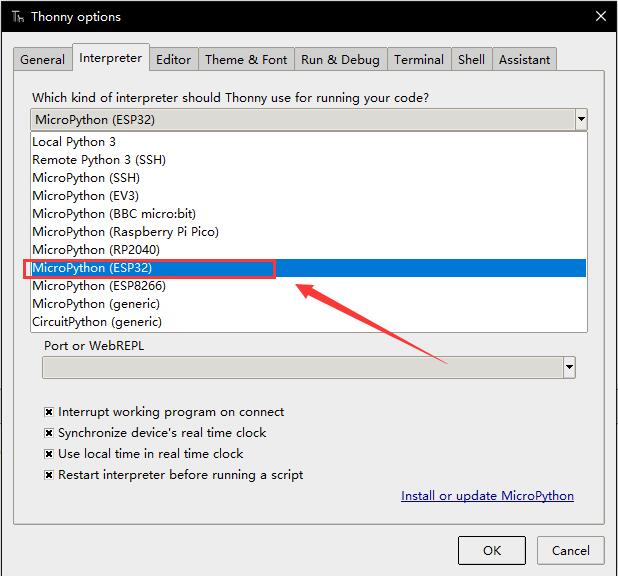
- 3. Click OK to save.
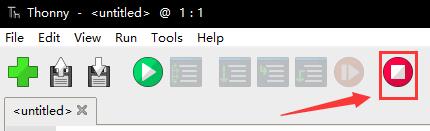
- 4. Click Stop or Ctrl + F2.
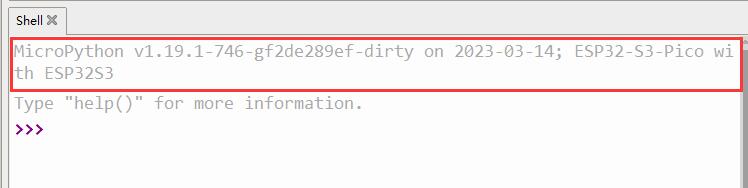
- 5. You can see the MicroPython version information and the board name.
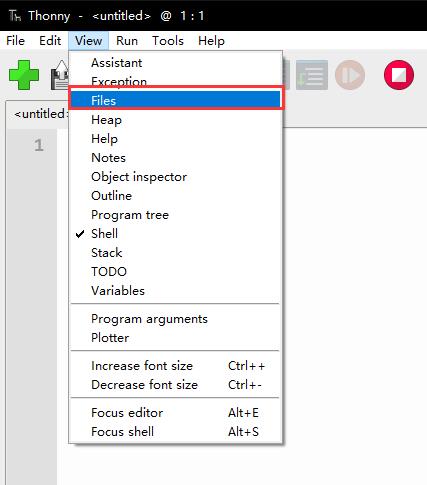
- 6. Open the files.
- 7. Choose our demo file and open a demo, here we choose a wifi-scan demo.
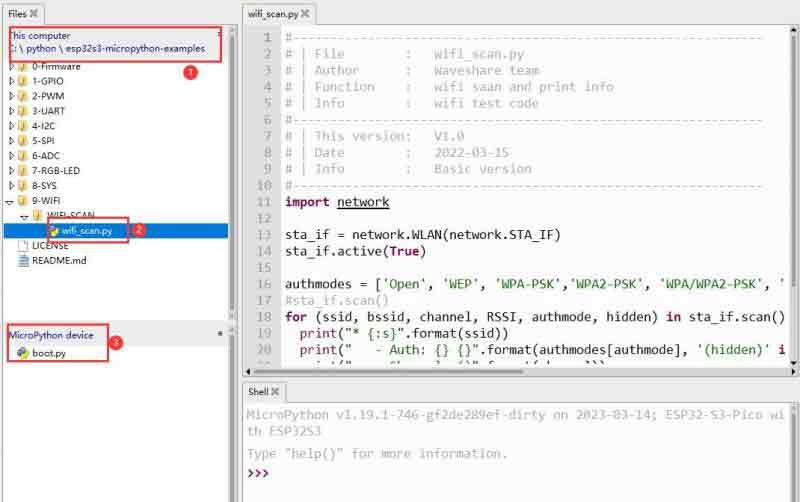
- ①Current local file directory.
- ②The demo we want to open is wifi-scan.py.
- ③ESP32-S3-PICO directory.
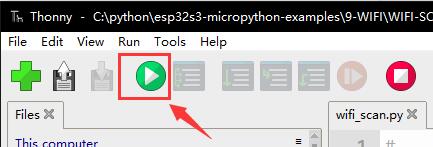
- 8. Click to run or press F5.
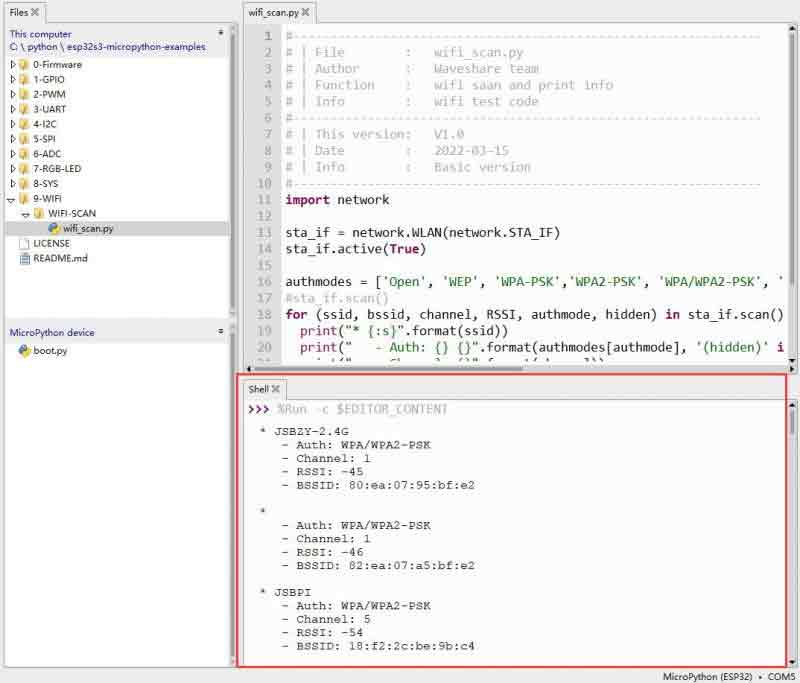
- 9. Please wait a moment, and you can see the wifi output information of esp32-s3-pico.
Resource
Schematic
Demo
Software
ESP32-S3
CH343
UART
Datasheet
ESP32-S3
MicroPython Official Document
FAQ
Question:After power on, the recognized serial port devices and USB ports keep restarting?
Check if the power supply voltage of the USB port is less than 5V. Generally, the power supply voltage of the USB port is above 4.9V, and both USB ports of the module can be used normally. If it is lower than 4.9V, there may be insufficient power supply and USB port disconnection. In this case, it is necessary to replace the USB port with sufficient voltage.
Question:After downloading the module program, sometimes there will be situations where the serial port cannot be connected or the program cannot be burned again.
Long press the BOOT button, then press RESET at the same time, release RESET and then release the BOOT button. At this time, the module can enter the download mode, which can solve most of the problems that cannot be downloaded.