- sales/support
Google Chat:---
- sales
+86-0755-88291180
- sales01
sales@spotpear.com
- sales02
dragon_manager@163.com
- support
tech-support@spotpear.com
- CEO-Complaints
zhoujie@spotpear.com
- Only Tech-Support
WhatsApp:13246739196
- Purchase/Shipping/Refund
WhatsApp:13424403025
Raspberry Pi 5inch Round LCD 1080 User Guide
- 5-inch circular IPS screen with 1080x1080 hardware resolution
- 10-point capacitive touch with 6H hardness tempered glass panel
- Full-fit touch technology for better display performance
- Compatible with Raspberry Pi OS / Ubuntu / Kali and Retropie
- As a computer monitor, compatible with Windows 11 / 10 / 8.1 / 8 / 7
- Supports HDMI audio output, built-in 3.5mm headphone jack and 4PIN speaker interface
Product Specifications
| Item | Description | Unit |
|---|---|---|
| Product Model | 5inch 1080x1080 LCD | / |
| Size | 5.0 | Inch |
| Viewing Angle | 160 | Deg |
| Resolution | 1080x1080 | Pixels |
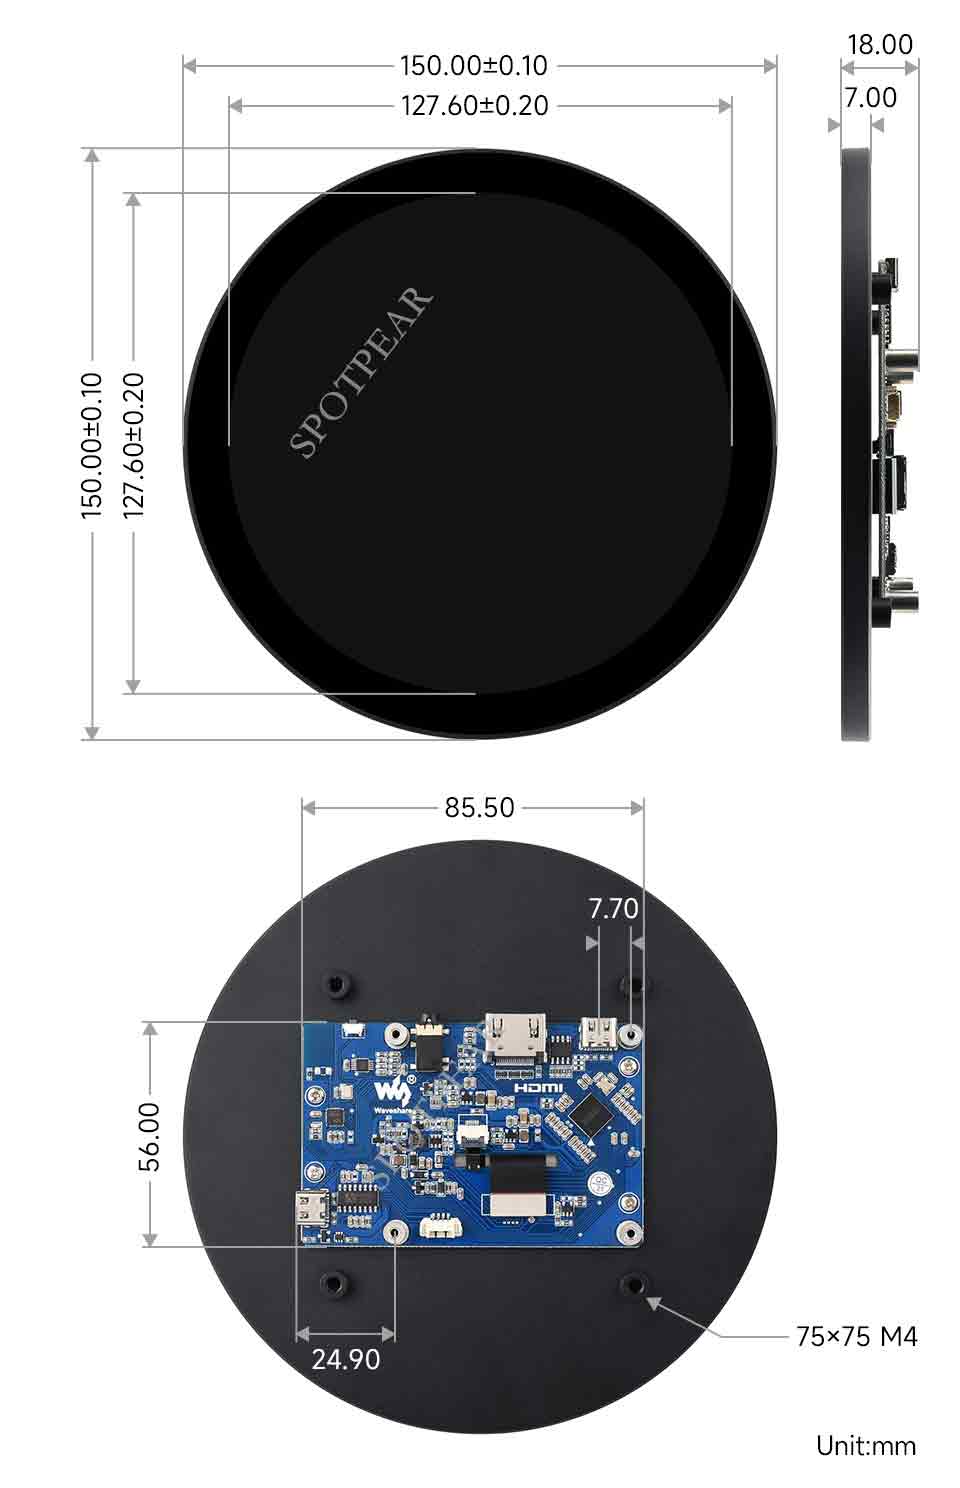
| Overall Dimension | 150.00(H)×150.00(V)×7.00(D) | mm |
| Display Area | 127.60(H)×127.60(V) | mm |
| Pixel Pitch | 0.1176(H) x 0.1176(V) | mm |
| Color Gamut | 70% | NTSC |
| Max Brightness | 300 | cd/m² |
| Contrast Ratio | 1300:1 | / |
| Backlight Adjustment | Button dimming | / |
| Refresh Rate | 60 | Hz |
| Display Interface | Standard HDMI interface | / |
| Power Interface | 5V Type-C power supply | / |
| Power Consumption | 2 | Watt |
| Weight | 381 | g |
Electrical Specifications
| Parameter | Min | Typical | Max | Unit | Note |
| Input Voltage | 4.75 | 5.00 | 5.25 | V | Note 1 |
| Input Current | 300 | 400 | TBD | mA | Note 2 |
| Operating Temperature | 0 | 25 | 60 | ℃ | Note 4 |
| Storage Temperature | -10 | 25 | 70 | ℃ | Note 4 |
- Note 1: Exceeding the maximum input voltage or improper operation may cause permanent damage to the device.
- Note 2: The input current needs to be ≥300mA, otherwise it will cause startup failure or display abnormality. Long-term abnormal state may cause permanent damage to the device.
- Note 3: Please do not store the display screen in a high-temperature and high-humidity environment for a long time. The display screen needs to work within the limit range, otherwise it may damage the display screen.
EDID Timing Parameters
If the system of the main control board can automatically recognize the EDID for display, there is no need to set the relevant timing parameters separately.
Otherwise, refer to the following EDID settings:
| Pixel Clock | H Adressable | H Blanking | V Adressable | V Blanking | H Front Porch | H Sync Width | V Front Porch | V Sync Width | H Image Size | V Image Size | H Border | V Border |
|---|---|---|---|---|---|---|---|---|---|---|---|---|
| 85.50 | 1080 | 200 | 1080 | 32 | 68 | 32 | 16 | 4 | 203 | 270 | 0 | 0 |
Interface Introduction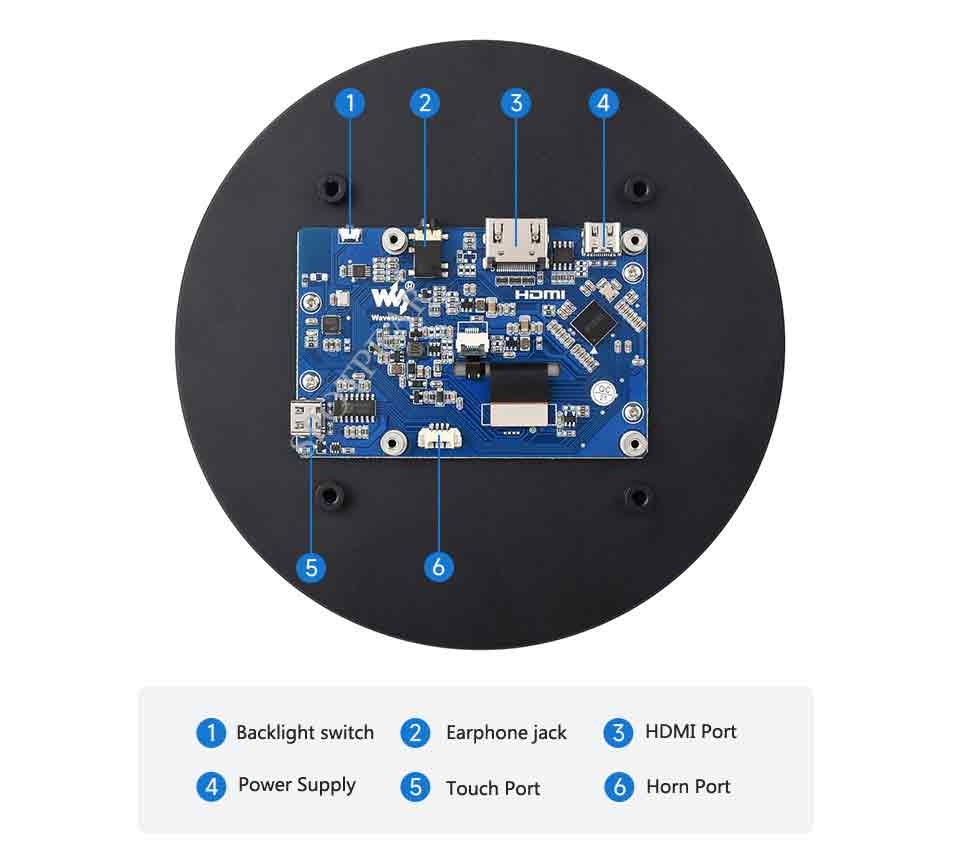
Instructions for Use
Used with Raspberry Pi
Hardware connection:
1. Connect the Touch interface to the USB interface of the Raspberry Pi.
2. Connect the HDMI interface to the HDMI interface of the Raspberry Pi.
Software settings:
Supports Raspberry Pi OS / Ubuntu / Kali and Retropie systems.
When the LCD works with these systems on the Raspberry Pi, the resolution must be manually set, otherwise the display resolution will be incorrect, affecting the experience.
1. Download the latest version of the mirror from the official website of Raspberry Pi.
2. Download the compressed file to your PC and unzip it to get the .img file.
3. Connect the TF card to the PC and format the TF card with SDFormatter software.
4. Open the Win32DiskImager software, select the system image prepared in step 1, and click write to burn the system image.
5. After the burning is completed, open the config.txt file in the root directory of the TF card, add the following code at the end of config.txt, save and safely eject the TF card.
hdmi_group=2
hdmi_mode=87
hdmi_pixel_freq_limit=356000000
hdmi_timings=1080 0 68 32 100 1080 0 12 4 16 0 0 0 60 0 85500000 0
6. Insert the TF card into the Raspberry Pi, power on the Raspberry Pi, and wait for a few seconds to display normally.
Usage with PC
Supports Windows 11/10/8.1/8/7 systems. Usage:
1. Connect the Touch interface of the LCD to the USB interface of the PC. Windows will automatically recognize the touch function.
2. Connect the HDMI interface of the LCD to the HDMI interface of the PC. Windows will automatically recognize the display function.
- Note:
- Some PC's do not support HDMI devices plug-and-play, and can usually function normally after a system restart.
- Insufficient USB interface power may cause the LCD to flicker. Connecting a 5V 1A power adapter to the Power interface of the LCD can restore normal operation.
Windows designated touch screen
Taking the Windows 10 system as an example:
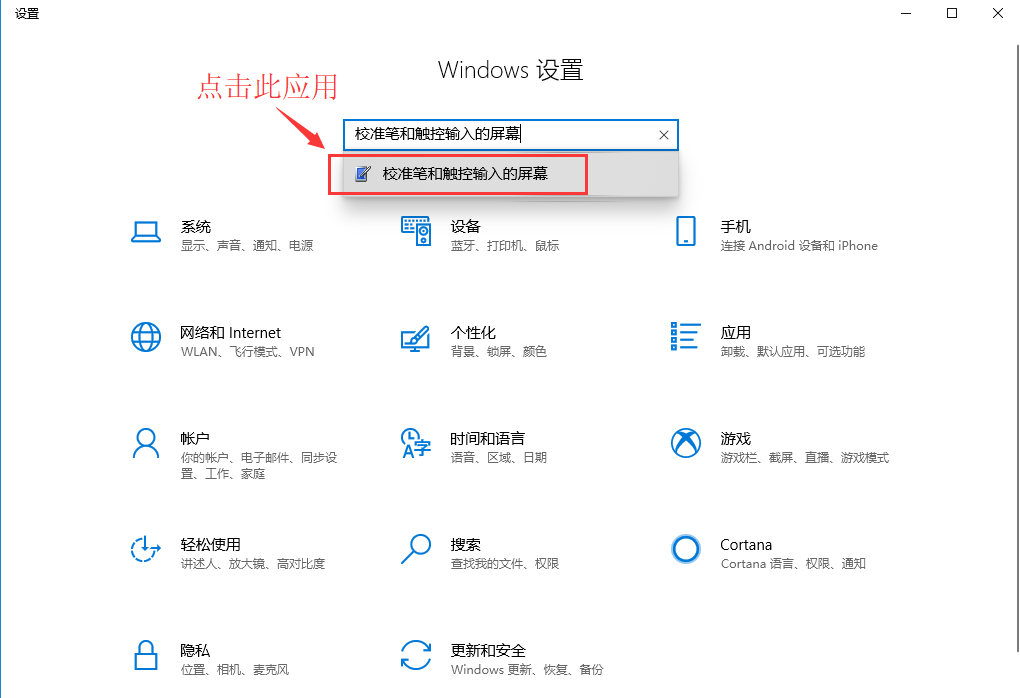
- 1. Enter the Windows settings and type "calibrate the screen for pen or touch input" in the search bar and click it (as shown below).
- 2. In the "Tablet PC Settings" pop-up window, click "Setup".
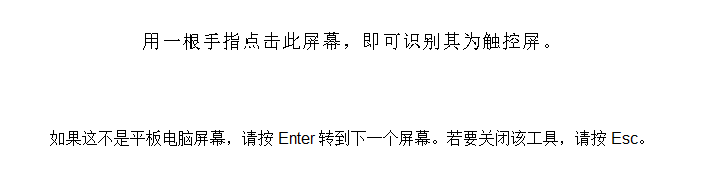
- 3. The screen will display the following prompt. Use your finger to touch the touchpad, and the computer will recognize it as a touch screen.
Outline Dimensions