- sales/support
Google Chat:---
- sales
+86-0755-88291180
- sales01
sales@spotpear.com
- sales02
dragon_manager@163.com
- support
tech-support@spotpear.com
- CEO-Complaints
zhoujie@spotpear.com
- Only Tech-Support
WhatsApp:13246739196
- Purchase/Shipping/Refund
WhatsApp:13424403025
Raspberry Pi Pico ESP32-S3-Pico User Guide
Introduction
The ESP32-S3-Pico is a low-cost, high-performance microcontroller development board with a compact size and rich peripheral interfaces.
Adopts ESP32-S3R2 as the main chip, which is an MCU chip with integrated 2.4 GHz Wi-Fi and Bluetooth 5 (LE).
The interface chips are CH343 and CH334, so you can experience the fun of USB and UART development with a single USB-C port, and no more trouble switching interfaces.
The DC-DC chip adopts MP28164, a high-efficiency buck-boost chip, which adopts PWM fixed-frequency current control mode to optimize circuit stability and response speed.
You can choose ESP-IDF, Arduino, MicroPython, or other development environments in software so that you can easily and quickly get started and apply it to the product.
Features
- Adopts ESP32-S3R2 chip.
- Comes with Xtensa 32-bit LX7 dual-core processor, capable of running at 240 MHz.
- Integrated 512KB SRAM, 384KB ROM, 2MB PSRAM, 16MB Flash memory.
- Type-C connector, easier to use.
- Onboard CH343 and CH334 chips can meet the needs of USB and UART development via a Type-C interface.
- Onboard DC-DC chip MP28164, high-efficiency DC-DC buck-boost chip with load current up to 2A.
- Supports multiple low-power operating states, the adjustable balance between communication distance, data rate, and power consumption to meet the power requirements of various application scenarios.
- 27 × multi-function GPIO headers.
- Castellated module allows soldering directly to carrier boards.
- Rich peripheral interfaces, including full-speed USB OTG, SPI, I2C, UART, ADC, PWM, and DVP (8-bit ~ 16-bit camera interface), LCD interfaces (8-bit ~ 16-bit parallel RGB, I8080, MOTO6800), etc. to achieve various functions flexibly.
Pinout Definition
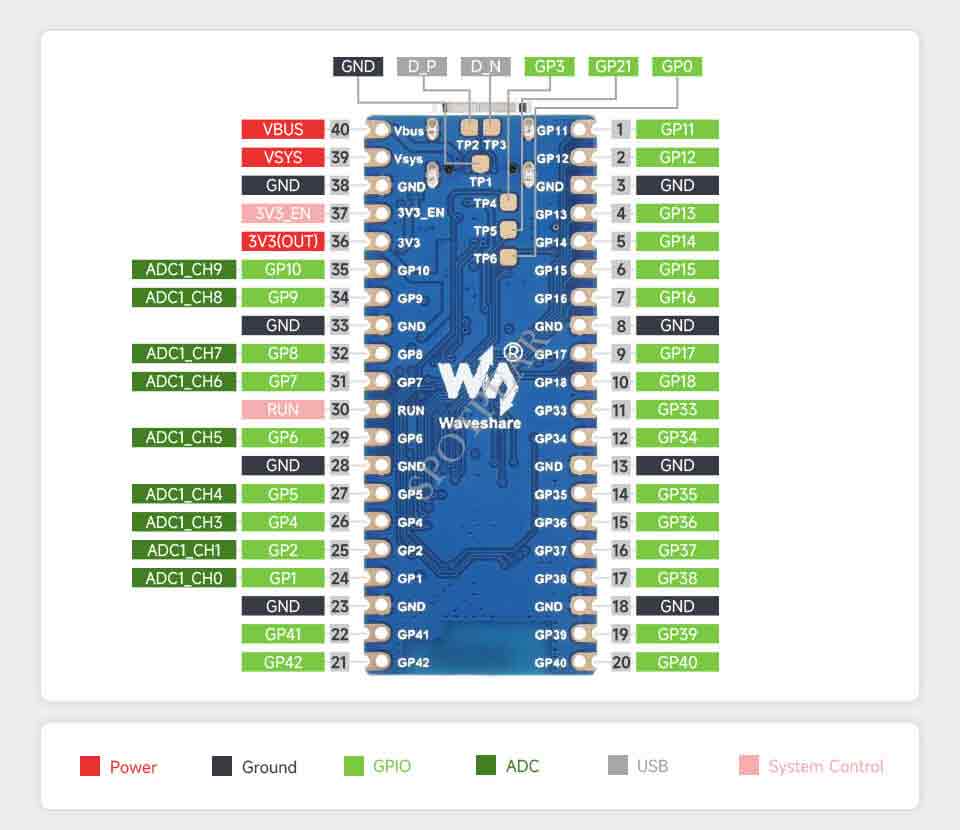
- Note: SPI, I2C, UART and other interfaces can be mapped to most GPIOs through the GPIO Matrix and IO MUX, see the ESP32-S3 datasheet for details.
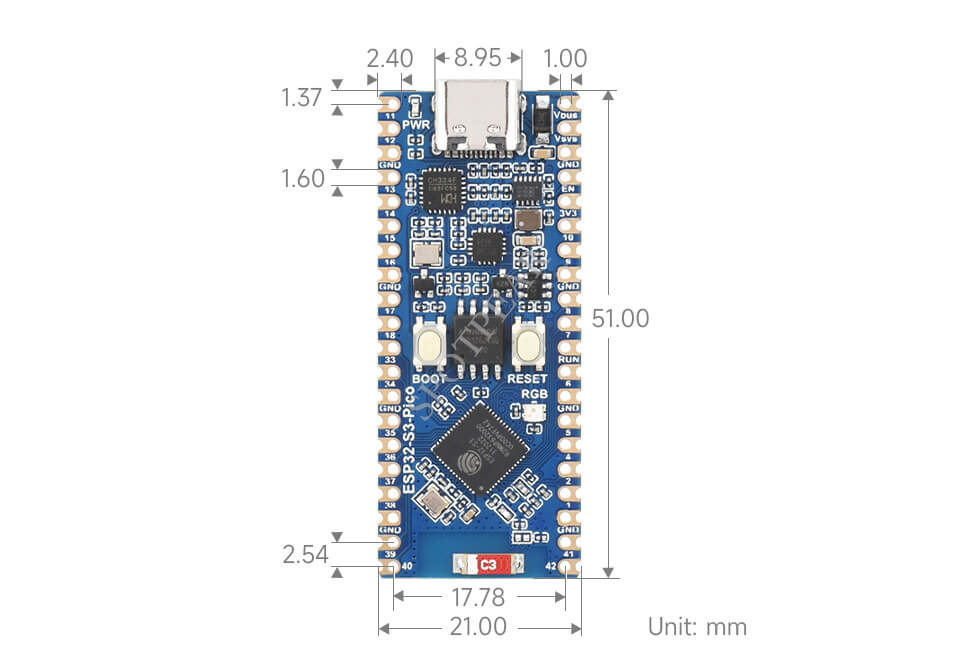
Dimensions
Development Environment Configuration
- The following development system is Windows by default.
ESP-IDF
- It is recommended to develop with the VSC plug-in.
Develop with VSCode
Install VSCode
- 1. Open the download page of the VSCode official website, and select the corresponding system and system bit to download.
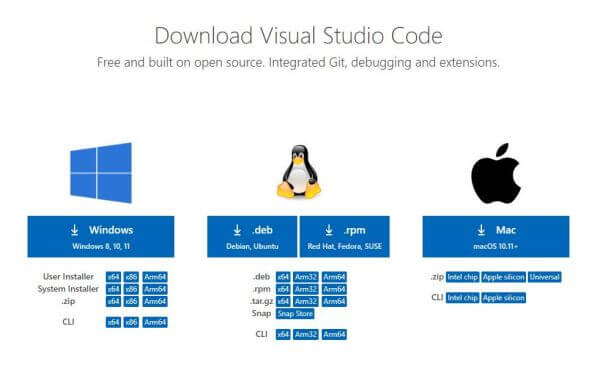
- 2. After running the installation package, the rest can be installed by default, but here for the subsequent experience is recommended, it is recommended to check boxes 1, 2, and 3 here.
- After the first two items are enabled, you can open VSCode directly by right-clicking files or directories, which can improve the subsequent user experience.
- After the third item is turned on, you can select VSCode directly when you choose the opening method.
Install Espressif IDF Plug-in
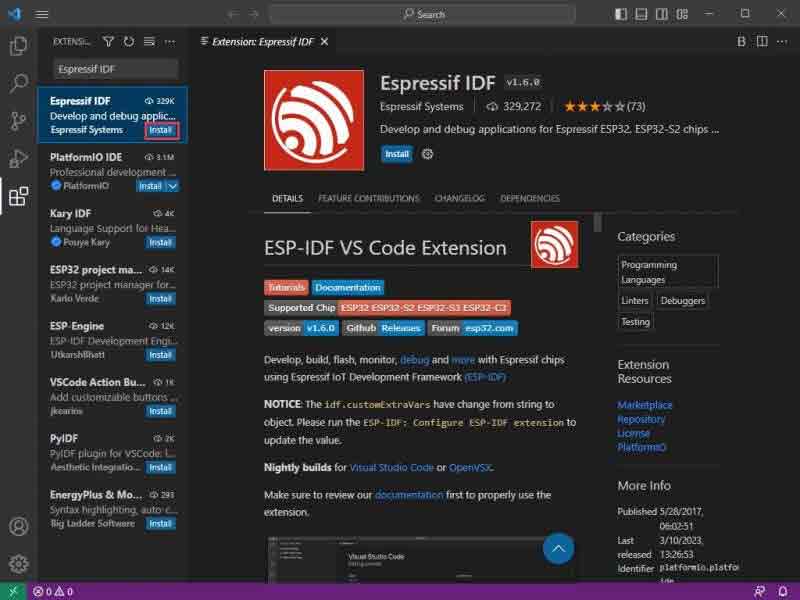
- Note: The latest version of the current plug-in is V1.6.0, for a consistent experience, users can choose the same version as us.
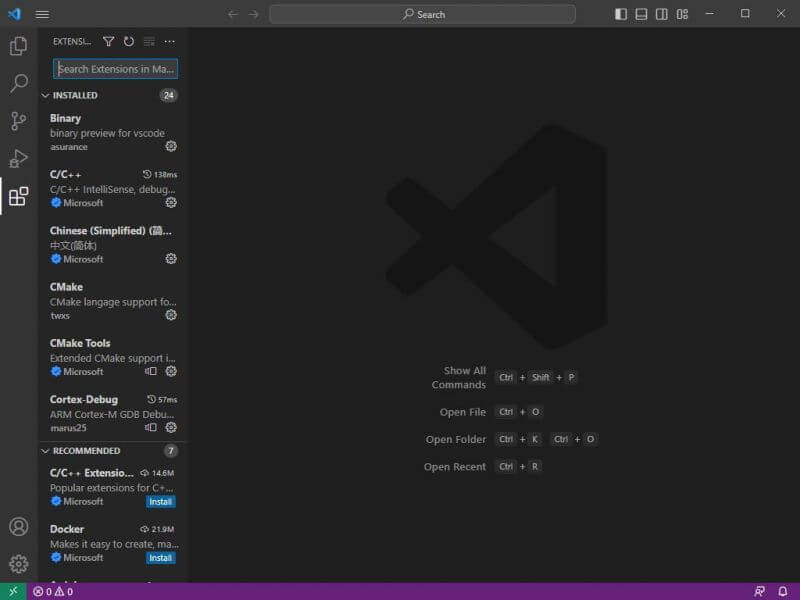
- 1. Open VSCode and use the shortcut key Shift+Ctrl+X to enter the plugin manager.
- 2. In the search bar, type Espressif IDF, select the corresponding plug-in, and click install.
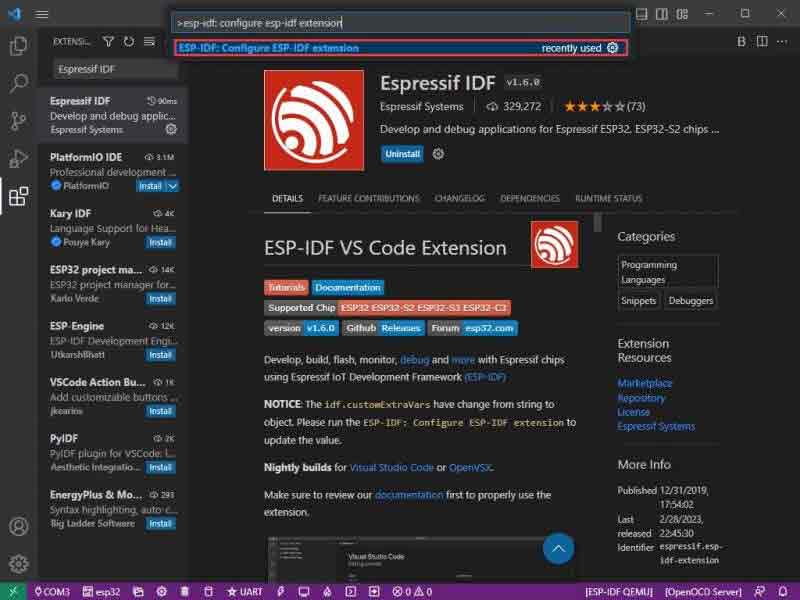
- 3. Use F1 to enter:
esp-idf: configure esp-idf extension
- 4. Choose express (This tutorial is for first-time installers, so only the first general installation tutorial is covered.)
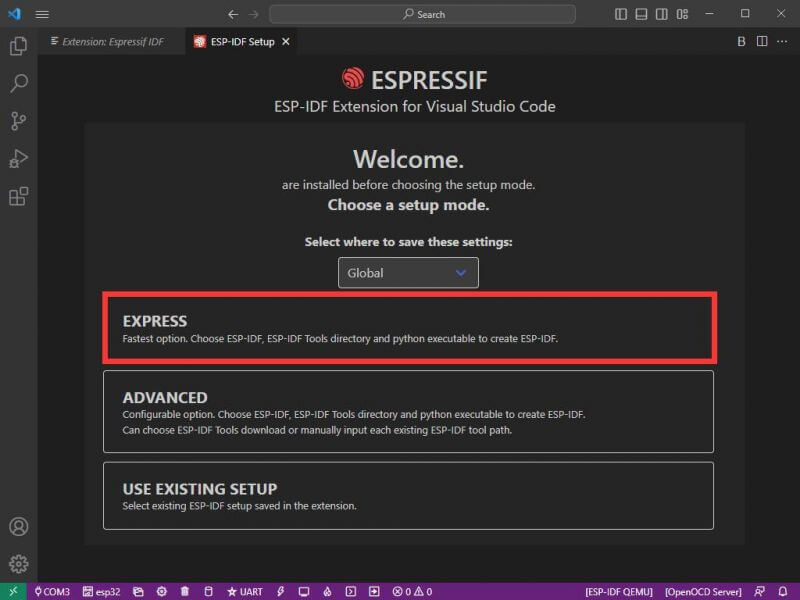
- 5. Open and display this screen.
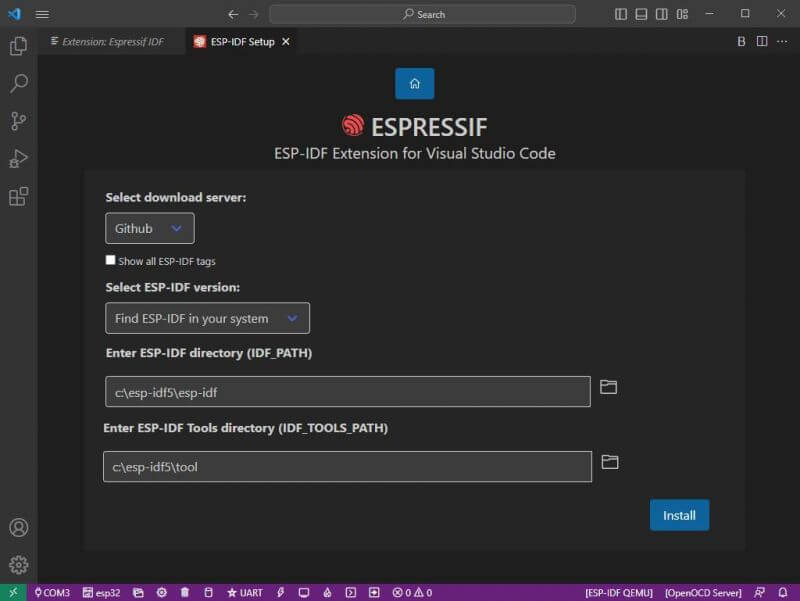
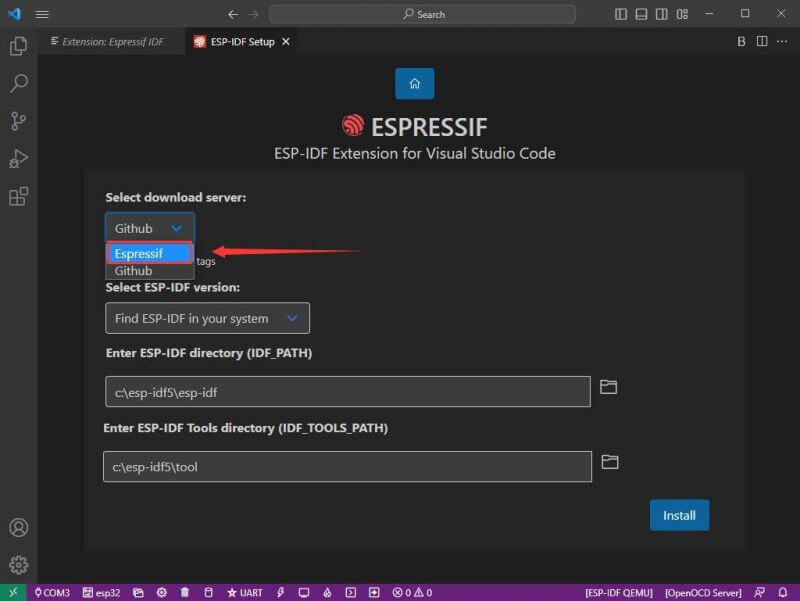
- 6. Choose a download server.
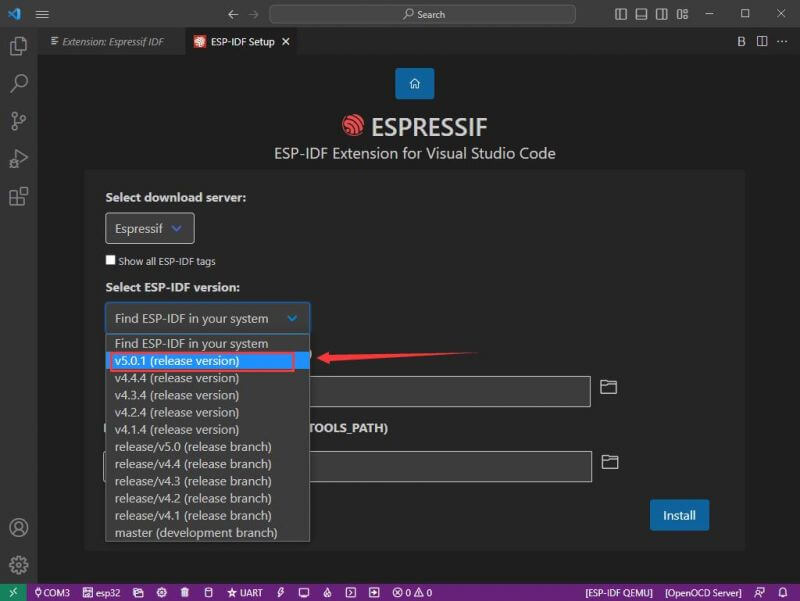
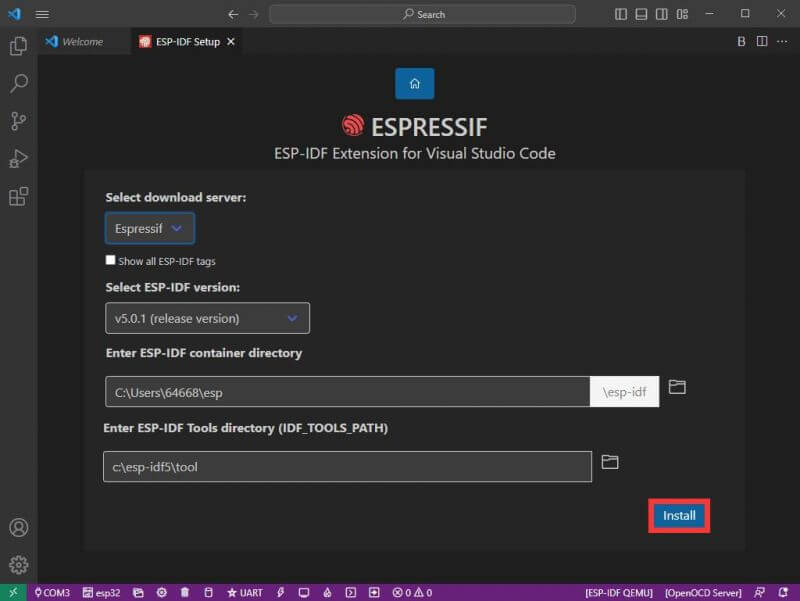
- 7. Select the ESP-IDF version you want now, we choose the latest V5.0.1 (note that ESP-IDF started to support ESP32-S3 only after version V4.4).
- 8. The following two are the ESP-IDF container installation address and the ESP-IDF required tools installation address respectively.
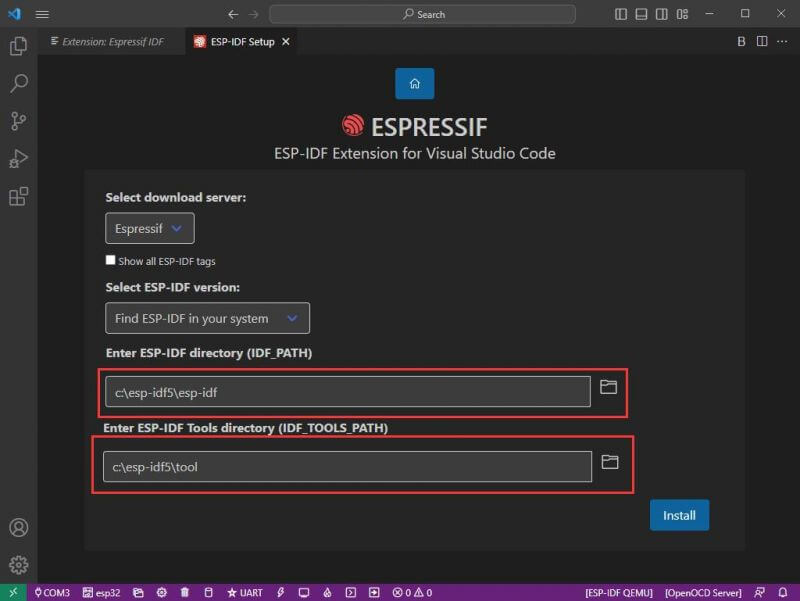
- Note: If you have installed ESP-IDF before, or if it has failed, please make sure to delete the file completely or create a new path.
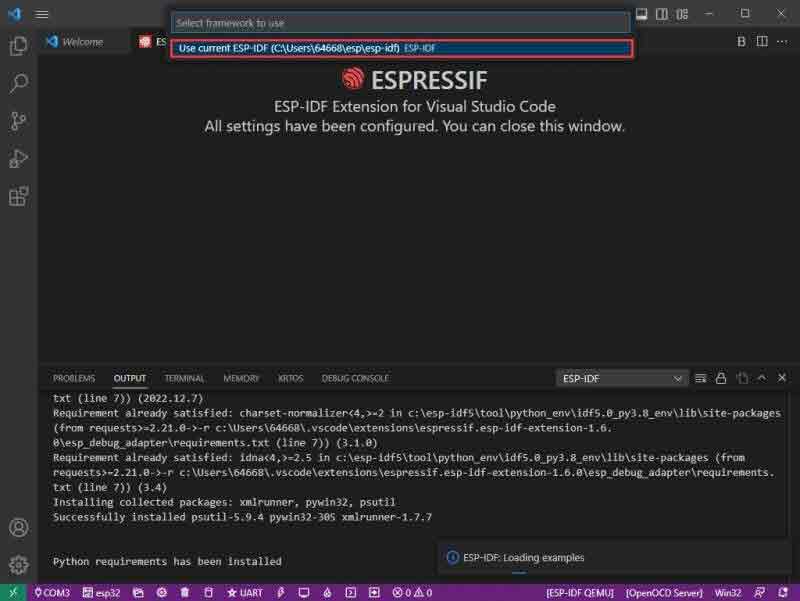
- 9. Once the configuration is complete, click install to download.

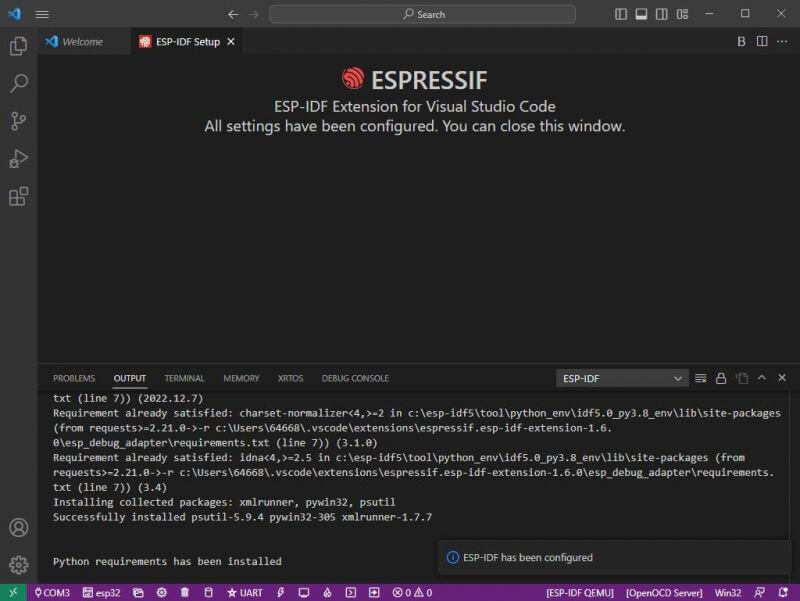
- 10. Enter the download page, it will automatically install the corresponding tools and environment, just wait a moment.
- 11. After the installation is completed, it will enter the following screen, indicating that the installation is complete.
Official Demo
Creating a Demo
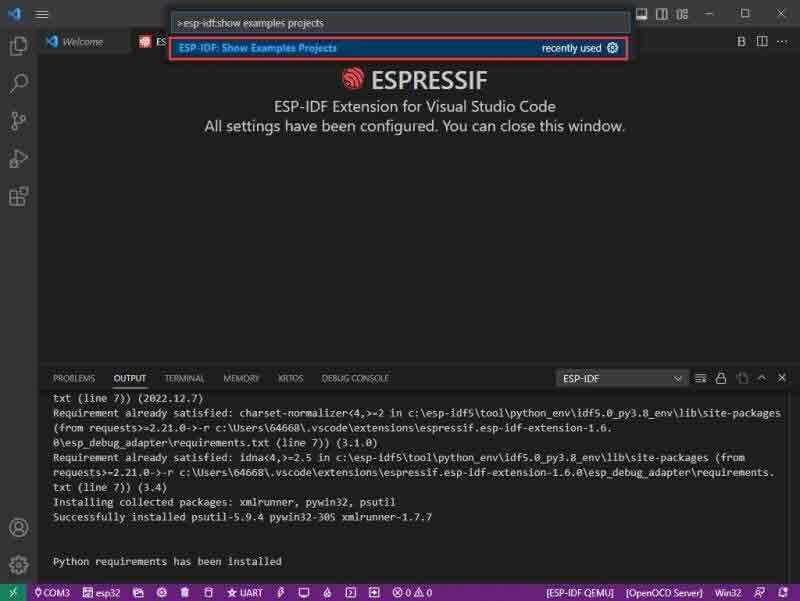
- 1. Using the shortcut F1, type:
esp-idf:show examples projects
- 2. Choose your current IDF version:
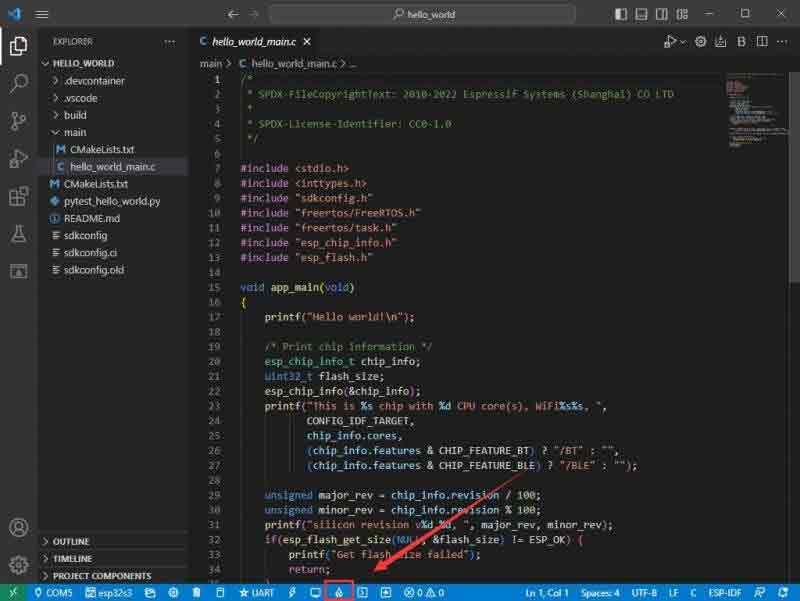
- 3. Take Hello World as an example:
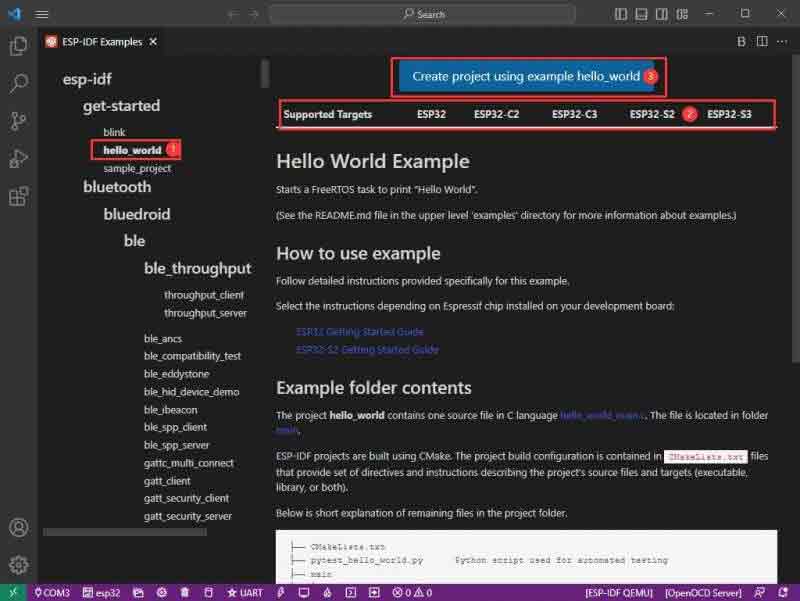
- 4. ① Choose the corresponding demo.
- 5. ② The readme file will explain which chip the demo is suitable for (the following section will introduce how to use the demo and its file structure, which is omitted here).
- 6. ③ Click to create the demo.
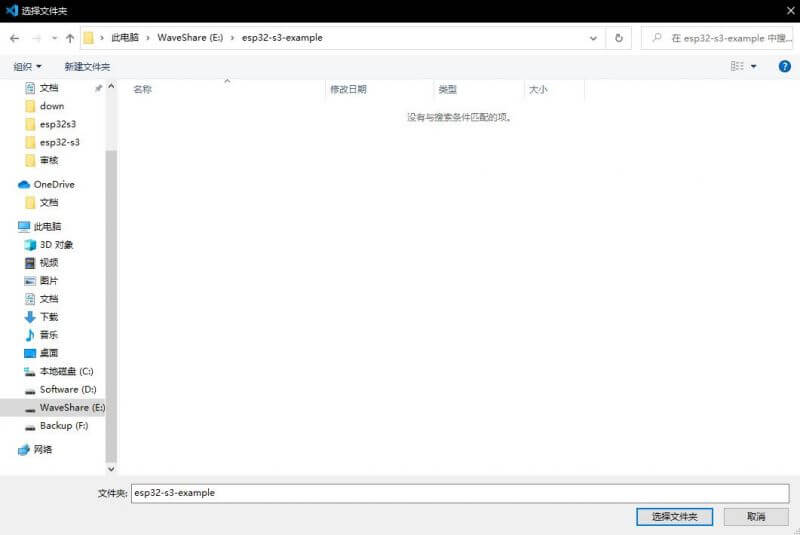
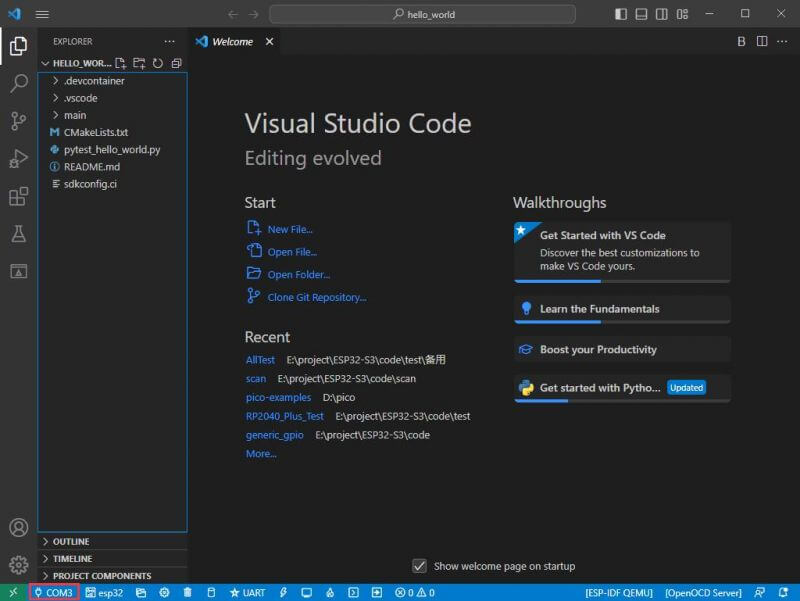
- 7. Choose the path to place the demo and ensure that there is no folder with the same name as the demo.
Change COM Port
- 1. The corresponding COM port is displayed here, click on it to modify.
- 2. The COM of our CH343 is COM5, so we choose COM5, please choose according to your CH343 corresponding COM port.
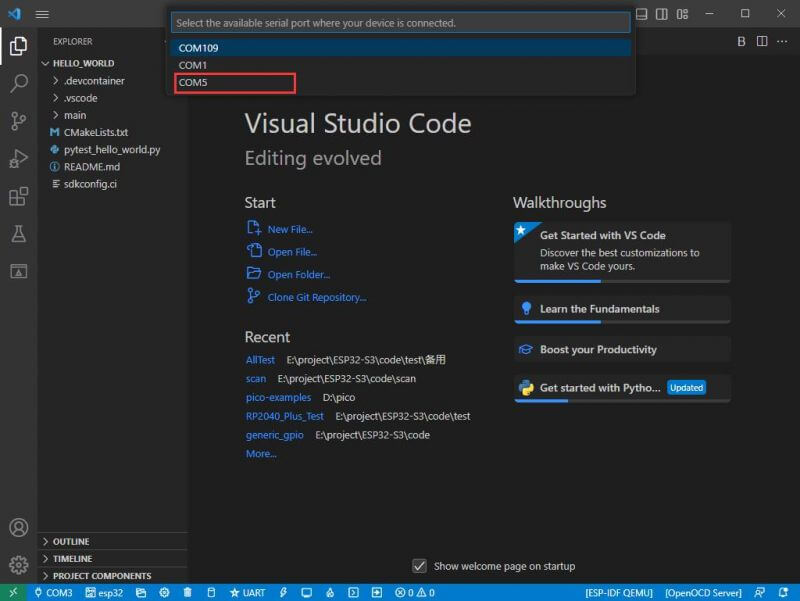
- 3. Choose the project and the demo.

- 4. Then our COM port is modified.
Modify the Driver
- 1. Here shows the driver object used, click here to modify the corresponding driver:
- 2. Choose the project or the demo:
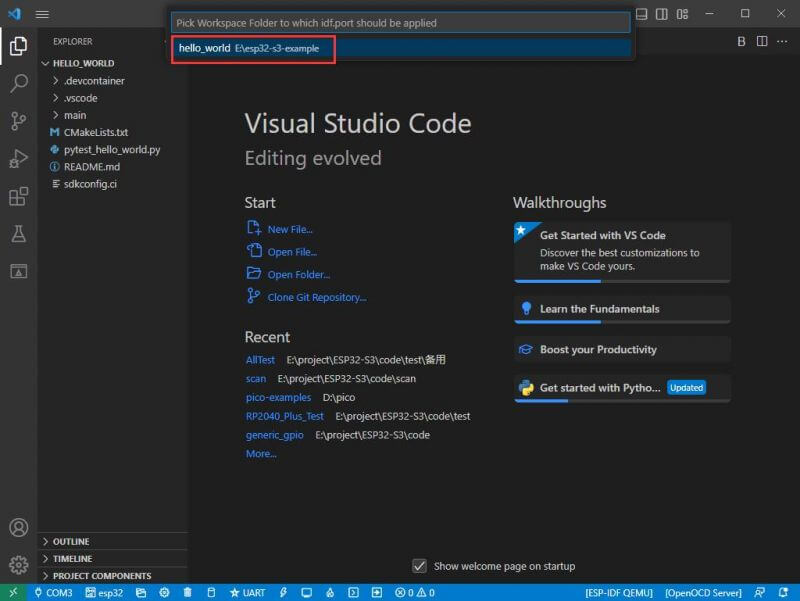
- 3. Wait for a few seconds after clicking.
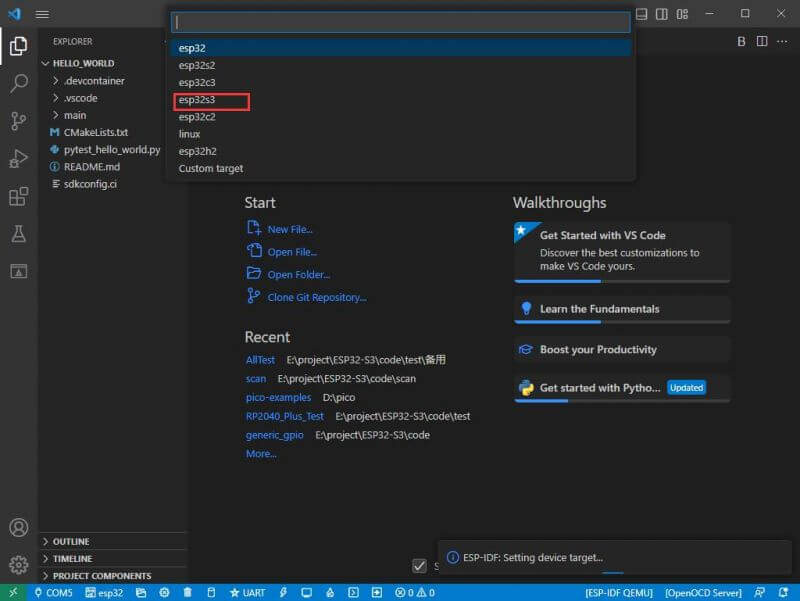
- 4. Choose the driver we need, that is, the main chip ESP32S3.
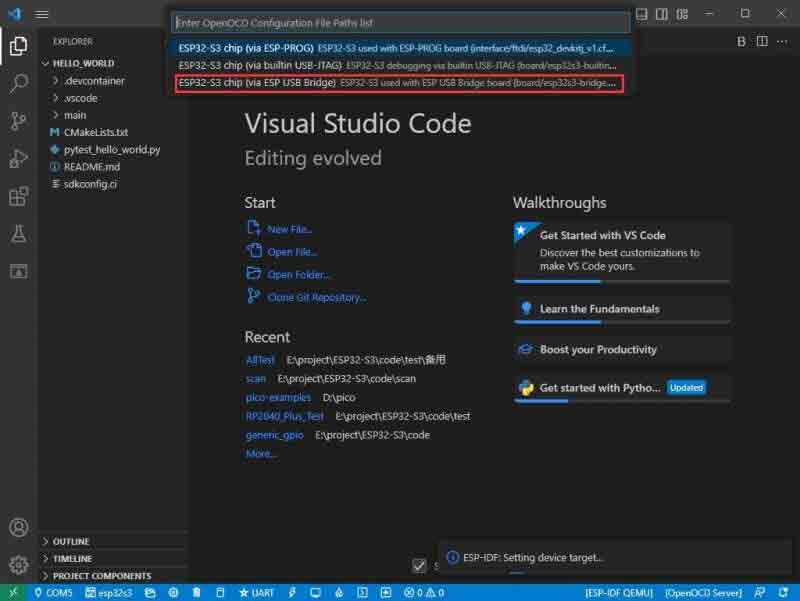
- 5. Choose the openocd path, it doesn't affect us here, so we can just choose one.
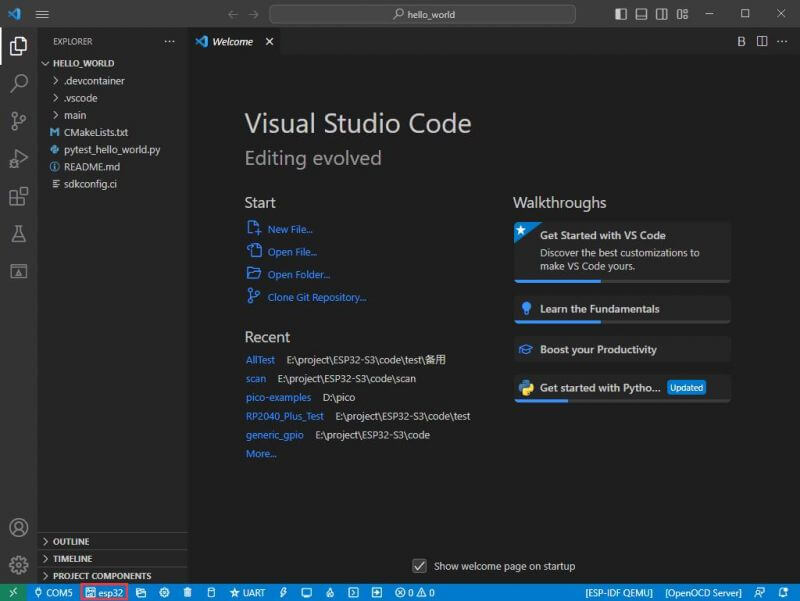
The Rest of the Status Bar Introduction
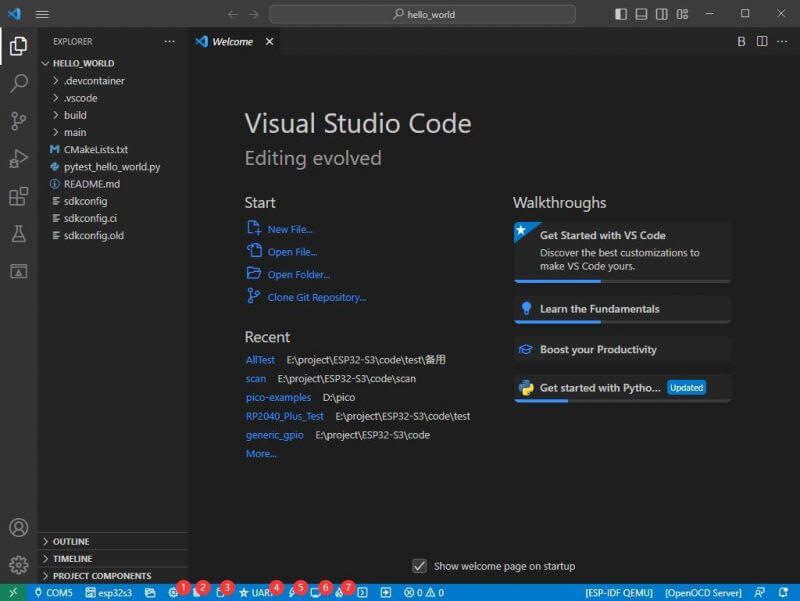
- ① SDK configuration editor: many functions and configurations of ESP-IDF can be modified within it.
- ② Clean up everything and delete all compiled files.
- ③ Compile.
- ④ Current download method, default is UART.
- ⑤ Program the current firmware, please do it after compiling.
- ⑥ Open the serial monitor to view serial information.
- ⑦ Combined button for compiling, burning, and opening the serial monitor (most commonly used during debugging).
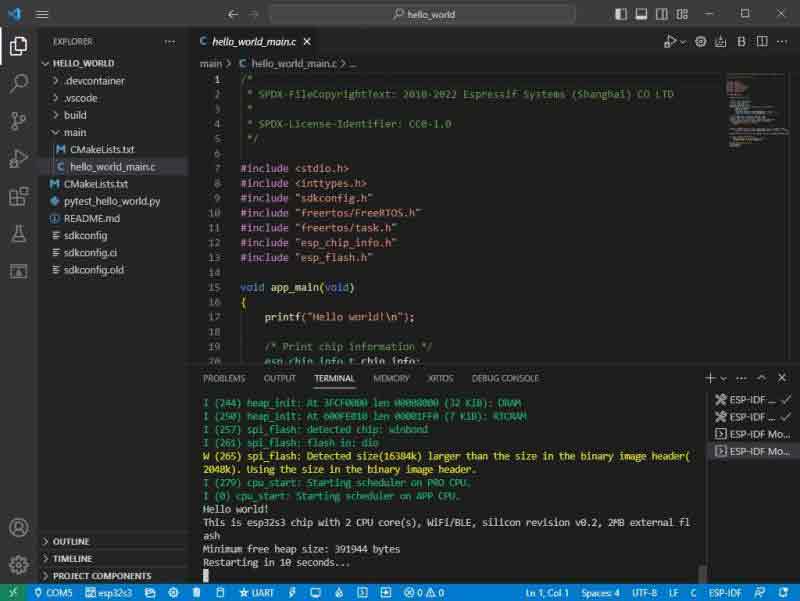
Compile, Program, and Serial Port Monitoring
- 1. Click on the Compile, Program, and Open Serial Monitor buttons we described earlier.
- 2. Compilation may take a long time to complete, especially when compiling for the first time.
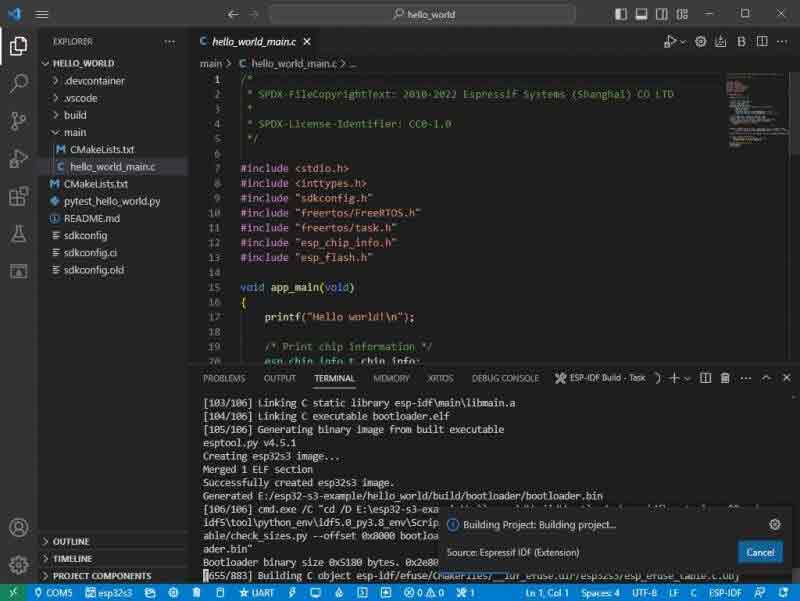
- During this process, ESP-IDF may take up a lot of CPU resources and therefore may cause system lag.
- 3. Because we use CH343 as the USB to serial chip, and the onboard auto-download circuit, it can download automatically without manual operation.
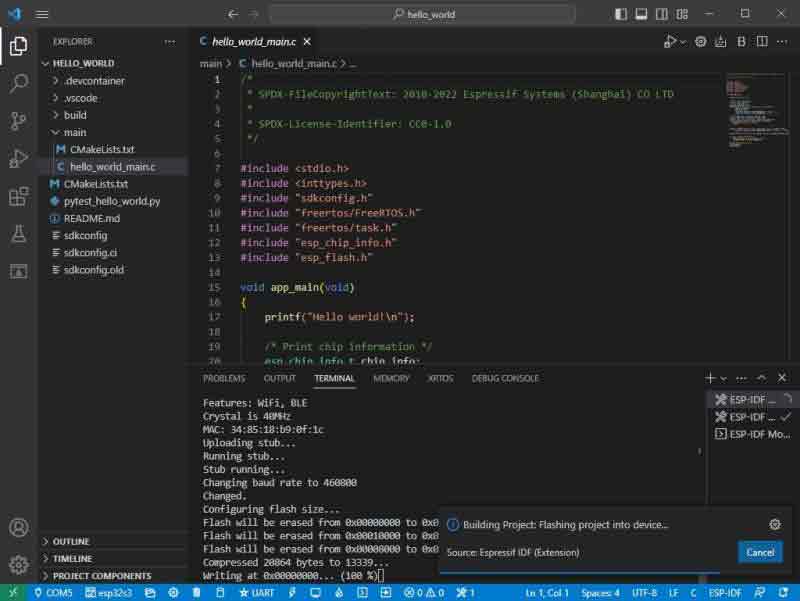
- 4. After successful download, it will automatically enter the serial monitor, you can see the corresponding information output from the chip and prompt to reboot after 10S.