


- sales/support
Google Chat: zj734465502@gmail.com
- sales
+86-0755-88291180
- sales01
sales01@spotpear.com
- sales02
dragon_manager@163.com
- support
services01@spotpear.com
- CEO-Complaints
manager01@spotpear.com
- sales/support
WhatsApp:13246739196
- HOME
- >
- ARTICLES
- >
- Common Moudle
- >
- LCD
4.3inch DSI LCD User Guide
Introduction
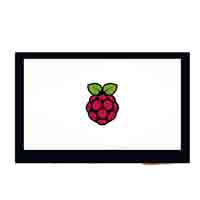
4.3inch Capacitive Touch Display for Raspberry Pi, 800×480, IPS Wide Angle, MIPI DSI Interface
Features
- 4.3inch IPS screen. 800x480 resolution
- Capacitive touch panel, support 5-point touch
- Supports Pi 4B/3B+/3A+/3B/2B/B+/A+. Another adapter board is required for CM3/3+
- DSI interface, refresh rate up to 60Hz.
- Supports Raspbian/Ubuntu/Kali and WIN 10 IoT, driver free.
User guide
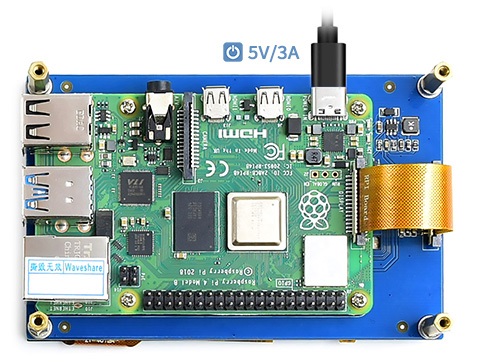
Hardware connection
- Connect the DSI interface of 4.3inch DSI LCD to the DSI interface of Raspberry Pi.
- For easy use, you can fix the Raspberry Pi on the backside of the 4.3inch DSI LCD by screws
Software setting
- Download image (Raspbian, Ubuntu, Kali or WIN 10 IOT) from the Raspberry Pi website. https://www.raspberrypi.org/downloads/
- Unzip the archive to get .img file (The installation method of WIN 10 IOT is different, please refer to its website)
- Insert your TF card to PC by card reader, format it firstly
- Write the .img file to your TF card by Win32DiskImager or Etcher
- After writing, insert the TF card to your Raspberry Pi
- Power on Raspberry Pi
Rotation
To change the orientation of the display, you can modify /boot/config.txt file as below
- Open the file
sudo nano /boot/config.txt
- Modify it for rotating
- 90°
display_lcd_rotate=1
dtoverlay=rpi-ft5406,touchscreen-swapped-x-y=1,touchscreen-inverted-x=1
- 180
display_lcd_rotate=2
dtoverlay=rpi-ft5406,touchscreen-inverted-x=1,touchscreen-inverted-y=1
- 270
display_lcd_rotate=3
dtoverlay=rpi-ft5406,touchscreen-swapped-x-y=1,touchscreen-inverted-y=1
If you use Raspberry Pi 4, you need to remove the line: dtoverlay=cv4-fkms-V3D
- Save and reboot Raspberry Pi
sudo reboot
Install virtual keyboard
Open terminal and install it by the following command
sudo apt-get install matchbox-keyboard
After installing, you can click Accessories -> Keyboard to open the keyboard.

TAG:
Circular LCD Screen
LuckFox
GC9A01
Tutorial
Autofocus Camera
Refractive Prism
Jetson Nano 4G module
ESP32
RS485 to RJ45
BPI
Luckfox Pico LCD
ESP32-C6-MINI-1Support WiFi 6 Bluetooth 5 Zigbee Thread
Raspberry Pi PICO LoRa
Raspberry Pi 3D Display
Core3566102032
ESP32-S3 1.28
series bus servos
Raspberry Pi Pico Buzzer
Pi5-Pcie-Fish-Boar
240x280
Price:
$39.89
Part Number:
4.3inch-DSI-LCD
Brand:
Spotpear
SKU:
0105401
TAG:
1.5inch Display
SpotPear
Mobile Robot
PI5 Case
Raspberry Pi RTC WatchDog HAT (B)
IPS
Metal Case
CAM-GC2083
Raspberry Pi 5 9layer Case
Changeable Photo
Raspberry Pi 5 Sound Card
NUCLEO MX25R6435F
ESP32 S3 touchscreen
Raspberry Pi 5 Fan
Raspberry Pi 5 PD Induction
Raspberry Pi 5
Industrial USB TO RS485
Accelerometer
SpotPear
ESP32