- sales/support
Google Chat: zj734465502@gmail.com
- sales
+86-0755-88291180
- sales01
sales01@spotpear.com
- sales02
dragon_manager@163.com
- support
services01@spotpear.com
- CEO-Complaints
manager01@spotpear.com
- sales/support
WhatsApp:13246739196
- HOME
- >
- ARTICLES
- >
- Common Moudle
- >
- ESP
ESP32-S3-Matrix Users Guide
】Resource
Demo
Software
】Programming Software
】UART
】Flash
】Bluetooth
】Schematic
】ESP32-S3 Datasheet
ESP32-S3 Technical Reference Datasheet
】Official ESP32 Documentation
】Overview
Introduction
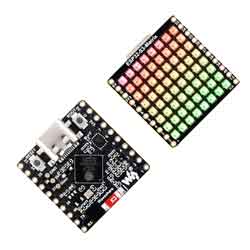
[] ESP32-S3-Matrix is a compact microcontroller development board with multiple digital interfaces, such as 20x GPIO pin headers, and onboard 8*8 RGB LED matrix, which can be used for displaying cool RGB LED effects or simple images.
[] In terms of hardware, it adopts ESP32-S3 as the main chip, integrates high-performance Xtensa® 32-bit LX7 dual-core processor, low-power co-processor, WiFi, Bluetooth, RF module, and other peripheral interfaces, enabling it to be compatible with other devices, and is easy to use.
[] In terms of software, you can choose the ESP-IDF development environment or develop on the Arduino IDE, and you can easily get started with it and apply it to your projects.
Features
[] Adopts ESP32-S3 chip, integrates high-performance Xtensa® 32-bit LX7 dual-core processor, the main frequency is up to 240MHz
[] Integrates 512KB SRAM, 384KB ROM, 16KB RTC SRAM, and 4MB Flash memory storage.
[] Integrates low energy Bluetooth(Bluetooth LE) wireless communication, 2.4GHZ WiFi, and superior RF performance.
[] USB Type-C connector, easier to use.
[] Adapting multiple peripheral interfaces, onboard 8*8 beads matrix of 64 RGB beads, for displaying cool RGB LED effects or simple images.
[] Support multiple low-power working effects, balancing the communication distance, data rate, and power consumption, meeting various application requirements.
Function Block
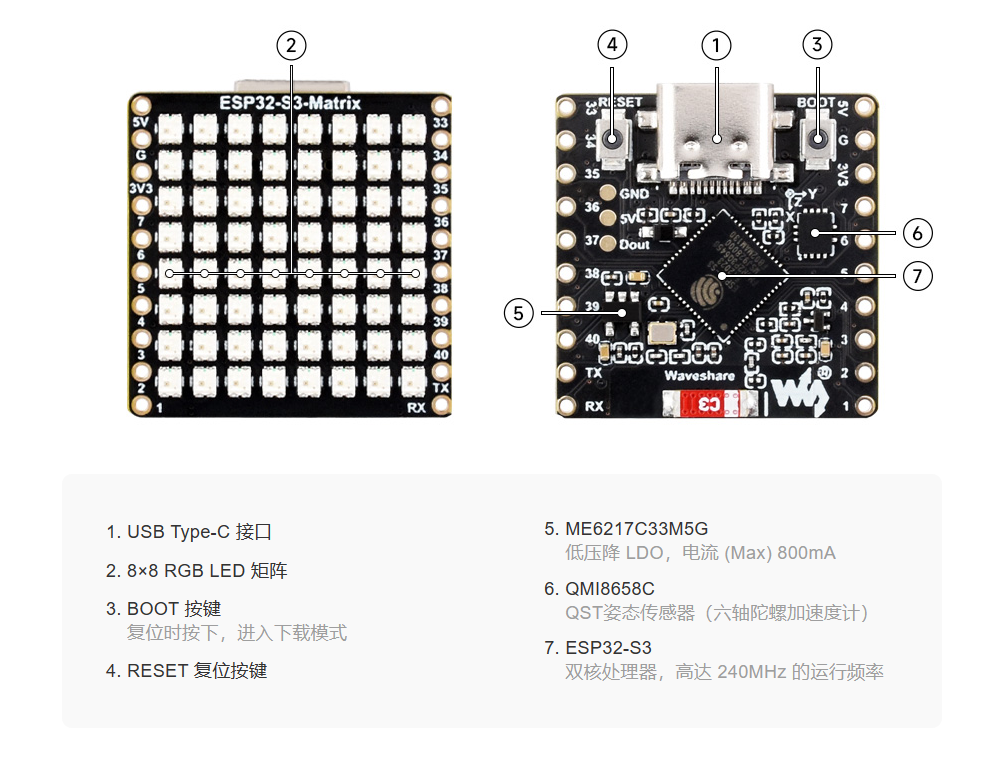
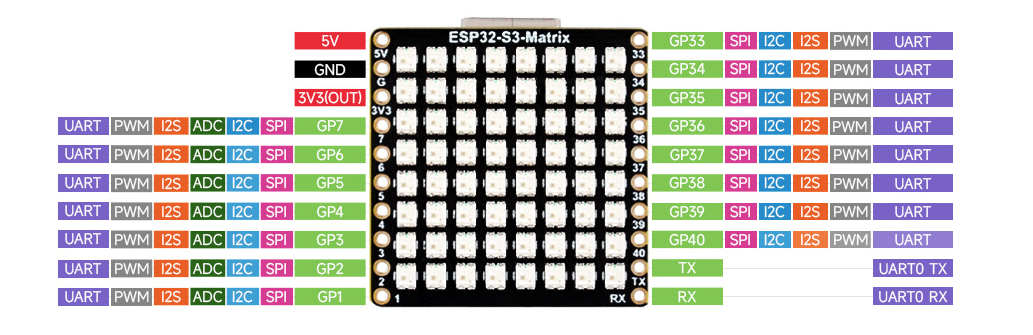
Pinout Definition
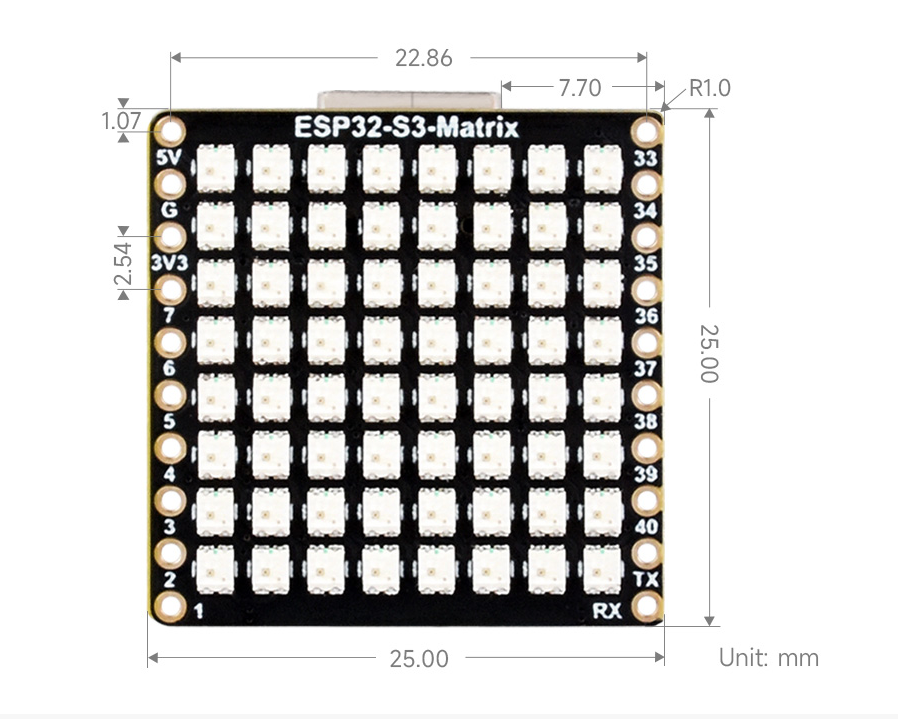
Dimensions
】Working with ESP-IDF
The following development system is Windows by default, and it is recommended to use the VSCode plug-in for development.
Develop with VSCode Plug-in
】Install VSCode
1. Open the download page of the official VSCode website, and select the corresponding system and system bit to download.

2. After running the installation package, the rest can be installed by default, but here for the subsequent experience, it is recommended to check boxes 1, 2, and 3.
After the first two items are enabled, you can open VSCode directly by right-clicking files or directories, which can improve the subsequent user experience.
After the third item is enabled, you can select VSCode directly when you choose how to open it.

Install Espressif IDF Plug-in
Note: Currently the latest version of the plugin is V1.6.4, users can choose the same version as us for a consistent experience!
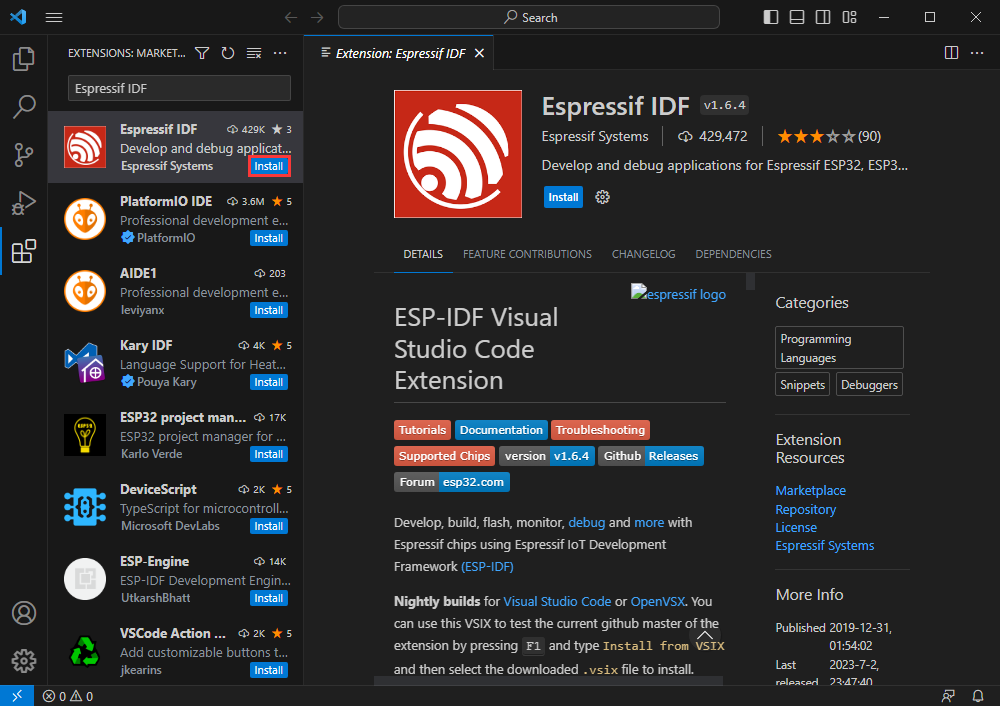
Open VSCode, use Shift+Ctrl+X to enter the plug-in manager.

In the search bar, enter Espressif IDF to select the corresponding plug-in and click "Install".
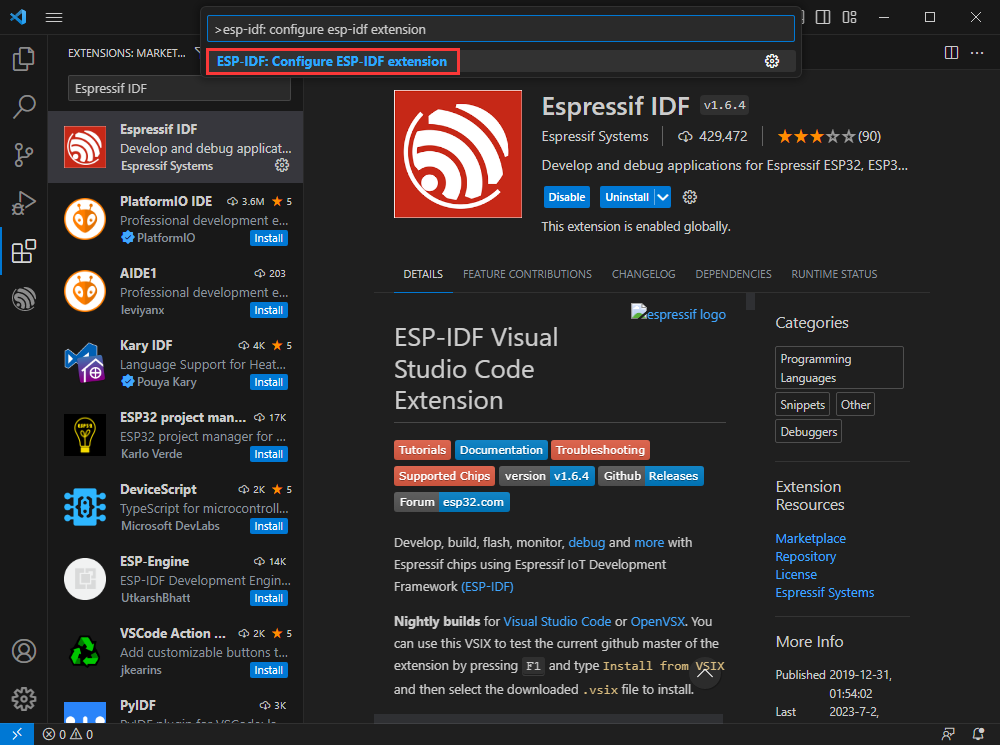
Press F1 to input:
esp-idf: configure esp-idf extension
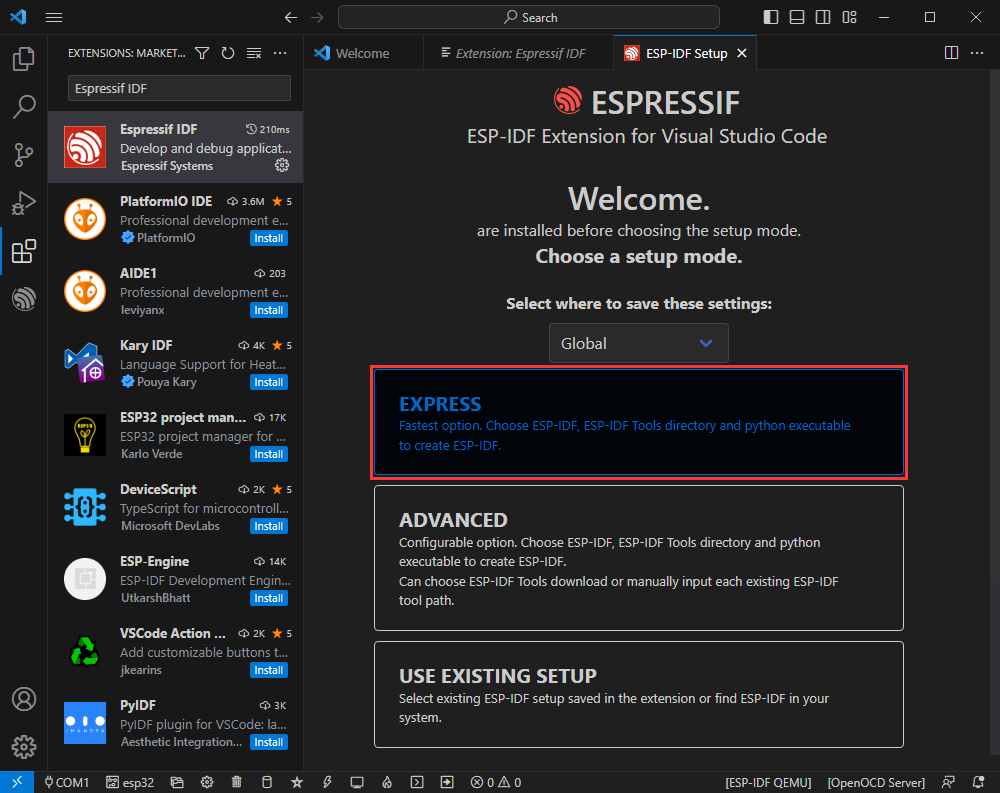
Select express (This tutorial is intended for first-time installation users, so only the first general installation tutorial is covered).
Select download sever, we recommend that domestic users use Espressif as your download server.
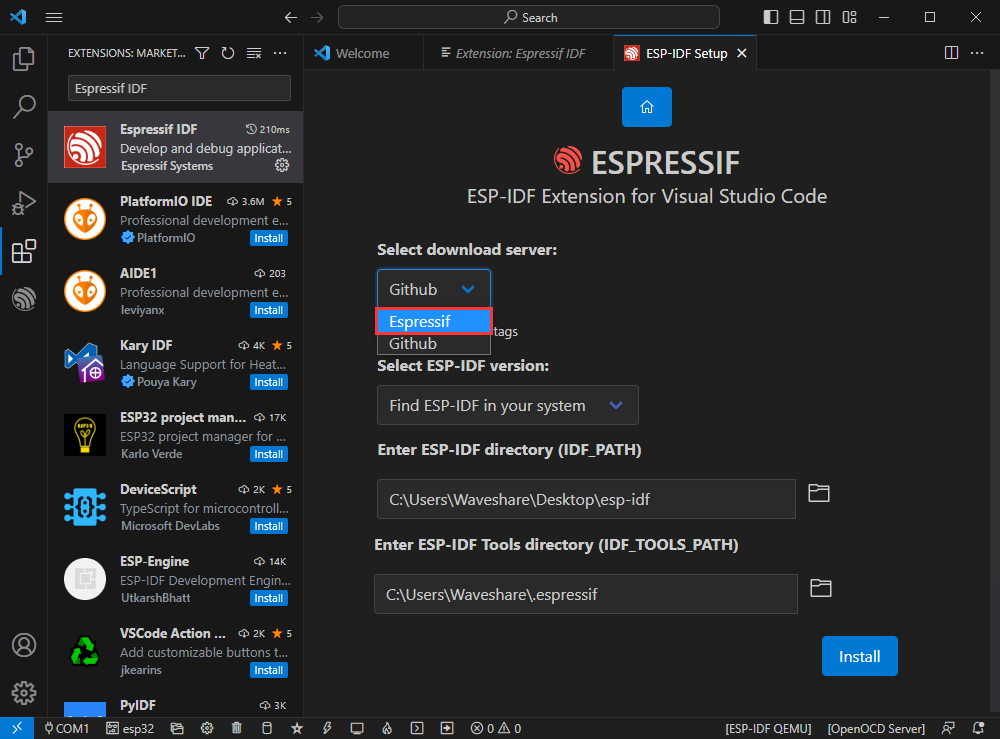
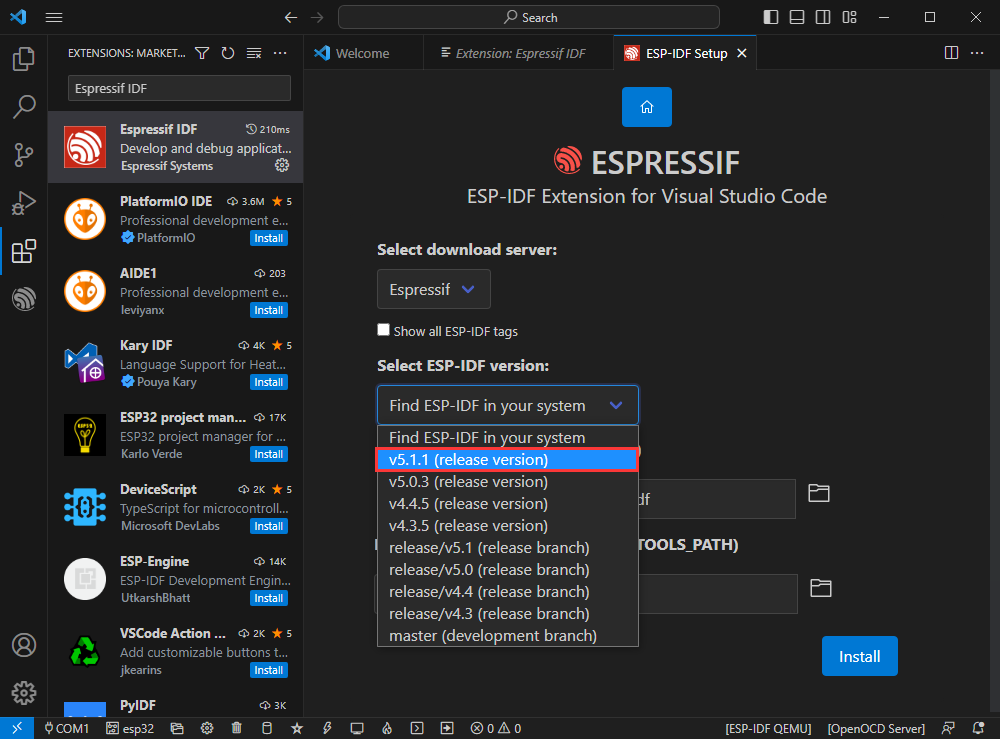
Select the version of ESP-IDF you want to use now, we choose the latest V5.1.1.
The following two are the installation paths respectively for the ESP-IDF container directory and the ESP-IDF Tools directory.
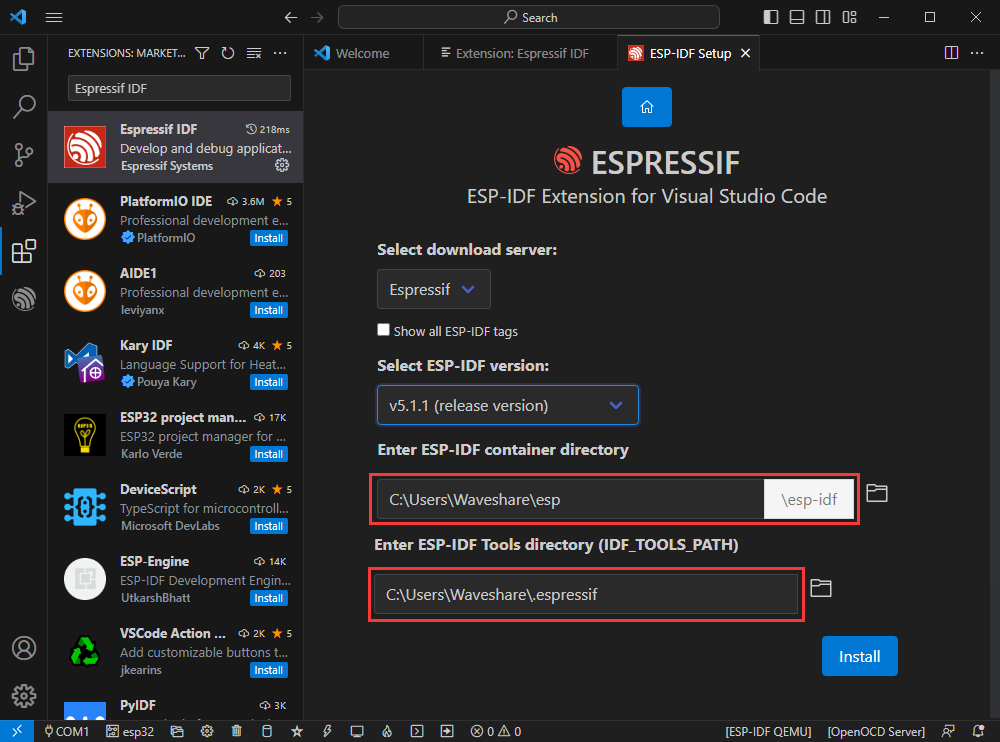
Note: If you have installed ESP-IDF before, or failed to do so, please be sure to delete the file completely or create a new path without Chinese.
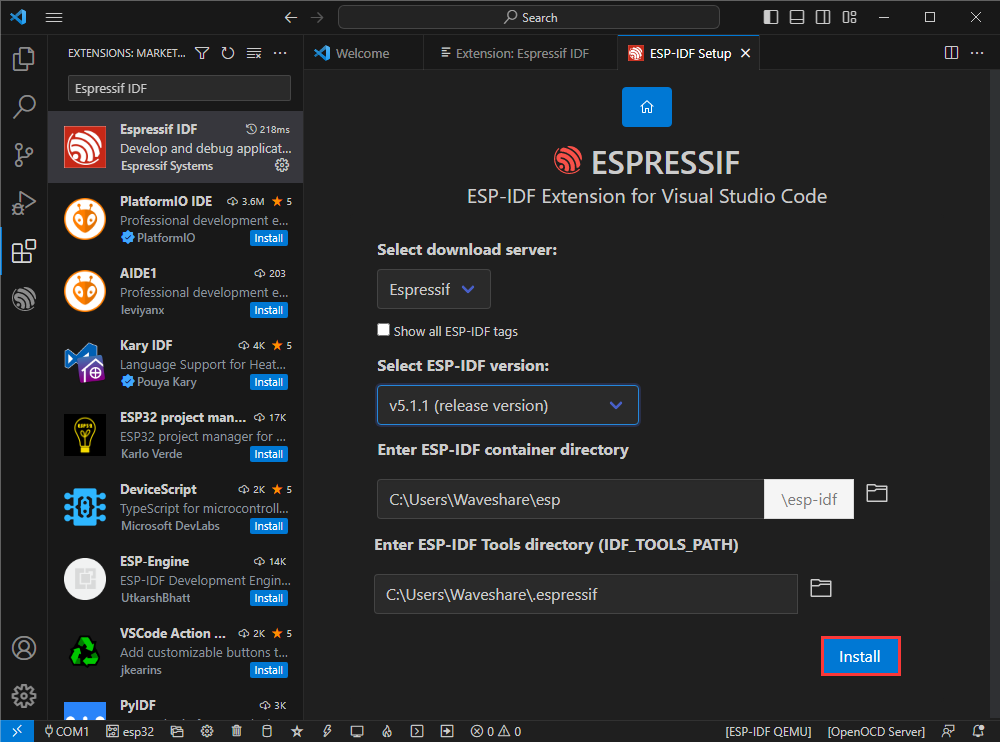
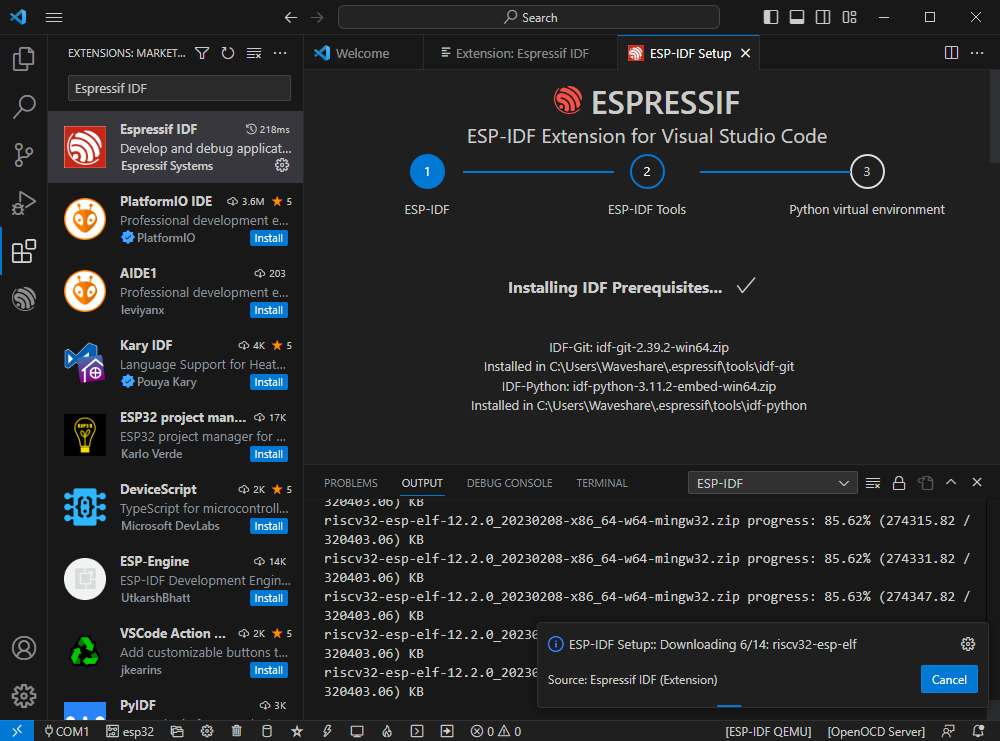
After configuring, click "Install" to download:
Enter the download interface, and then it will automatically install the corresponding tools and environment, just wait for a second.
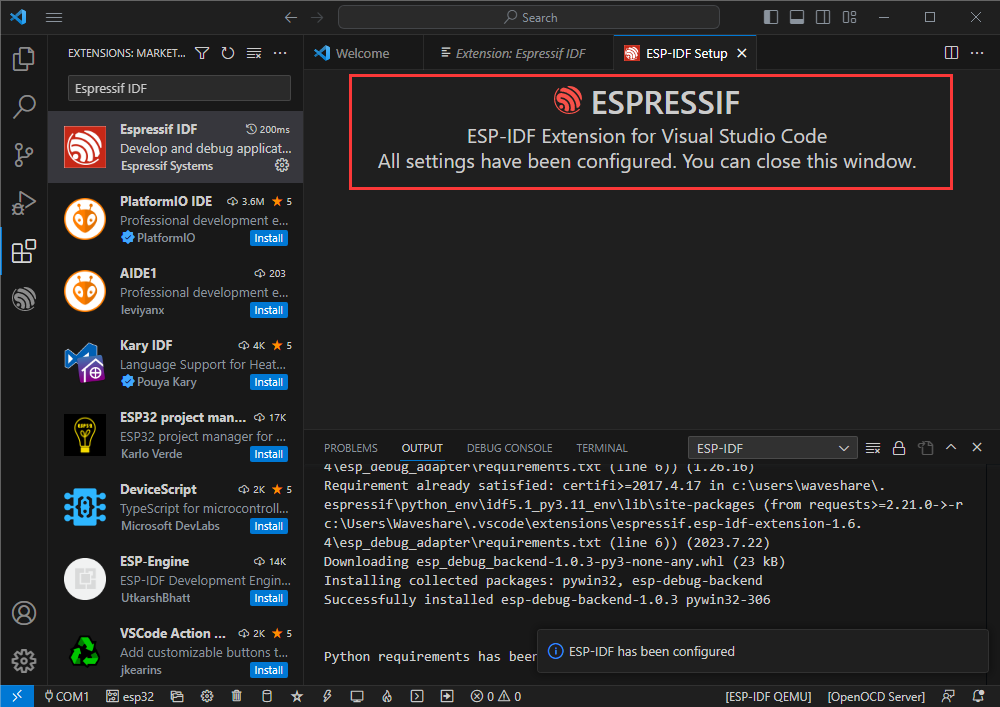
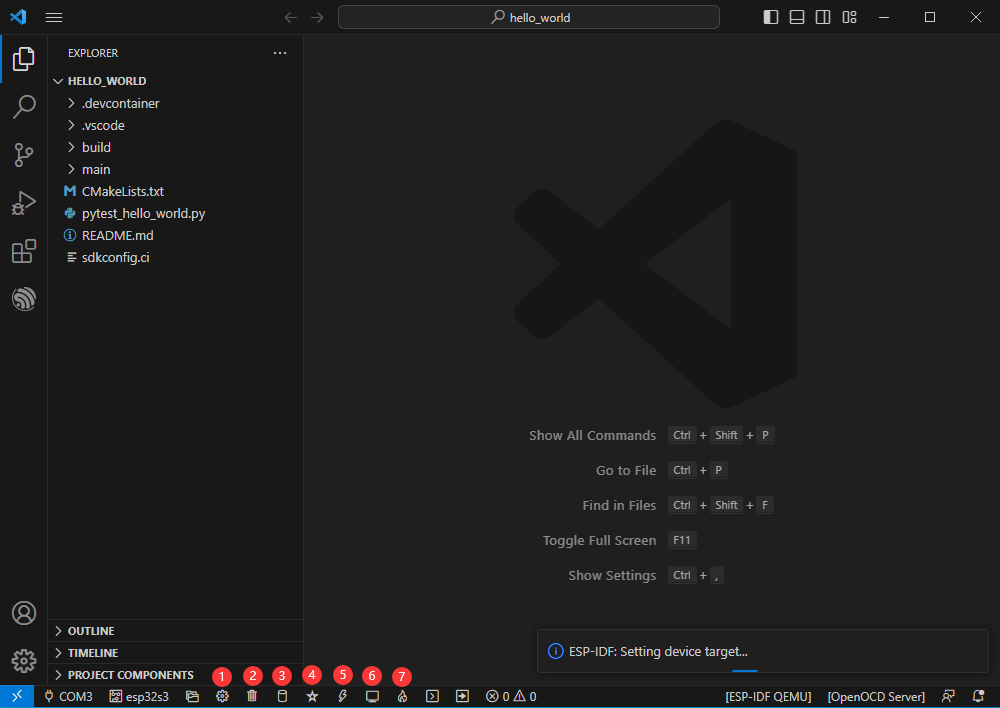
After the installation is complete, you will enter the following interface, indicating that the installation is finished.
Official Demo Usage GUIDE
Create Demo
Press F1 to enter:
esp-idf:show examples projects
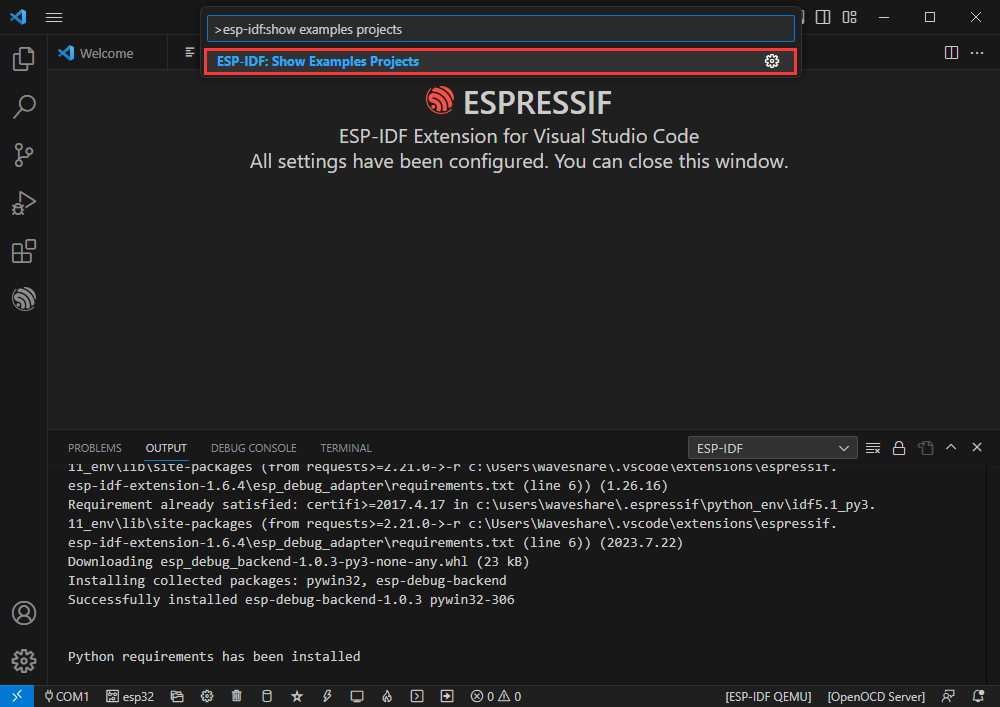
Select your current IDF version:
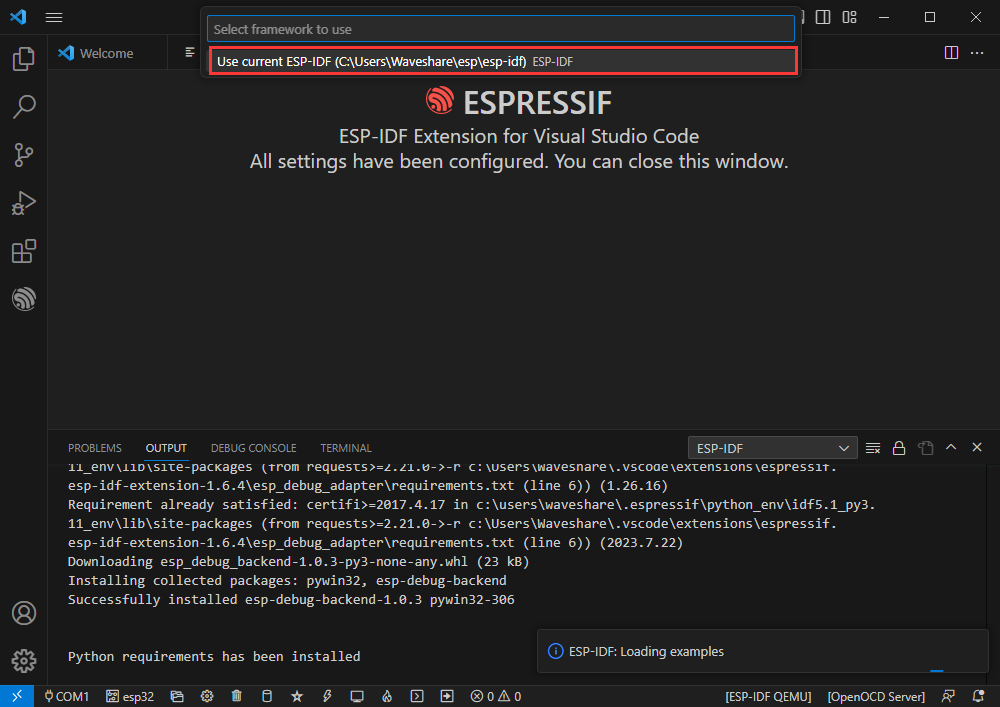
Take the Hello World demo as an example:
①Select the corresponding demo.
②Its readme will state what chip the demo applies to (how the demo is used and the file structure are described below, omitted here).
③Click to create the demo.
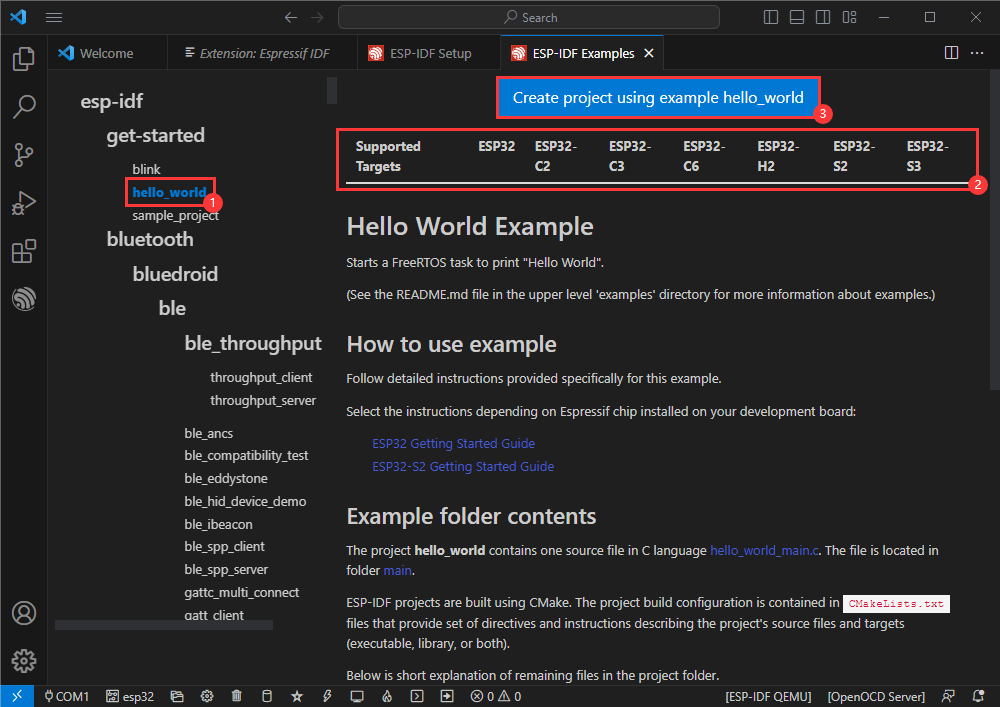
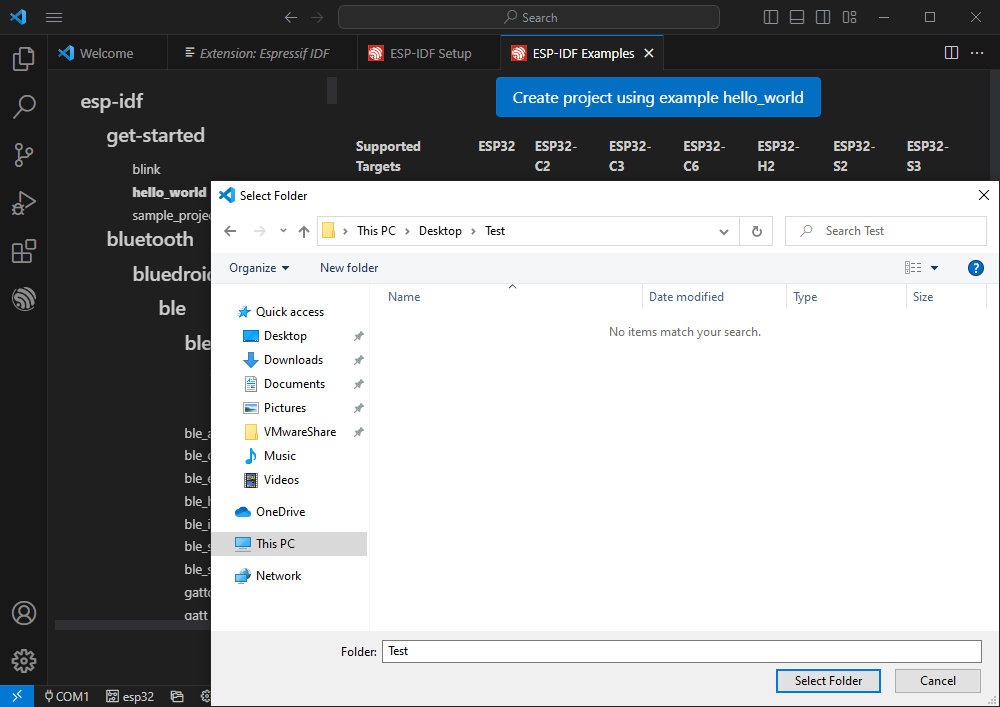
Select the path to place the demo, no folder with the same name as the demo is required
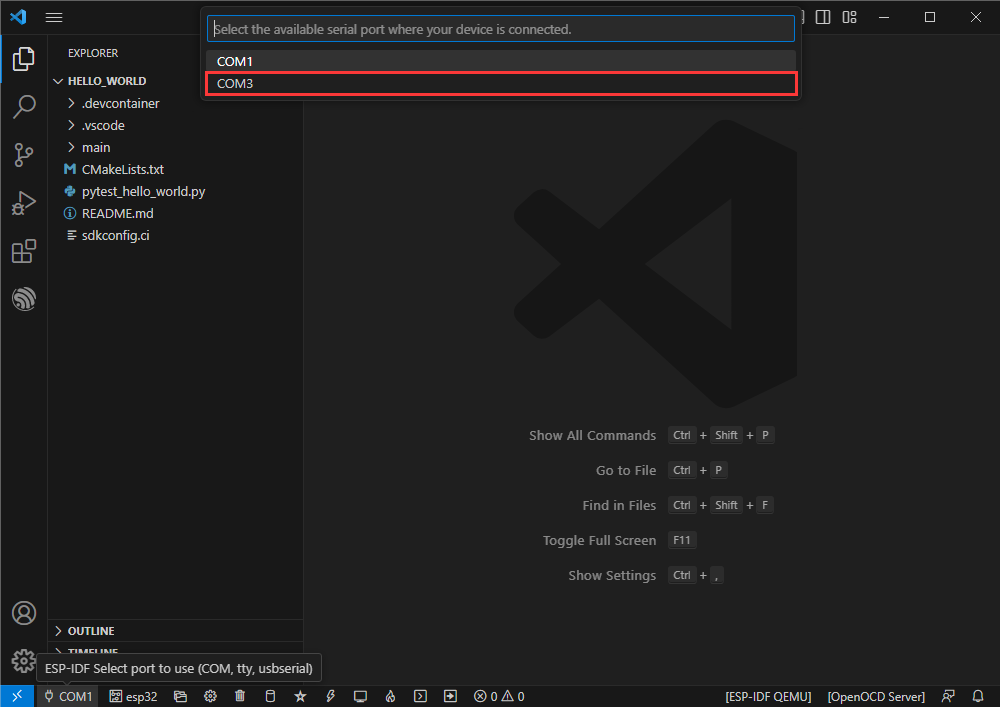
】Modify COM Port
The corresponding COM ports are shown here, click to modify them.
Please select the COM ports according to your device. (You can view it from the device manager.)
In case of a download failure, please press the reset button for more than 1 second or enter download mode, and wait for the PC to recognize the device again before downloading once more.
Select the project or demo to use:
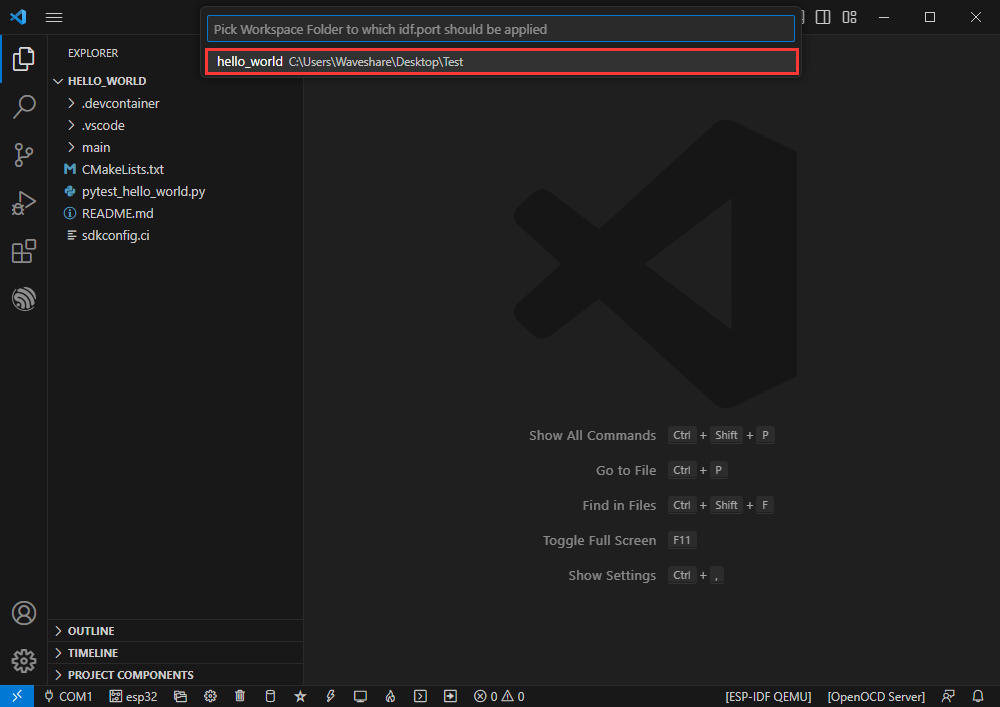
Then we finish the modification of the COM ports.
】Modify the Driver Object
The driver object is displayed here, and you can modify it by clicking on it.
Select the project or demo to use.
Wait for a minute after clicking.
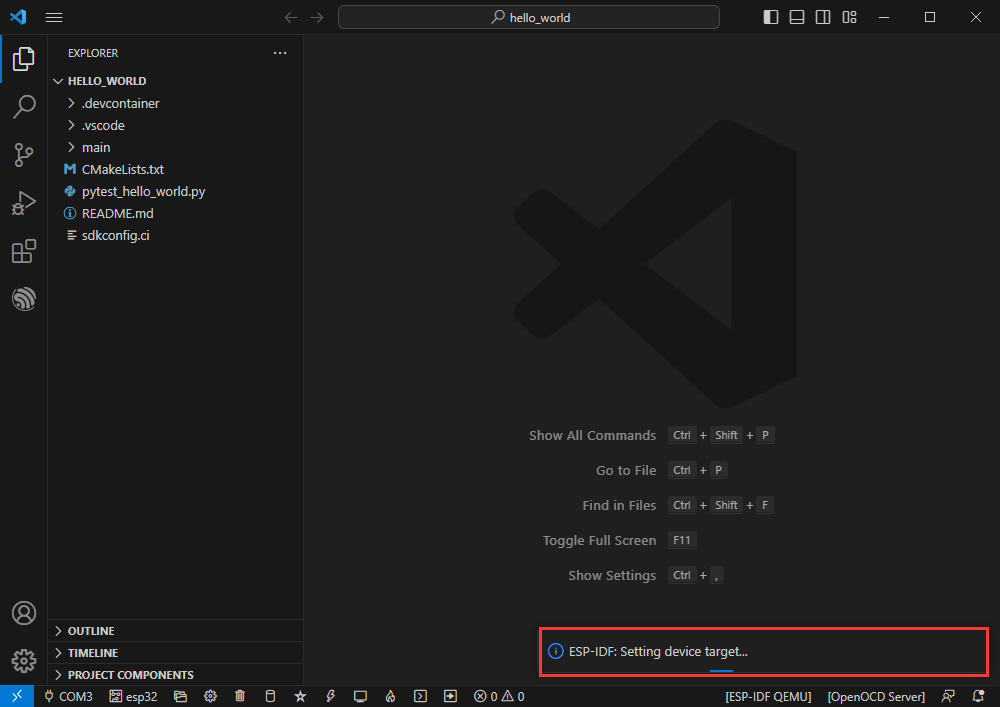
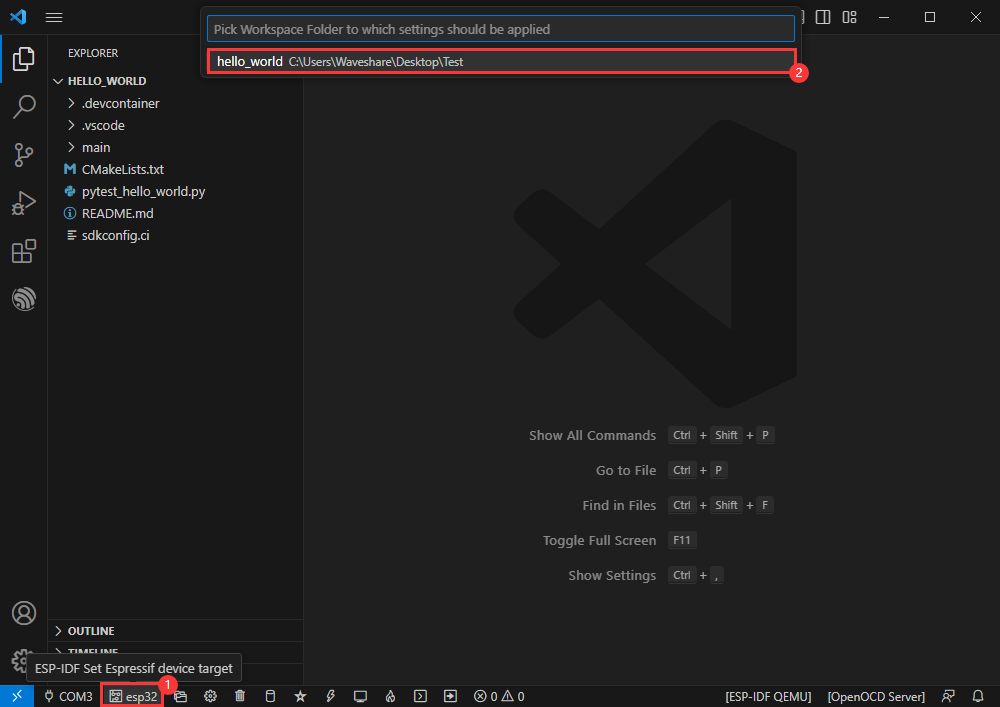
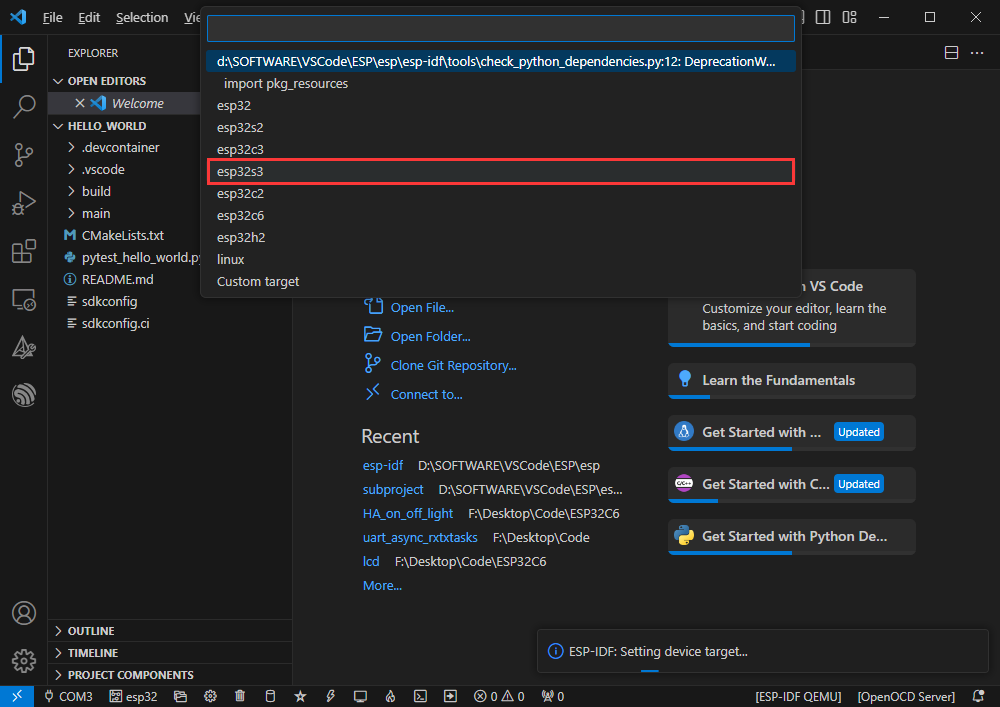
Select the object we need to drive, which is our main chip, ESP32S3.
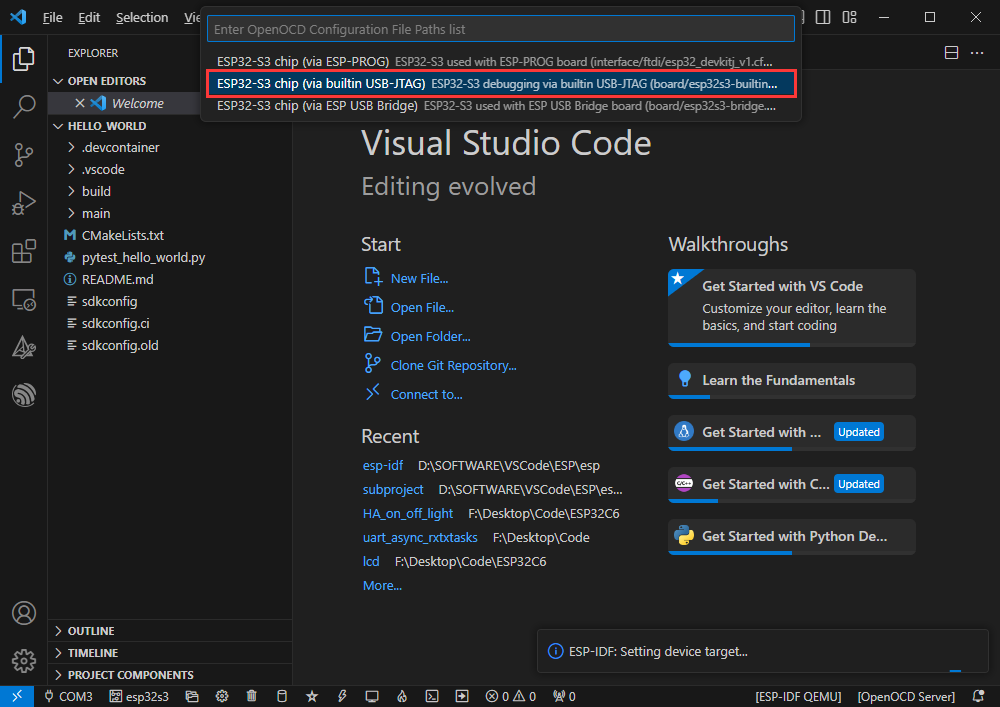
Choose the path to openocd, it doesn't affect us here, so let's just choose one at random.
】The Rest of the Status Bar
①SDK configuration editor, supports modifying many features and configurations of ESP-IDF.
②All cleanup, and clear all compiled files.
③Compile.
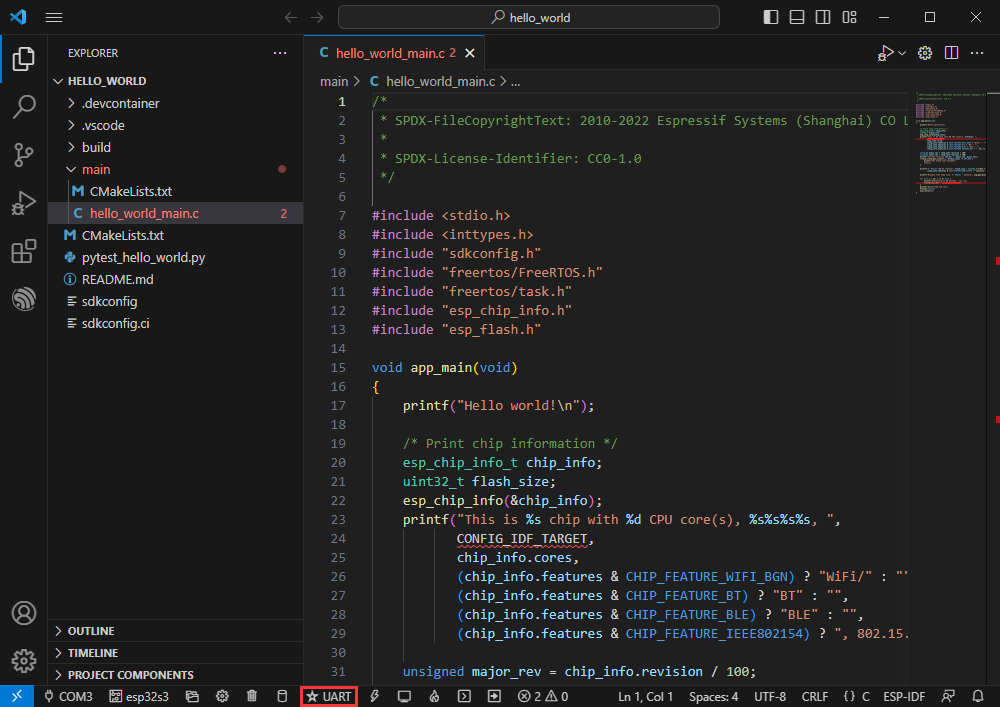
④Current download mode, default is UART.
⑤Burn the current firmware, please do it after compiling.
⑥Open the serial port monitor, used to view the serial port information.
⑦Compile, burn, open the serial monitor all-in-one button, (most commonly used for debugging).
Compile, Program, Serial Port Monitoring
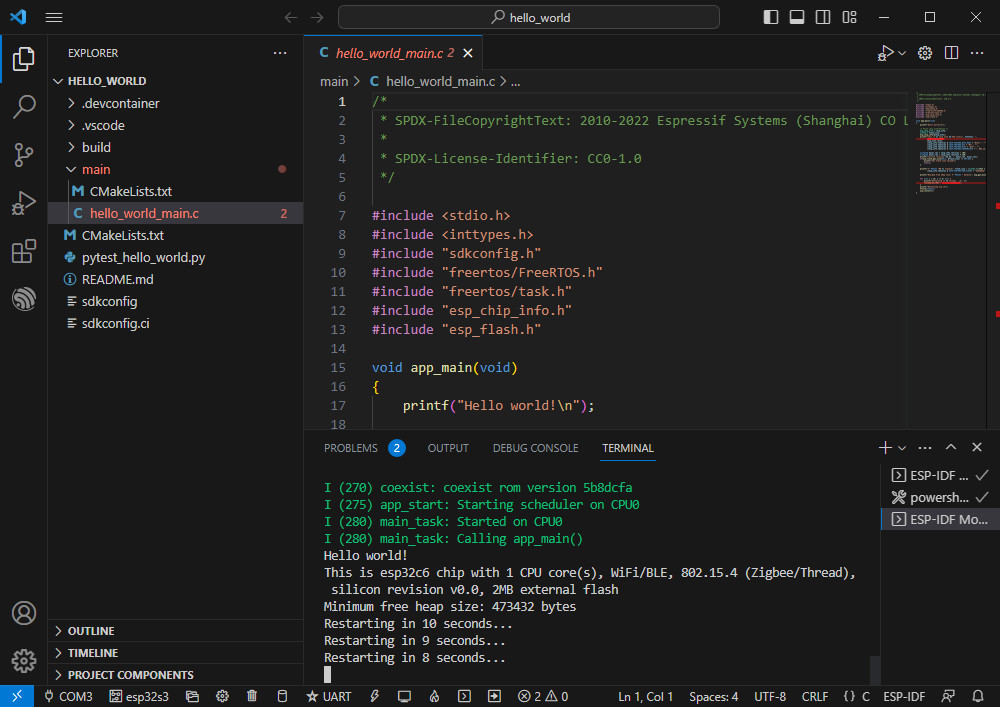
Click on the all-in-one button we described before to compile, burn, and open the serial port monitor.

It may take a long time to compile especially for the first time.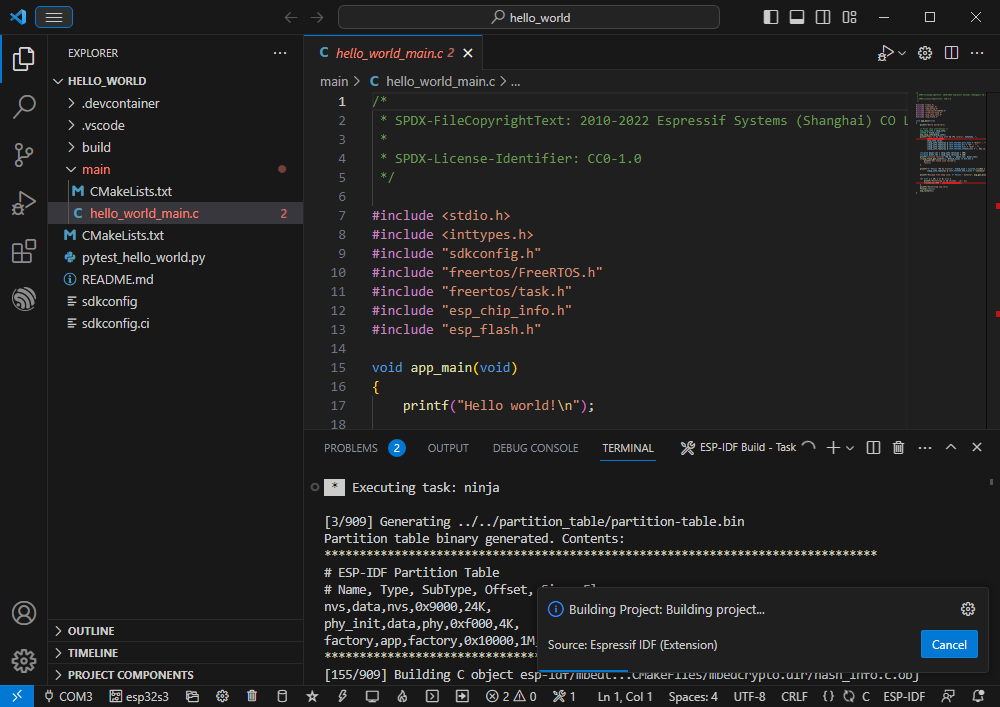
During this process, the ESP-IDF may take up a lot of CPU resources, so it may cause the system to lag.
If it is the first time to burn the program for a new project, you will need to select the download method, and select UART.
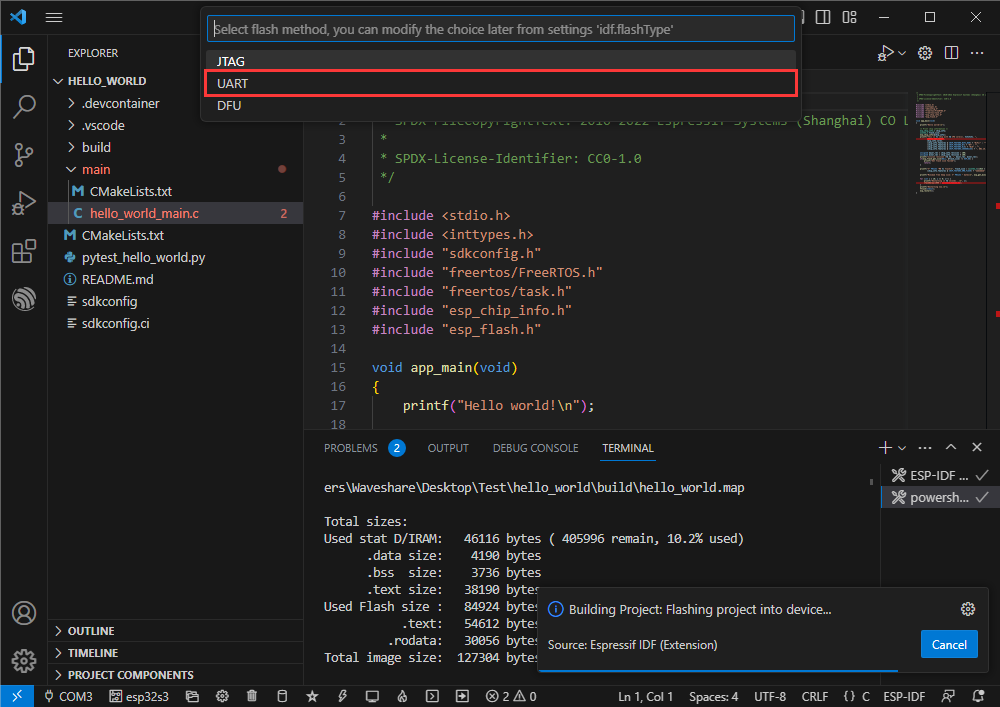
This can also be changed later in the Download Methods section (click on it to bring up the options).
As it comes with the onboard automatic download circuit, there is no need for manual operation to download automatically.
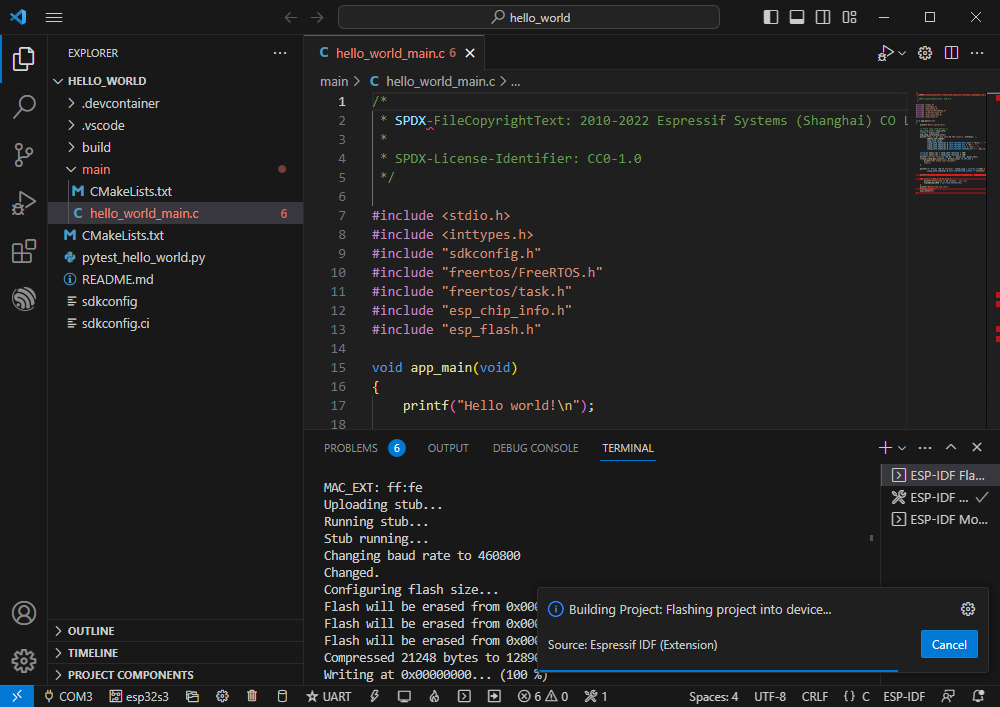
After successful download, automatically enter the serial monitor, you can see the chip output the corresponding information and be prompted to restart after 10S.
】 Erase Device Flash
Unpack the software resource package (Flash debugging software).
Open flash_download_tool_3.9.5.exe software, select ESP32-S3 and USB.
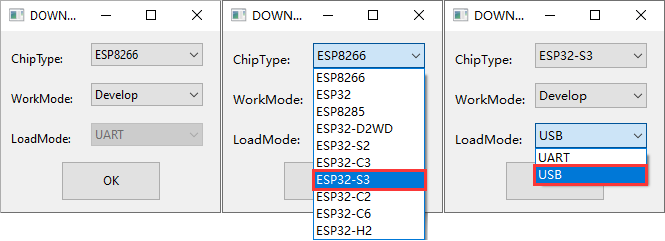
Select the UART port number, and click START (not select any bin file).
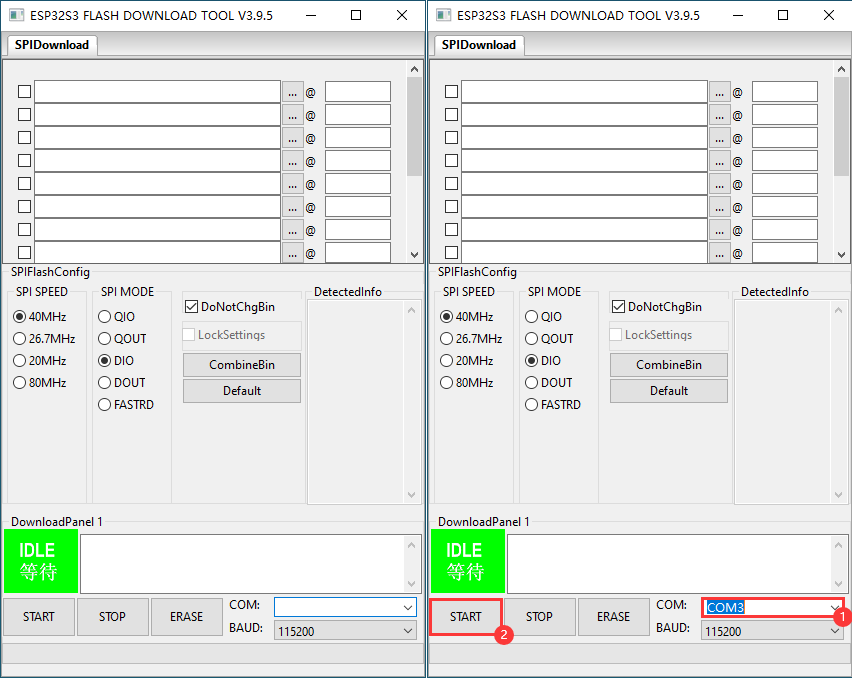
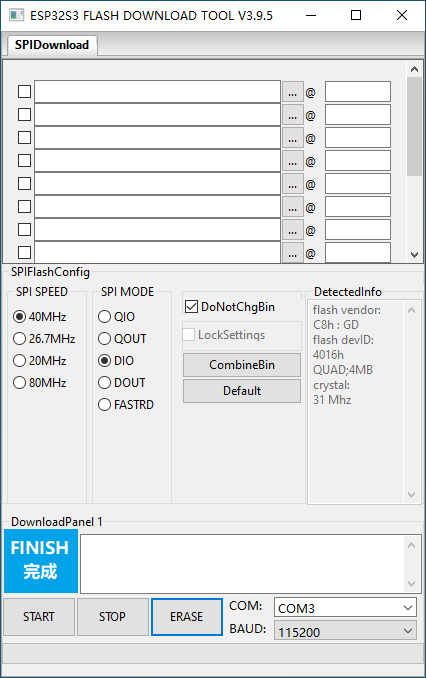
After programming, click on "ERASE".
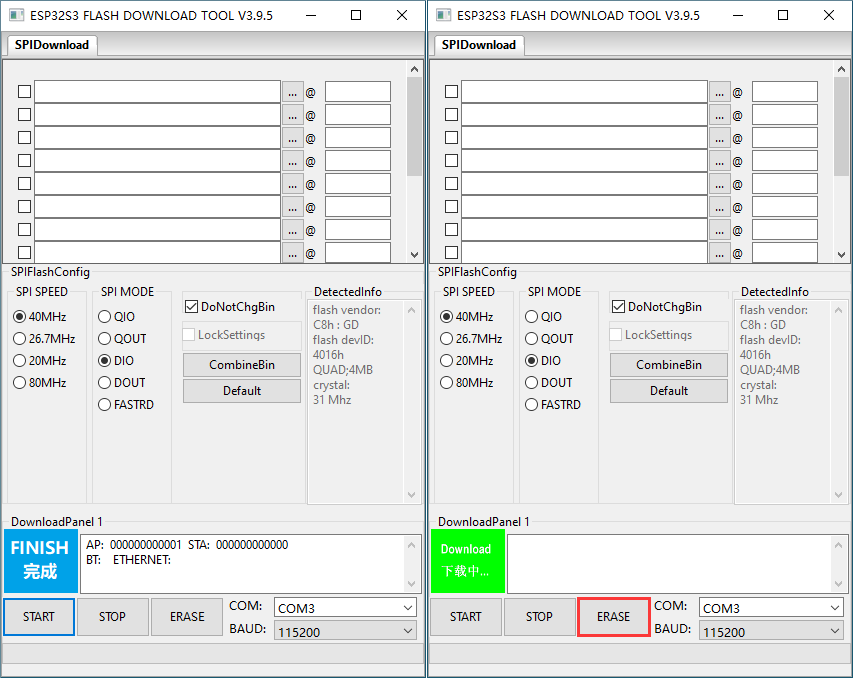
Waiting for Erase to Finish.
】Working with Arduino
Environment Set-up
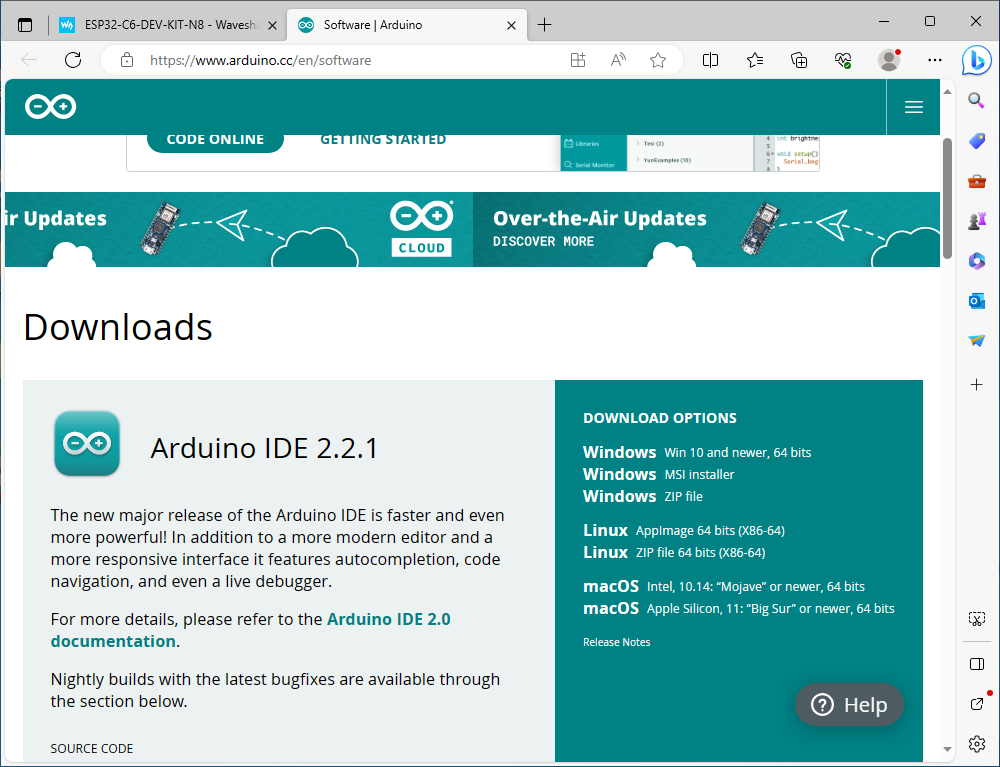
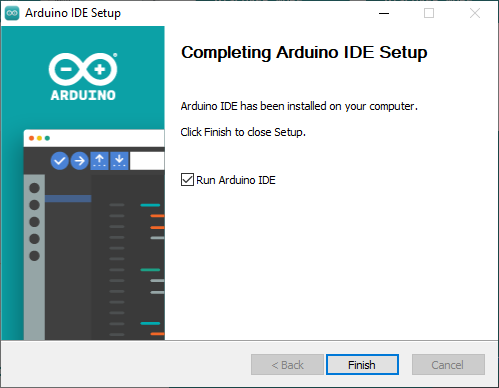
Install Arduino IDE.
Enter Arduino IDE after installation.
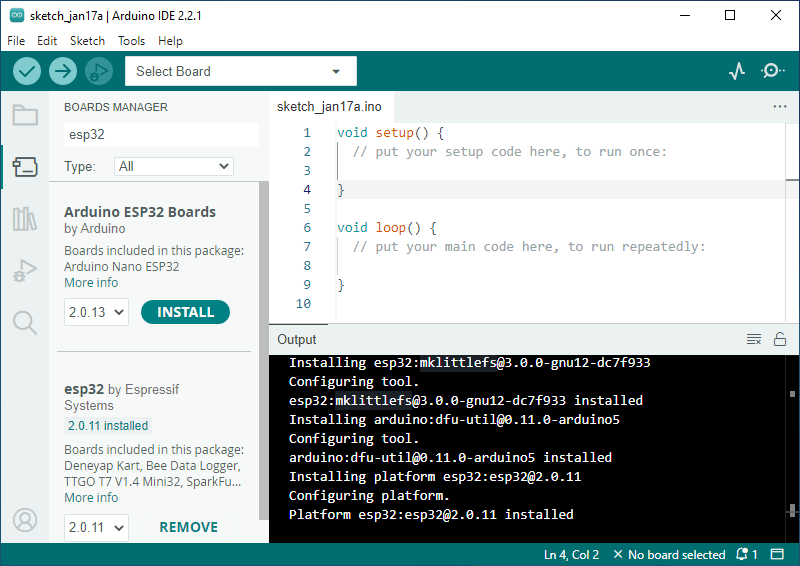
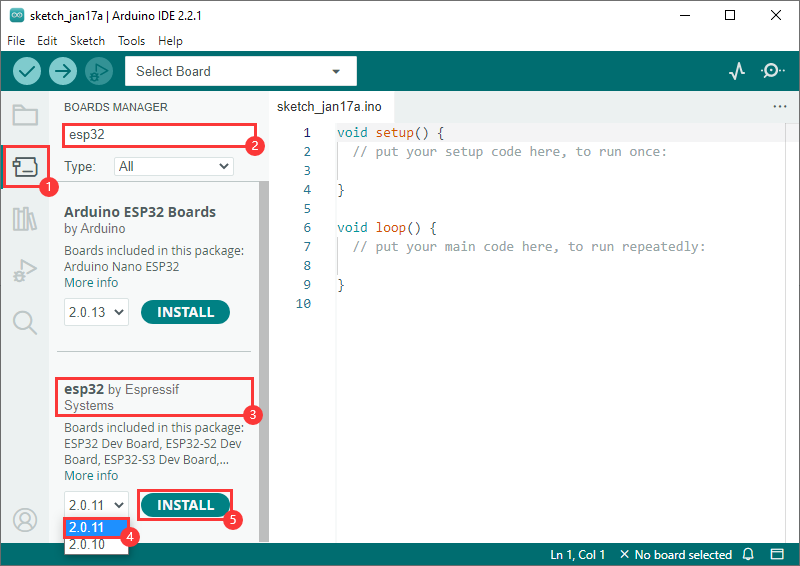
Go to the board manager, search for esp32, select the latest version of esp32 by Espressif Systems at the bottom, and click install (if it doesn't install correctly, you can try using a phone hotspot).
Restart the Arduino IDE after installation, and then you can use it.
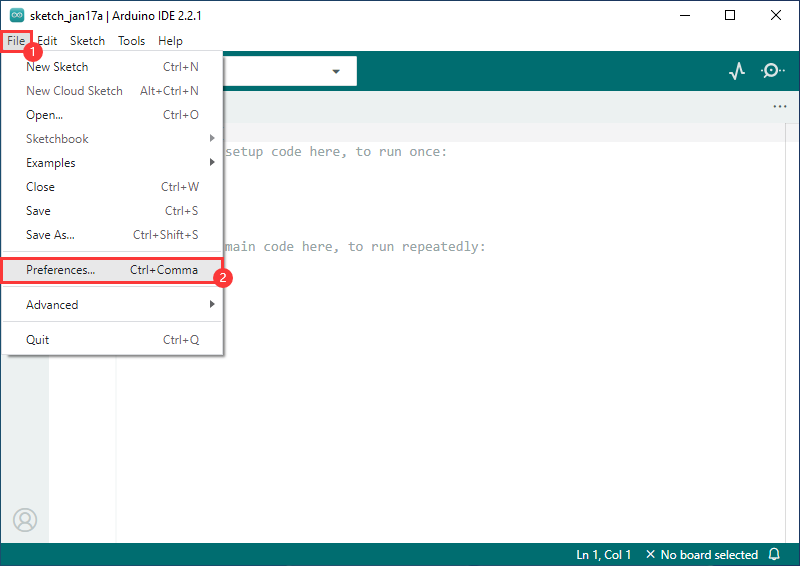
】If the installation fails
Failed to install 2.0.11 version:
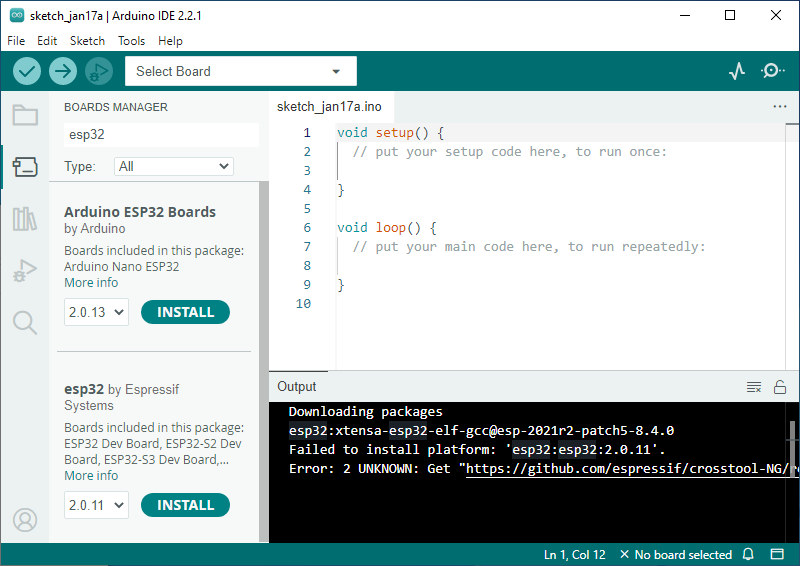
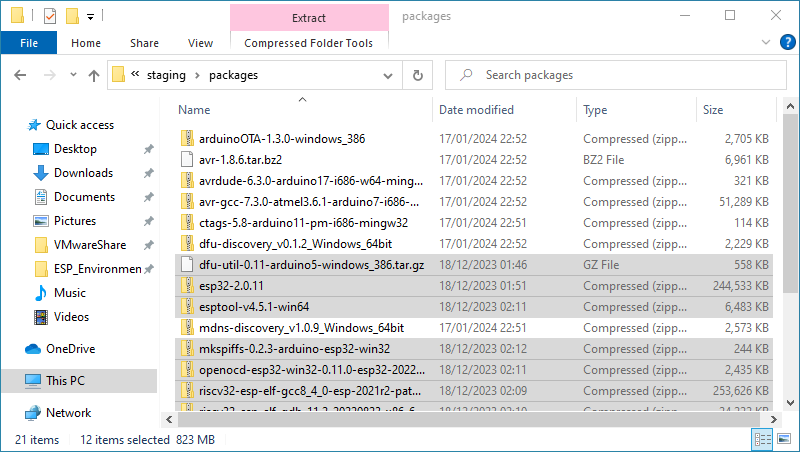
Download the resource file:
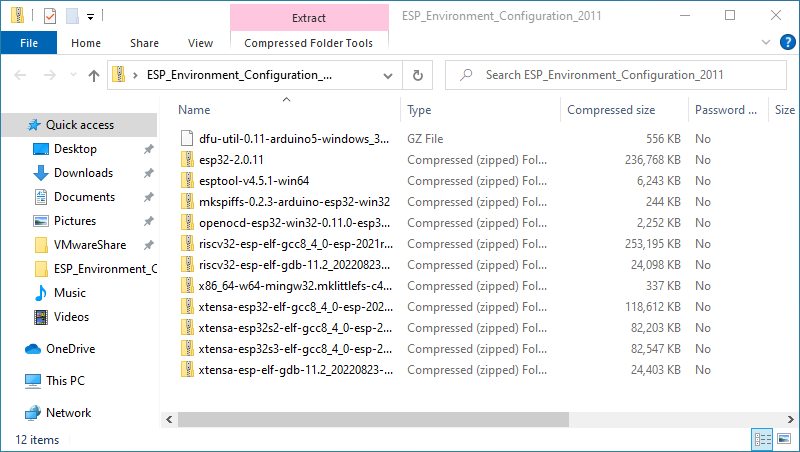
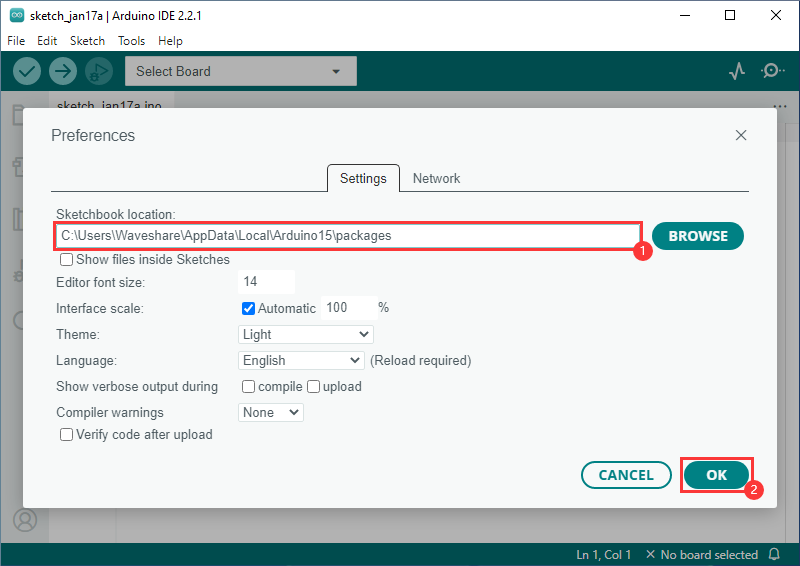
Click on the path from the resource manager "c:\Users\Waveshare\AppData\Local\Arduino15\packages" (Waveshare is the user name of the computer, and you need to turn on Show Hidden Files).
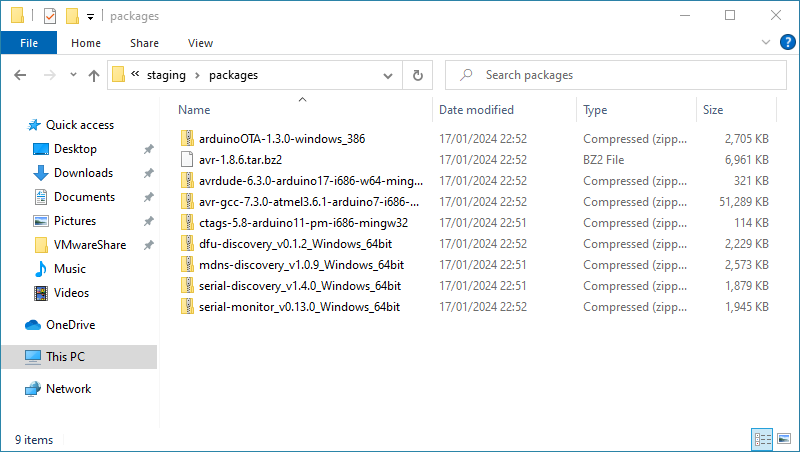
Unzip the downloaded files to the packages file folder:
Install it again:
Restart the Arduino IDE after installation and you're ready to go!

Run Example
】Create Example
Above, change the project folder to c:\Users\Waveshare\AppData\Local\Arduino15\packages (Waveshare is the computer username).
Open Arduino IDE again.
Demos can be created from the examples in the Project folder under File.
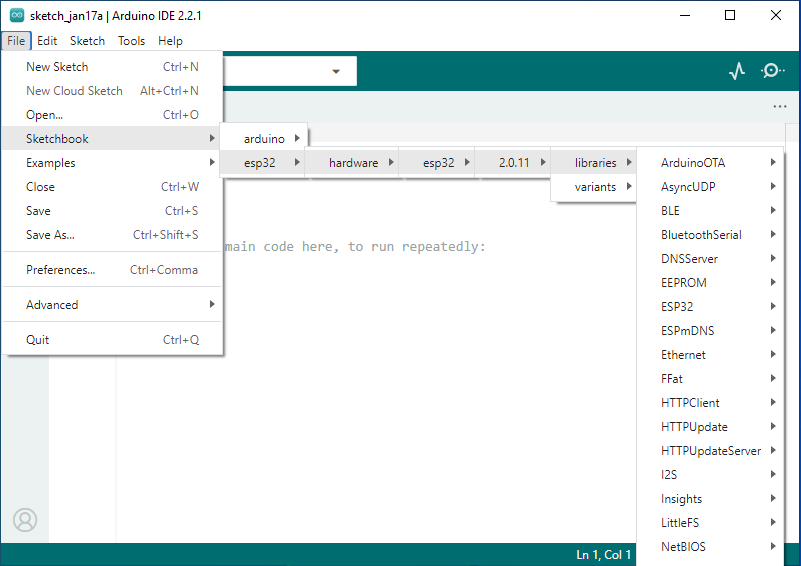
The following is the RGB flashing example (File -> Sketchbook -> esp32 -> hardware -> esp32 -> 2.0.11 -> libraries -> ESP32 -> examples -> BlinkRGB under GPIO).
】Upload Demo
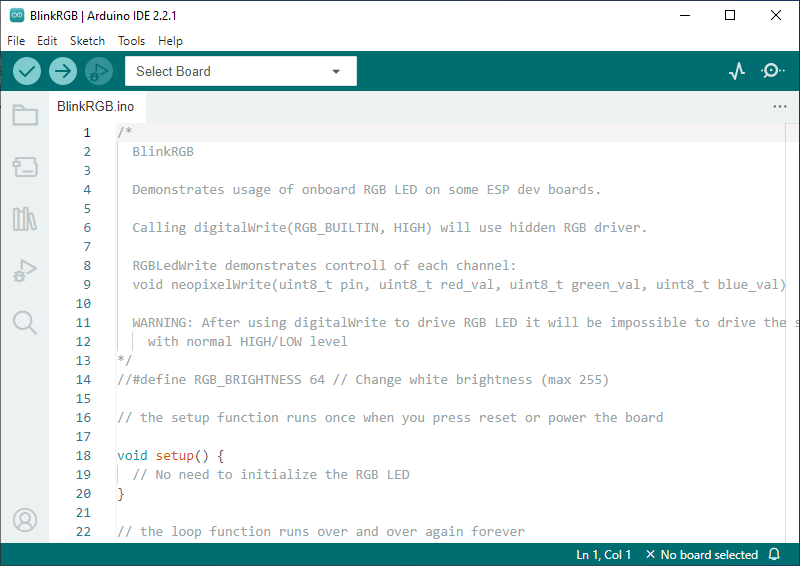
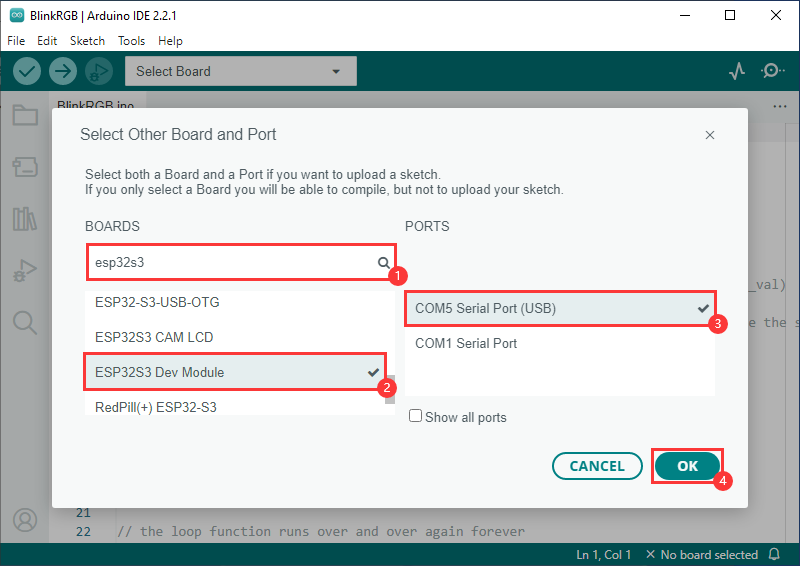
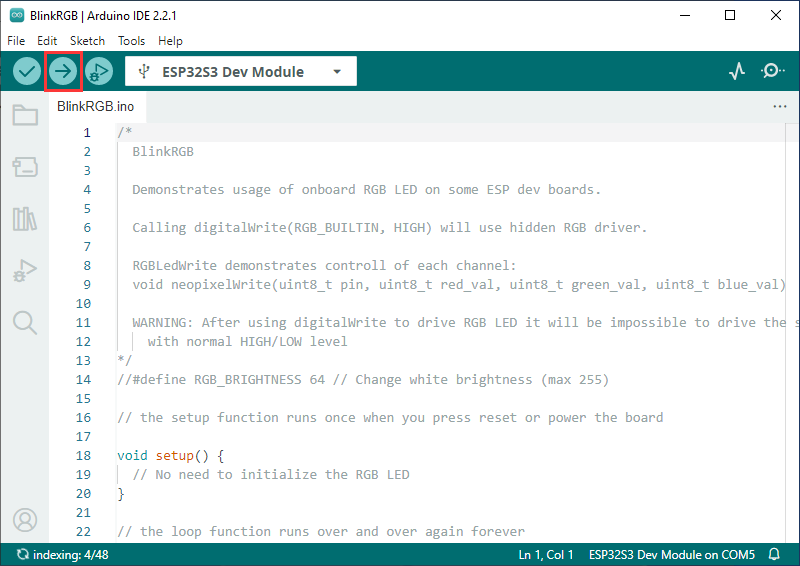
Select the development board and port.
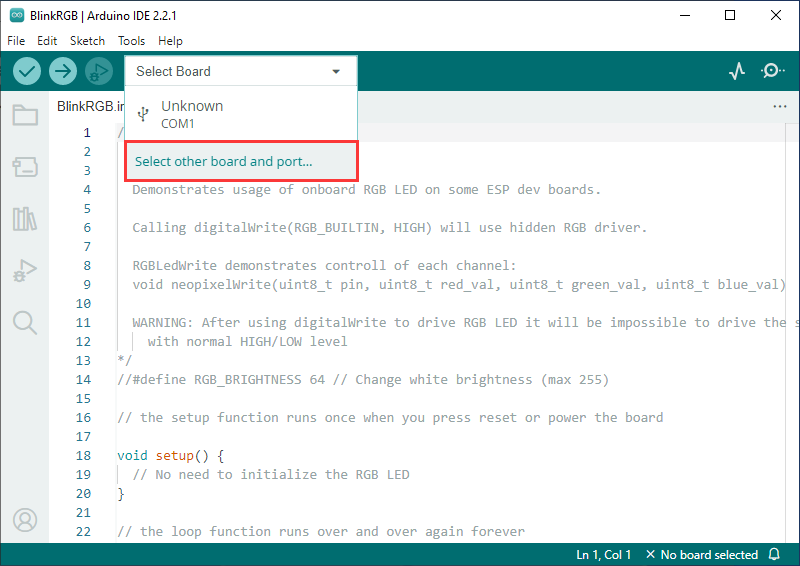
Search esp32s3, select ESP32S3 Dev Module, and the ports to download.
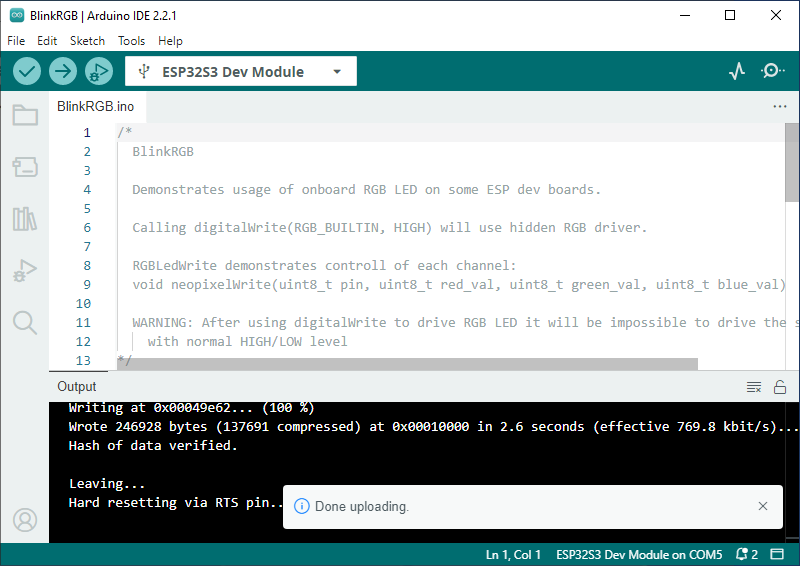
After selecting, click to upload and Arduino IDE will start to compile and program the demo.
After uploading, you can see the effect on the development board.
】Examples
The following demonstrates device control on the Arduino IDE.
Library Installation
Install Adafruit NeoPixel library:

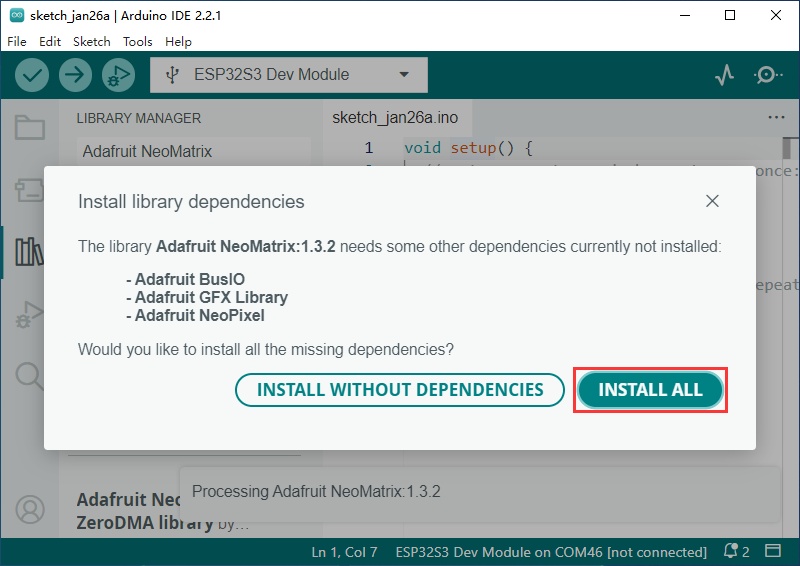
Install Adafruit NeoMatrix library:
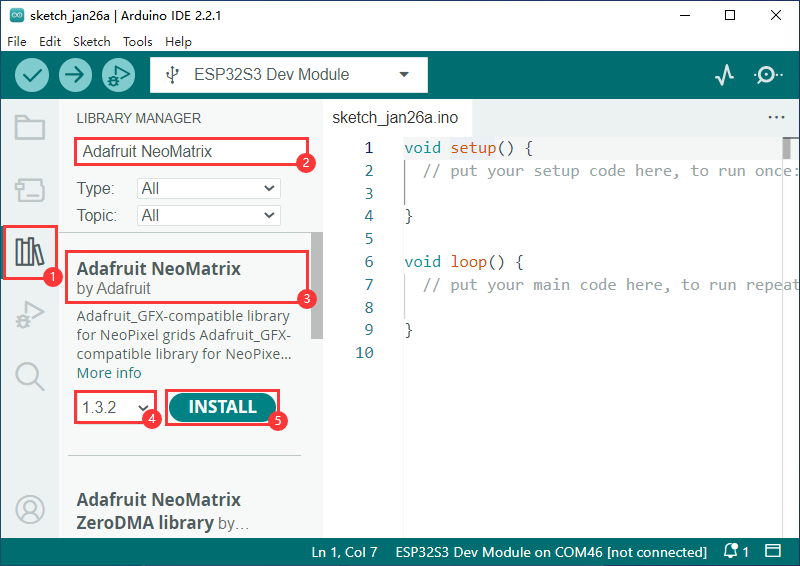
Install ALL:
Install Adafruit GFX Library:
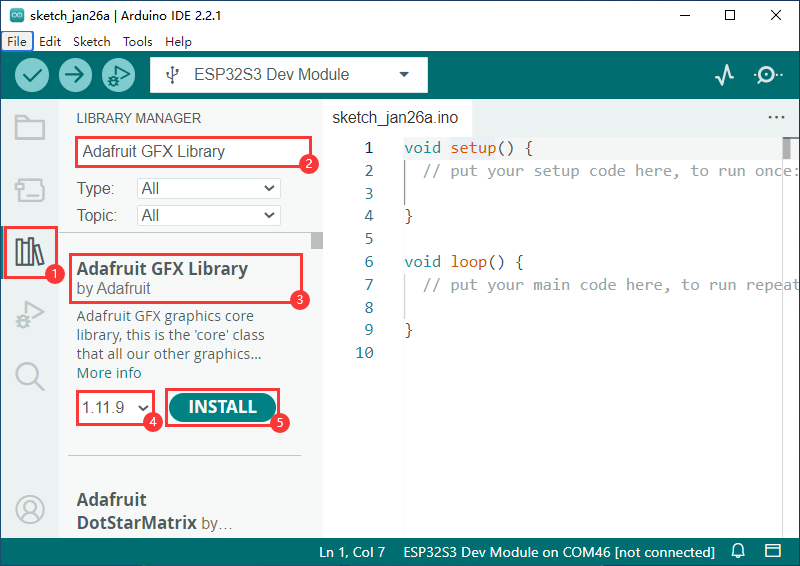
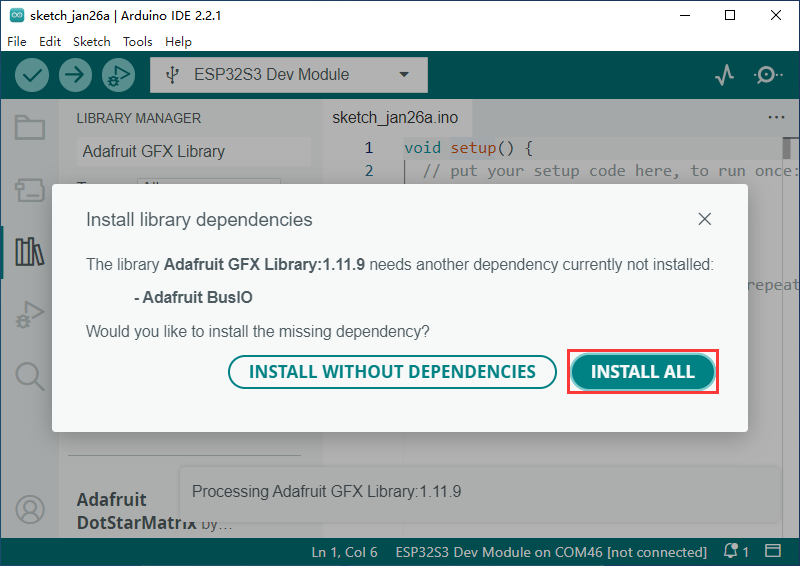
Install ALL:
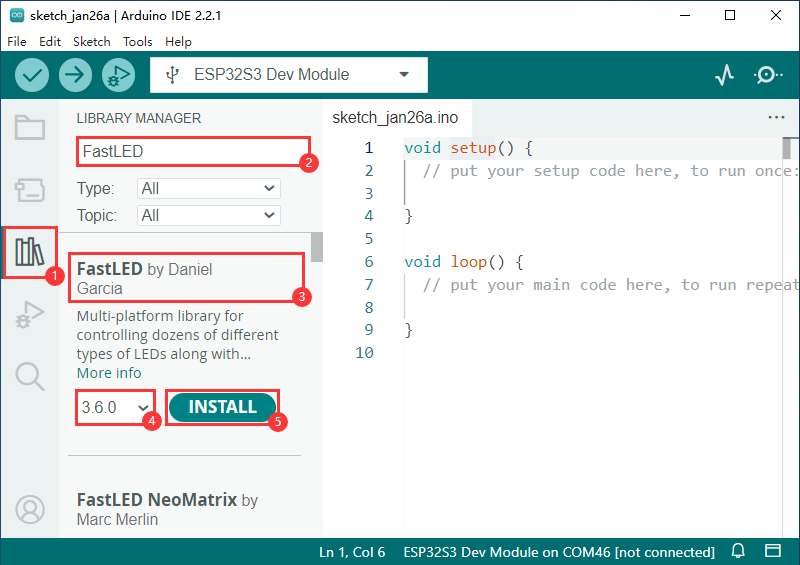
Install FastLED library:
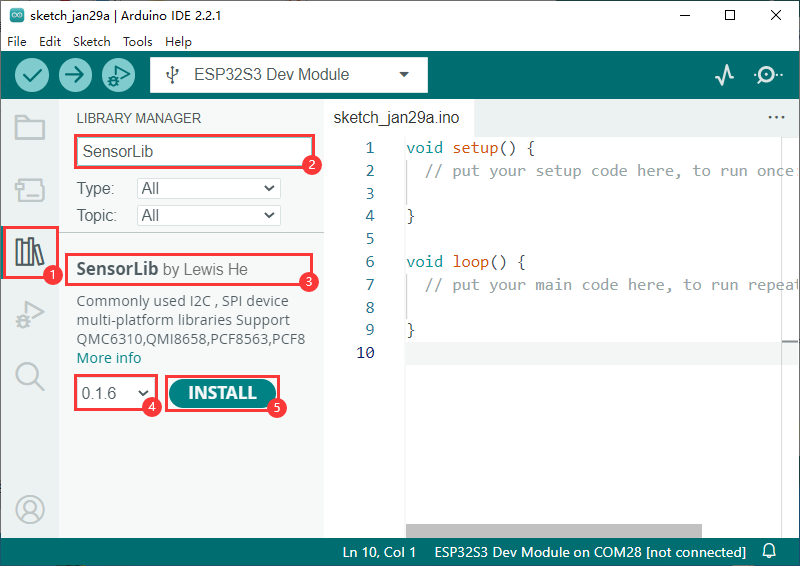
Install SensorLib library for QMI8658:
Display Characters
Install Corresponding Library Files.
Download Sample Demo, the examples in the Font folder in the example are for mobile display characters.
As shown below, 26 lowercase characters display as follows:
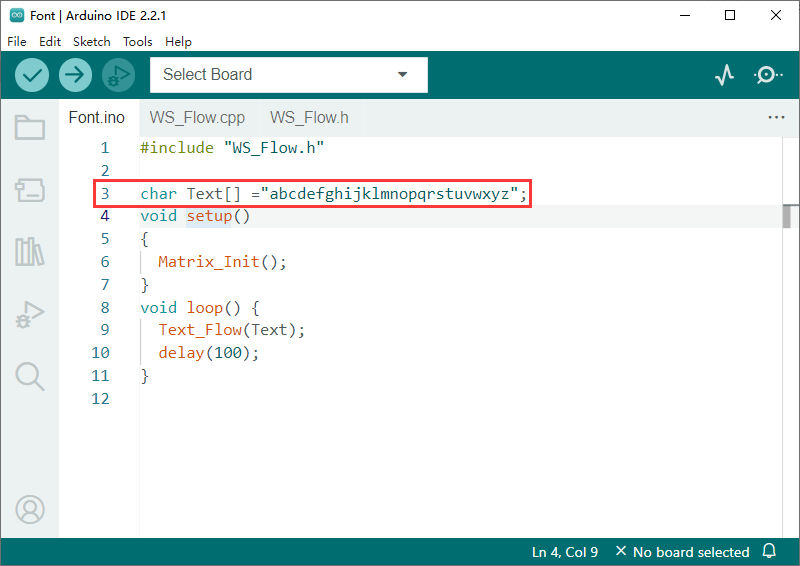
The characters inside the quotation marks can be modified to display the corresponding characters on the ESP32-S3-Matrix.
After modification, upload the demo and use.
Dynamic Game
Install the corresponding library files.
Download the sample demo, The example in the "Game" folder of the sample is a small game where a light bead moves aligning with the tilt of ESP32-S3-Matrix.
Uploading the demo and use it.
After successfully uploading the demo, a bead will be on near the center position.
The lit bead will move according to the current tilt angle of the device.
The demo can be modified according to the requirement to achieve more complex operations.
RGB Color
Install the corresponding library files.
Download the sample demo. The example in the "Color" folder of the sample is a rather cool color flow.
Upload the demo and use it.
After successfully uploading the demo, the board will display colors in a flowing state.
The demo can be modified according to requirements to achieve more complex operations.
Web Page Control
Install the corresponding library files.
Download the sample demo. The example in the "HTTP" folder of the sample allows controlling ESP32-S3-Matrix display via a web page.
Uploading the demo to use it. Once the demo is successfully uploaded, follow the instructions below
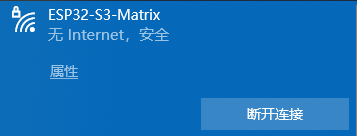
Control the device (phone, computer, etc.) to connect to the WIFI named ESP32-S3-Matrix.
Once successfully connected to the WIFI, you can enter the ESP32-S3-Matrix control page by typing "10.10.10.1" into your browser's address bar and pressing Enter.
10.10.10.1
The web page contains two global refresh buttons for controlling ESP32-S3-Matrix, as well as a text box and a submit button.
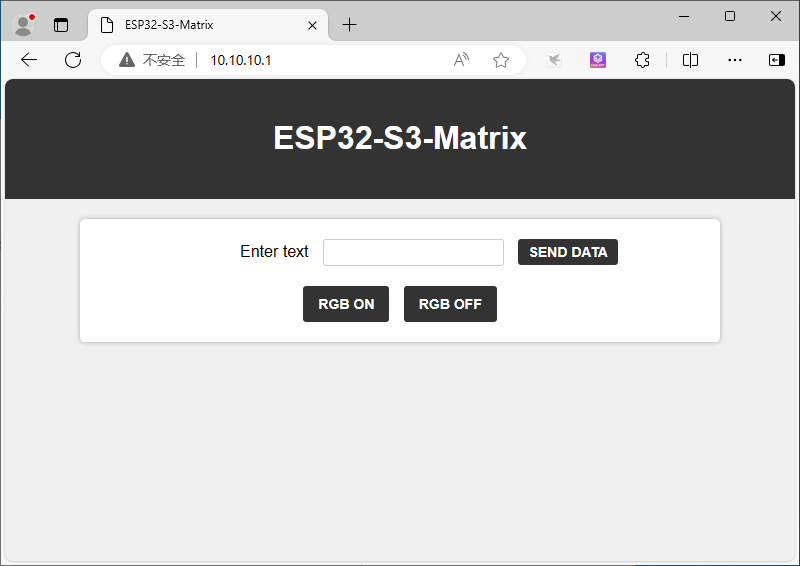
After entering characters into the text box, clicking the Submit button will cause the characters in the text box to flow and display on the ESP32-S3-Matrix.