


- sales/support
Google Chat: zj734465502@gmail.com
- sales
+86-0755-88291180
- sales01
sales01@spotpear.com
- sales02
dragon_manager@163.com
- support
services01@spotpear.com
- CEO-Complaints
manager01@spotpear.com
- sales/support
WhatsApp:13246739196
- HOME
- >
- ARTICLES
- >
- Common Moudle
- >
- ESP
ESP32-S3-Tiny Tutorial
】material
】software
Programming software
serial port
Flash burning
Bluetooth debugging
】Schematic diagram
】Data sheet
ESP32-S3
】Official document
ESP32 official documentation
】illustrate
】Product introduction
ESP32-S3-Tiny is a small microcontroller development board equipped with a variety of digital interfaces. The product adopts a split design, which can separate the USB and button circuits, reduce the overall thickness and volume of the PCB board, and introduce 34 GPIOs in a very small form factor, making it easier for users to integrate into projects. Split design, compact size and very thin thickness, making this board ideal for projects requiring small size
In terms of hardware, the ESP32-S3 chip is used, which integrates a high-performance Xtensa® 32-bit LX7 dual-core processor, ultra-low-power co-processor, Wi-Fi baseband, Bluetooth baseband, RF module and peripherals. It can be compatible and expanded with a variety of peripheral devices, making it more convenient to use.
In terms of software, you can choose the ESP-IDF development environment or develop on the Arduino IDE, so you can get started easily and quickly and apply it to products.
】Product Features
[] Using ESP32-S3 chip, the chip integrates a high-performance Xtensa® 32-bit LX7 dual-core processor with a main frequency of up to 240 MHz
[] Integrated 512 KB SRAM, 384 KB ROM, 16 KB RTC SRAM, 2MB PSRAM and 4MB Flash memory
[] Integrated Bluetooth LE wireless communication and 2.4 GHz Wi-Fi, with superior radio frequency performance
[] Using USB Type-C interface, no need to worry about plugging forward and reverse
[] Introduce rich peripheral interfaces, which can realize various functions more flexibly
[] Supports multiple low-power working states, can adjust the balance between communication rate and power consumption, and meet the power consumption requirements of various application scenarios.
】Resource interface
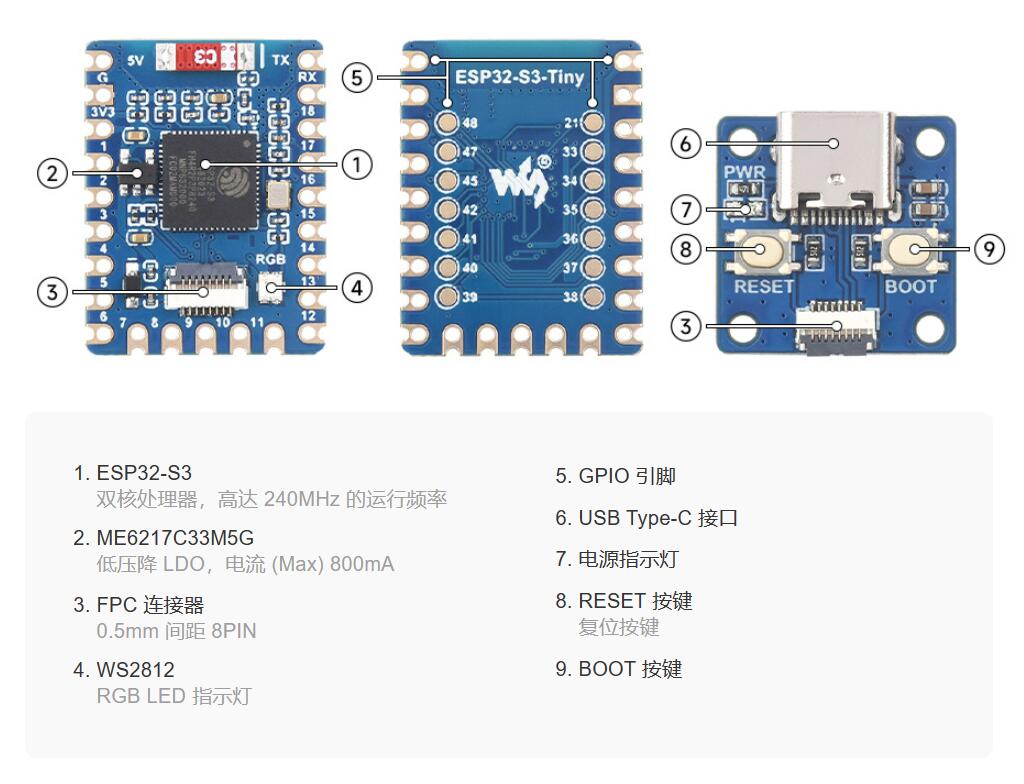
】Pin distribution

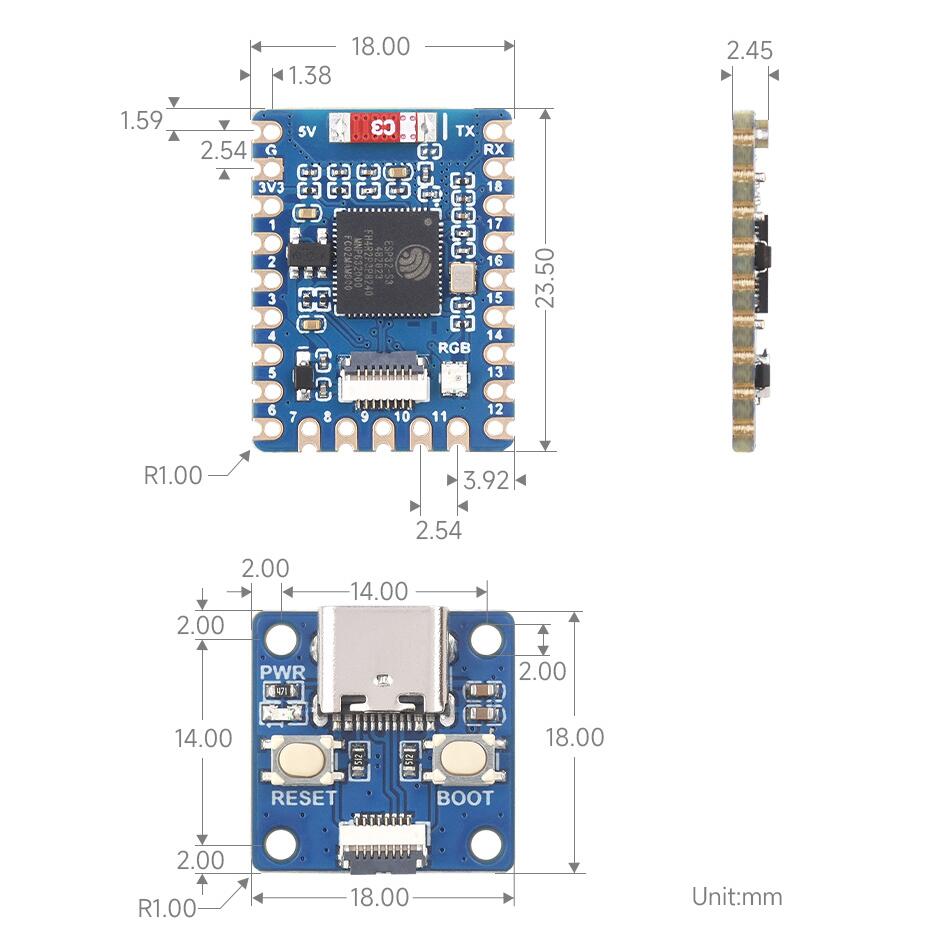
】Product Size
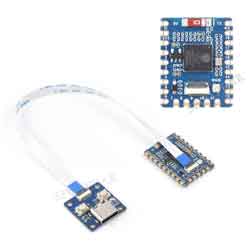
】Cable installation
Please read this chapter and precautions completely before installing the cable, otherwise the device may be damaged or short-circuited!
[] Open the cable connector flip cover

When installing the cable, be sure to install it in the middle
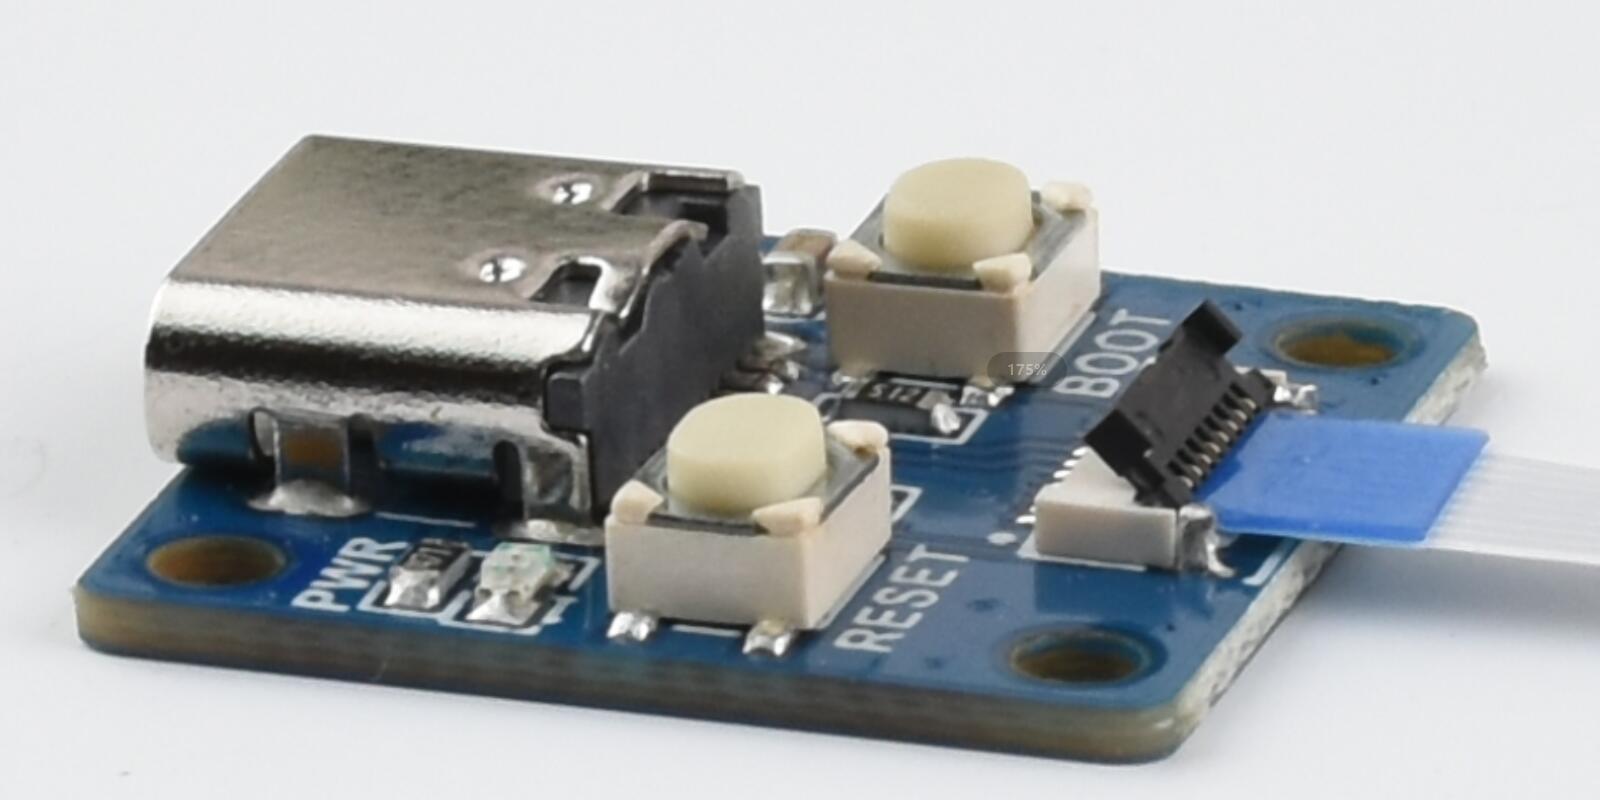
Close the flip cover. Normally the flip cover can be fully closed.
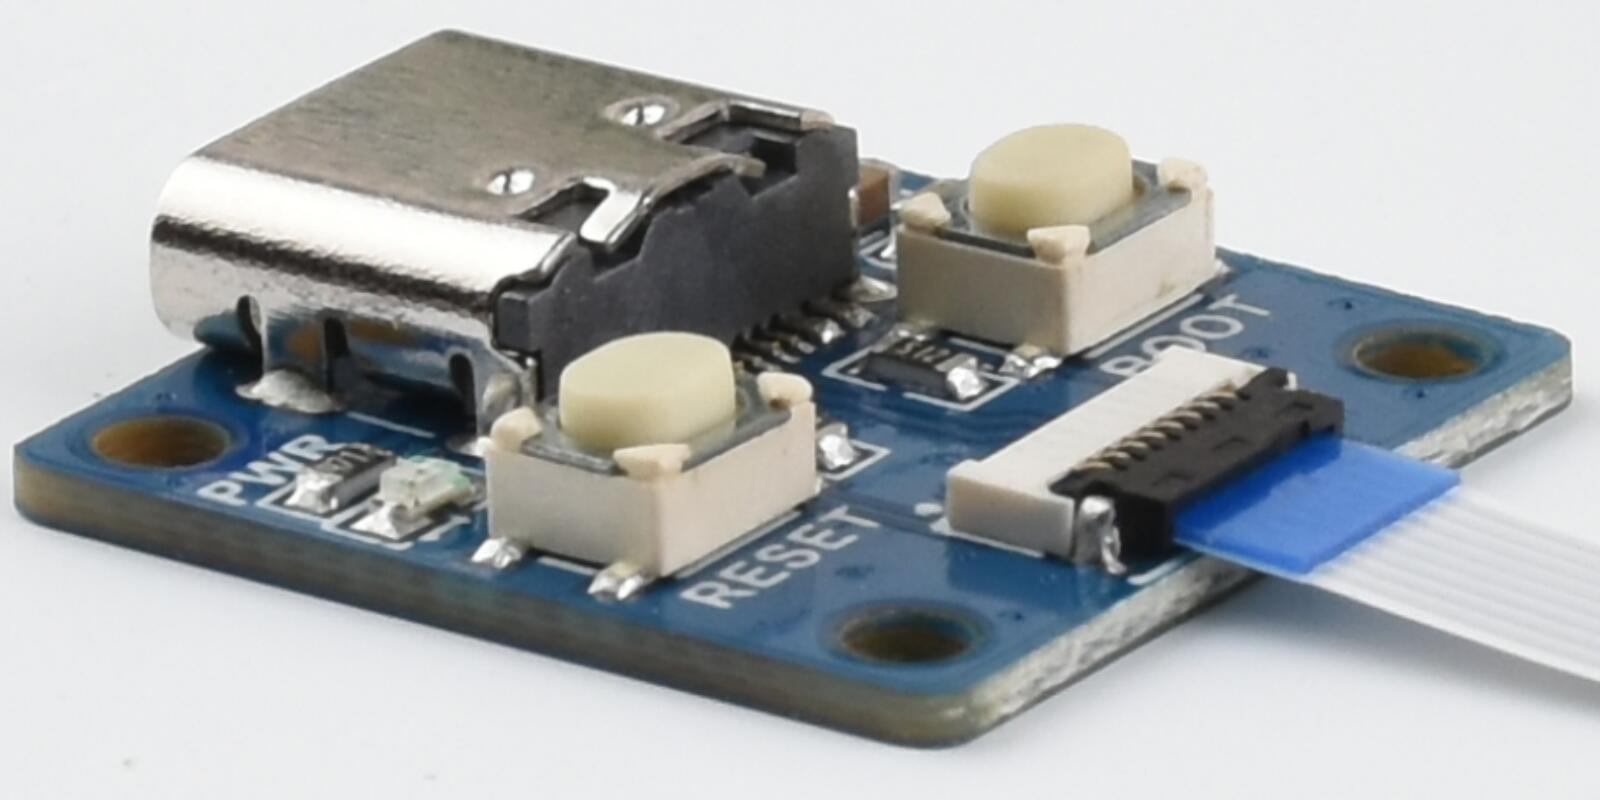
If the cable is not installed in place and the flip cover cannot be closed properly, please adjust the position of the cable and try to close the flip.
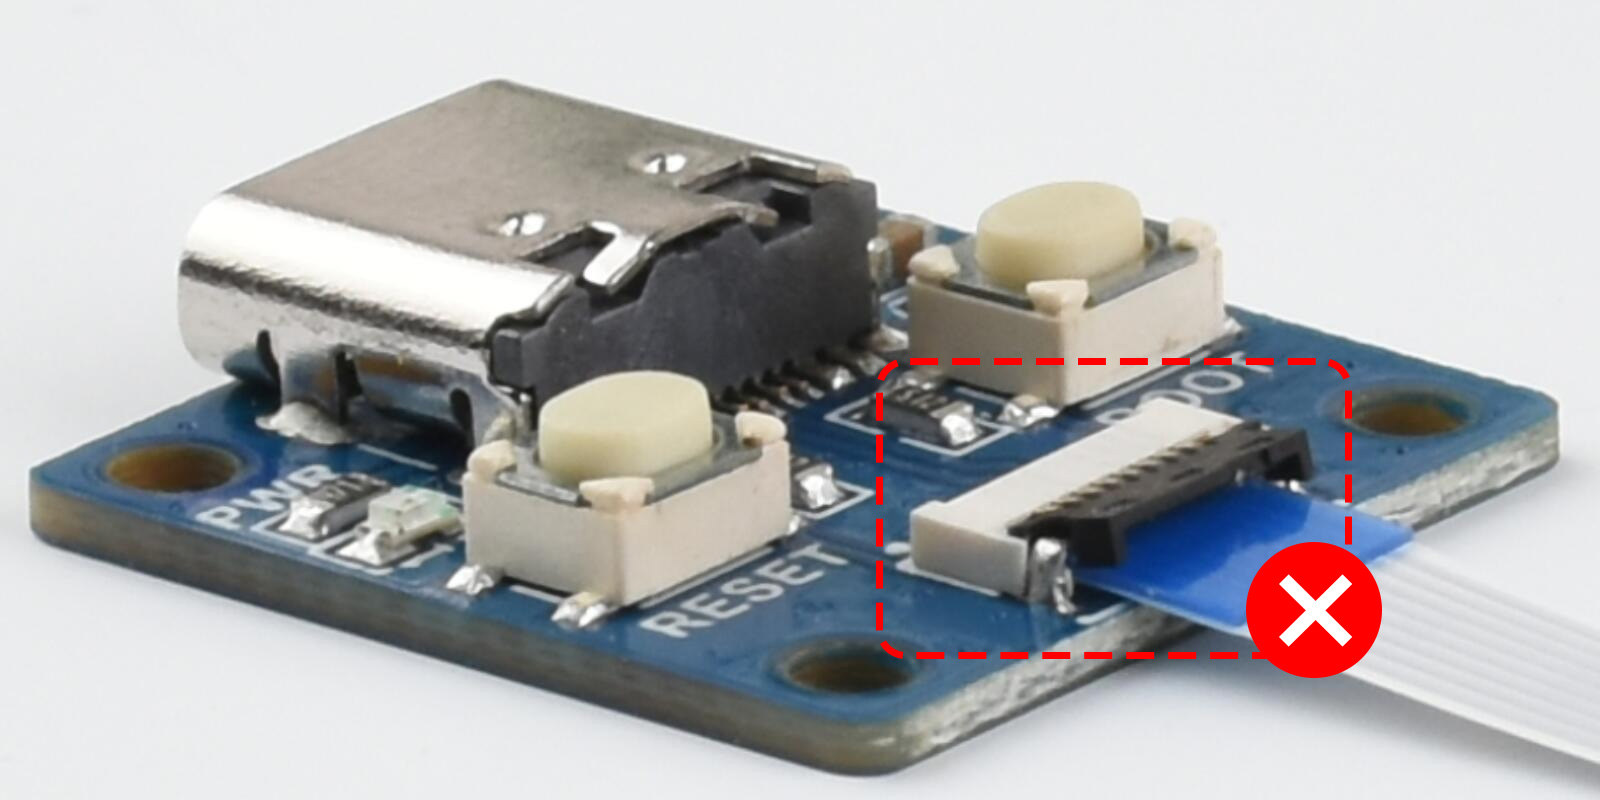
Precautions
Do not unplug or plug in the cable while the power is on, otherwise it may cause a short circuit
When installing the cable, you need to pay attention. The cable should be installed in the middle and inserted into the bottom. If not installed correctly, it may lead to abnormal connection or even short circuit.
】Used under ESP-IDF
The following development systems default to Windows. It is recommended to use the VSCode plug-in for development.
】Developed using VSCode plug-in
Install VSCode
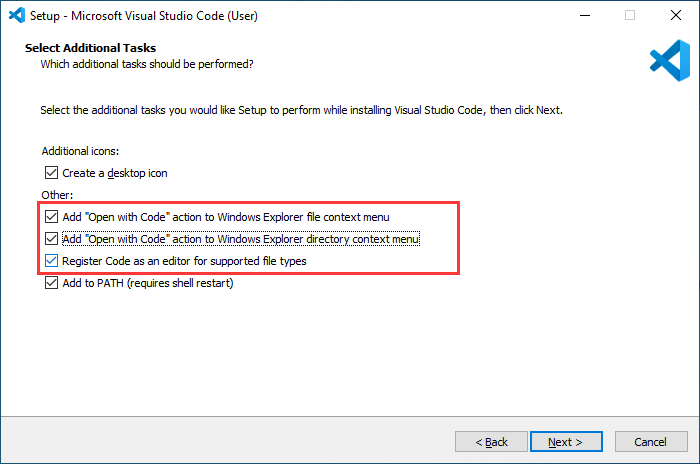
Open the download page of the VSCode official website , select the corresponding system and system digits to download.

After running the installation package, the rest can be installed by default. However, for the sake of subsequent experience, it is recommended to check items 1, 2, and 3 in the box here.
After the first and second items are turned on, VSCode can be opened directly by right-clicking the file or directory, which can improve the subsequent use experience.
After the third item is turned on, when selecting the opening method, you can directly select VSCode
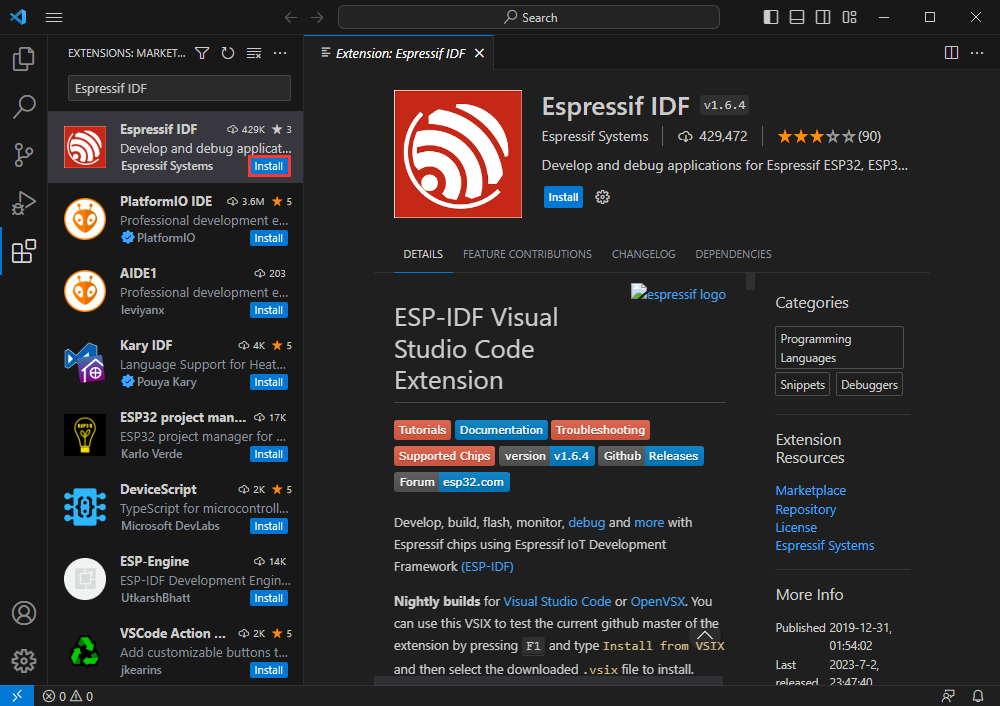
Install Espressif IDF plugin
Note: The latest version of the current plug-in is V1.6.4. For consistent experience, users can choose the same version as us.
Open VSCode, use the shortcut key Shift+Ctrl+X to enter the plug-in manager

In the search bar, enter Espressif IDF, select the corresponding plug-in and click install.

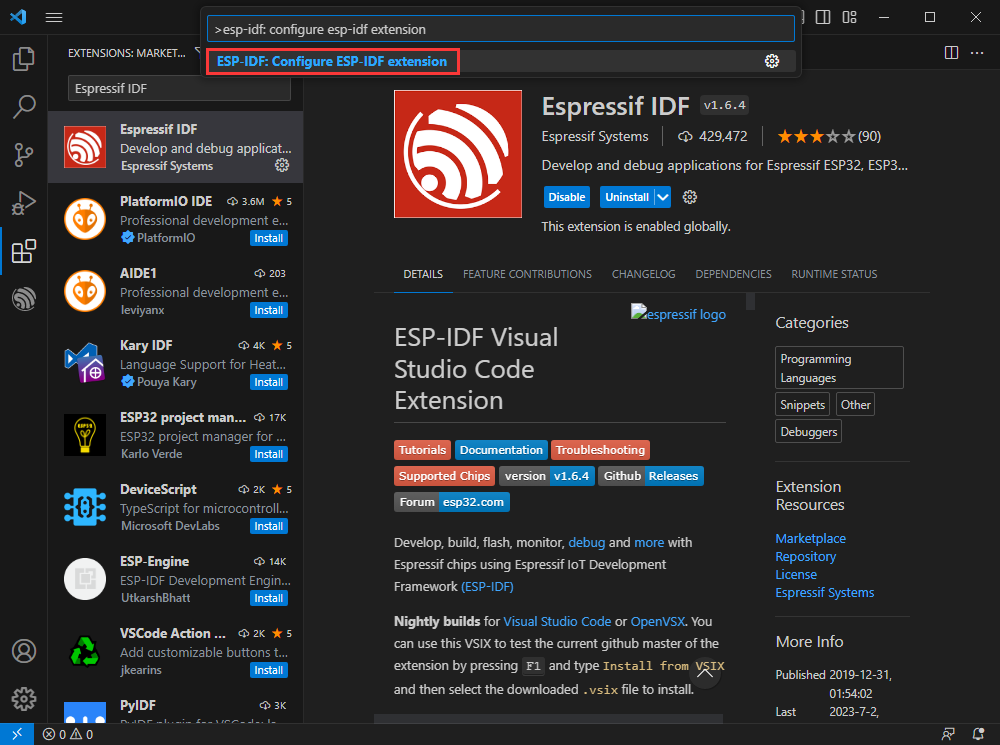
Use the shortcut key F1 and enter
esp-idf: configure esp-idf extension
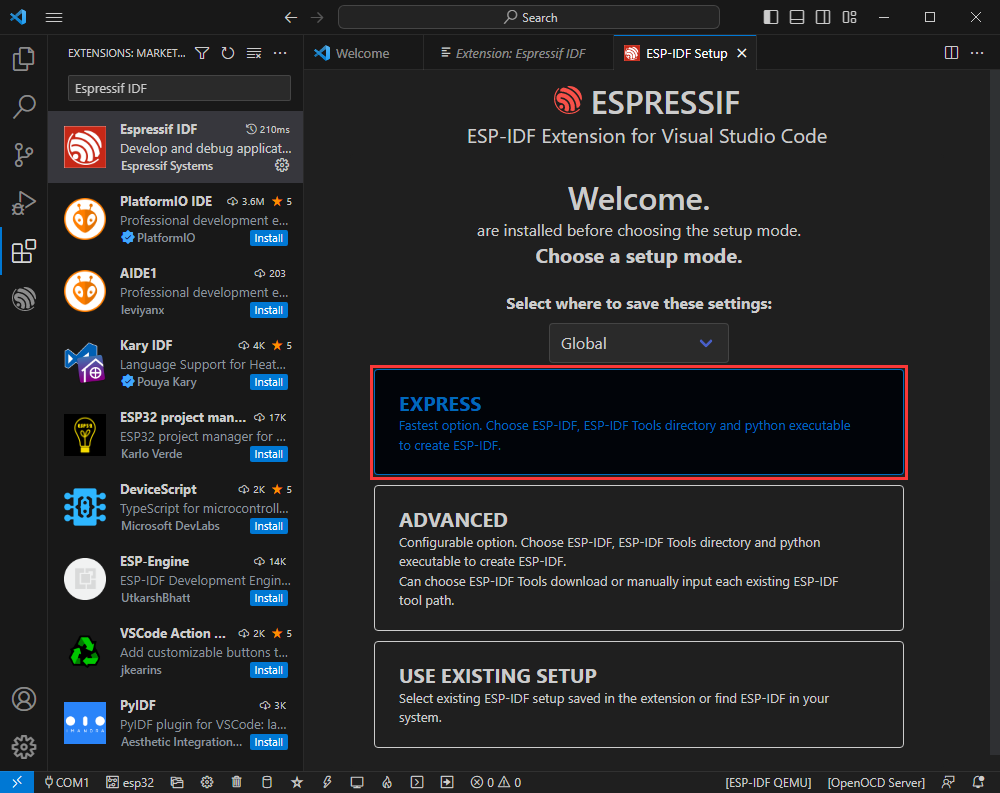
Select express (this tutorial is for first-time installation users, so it only describes the first general installation tutorial)
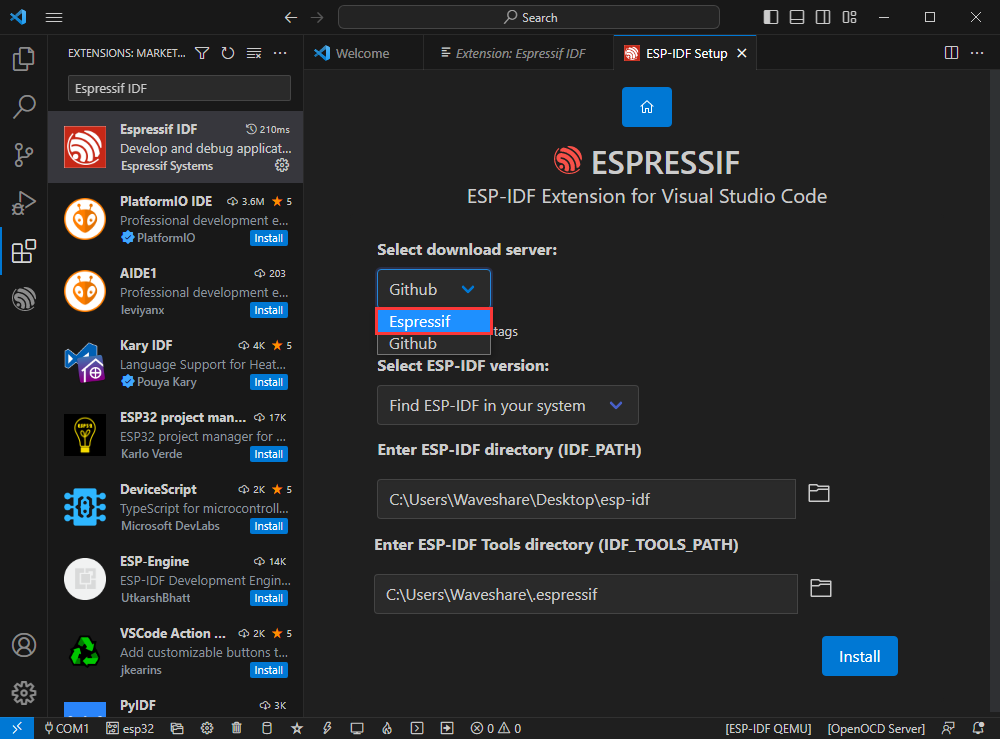
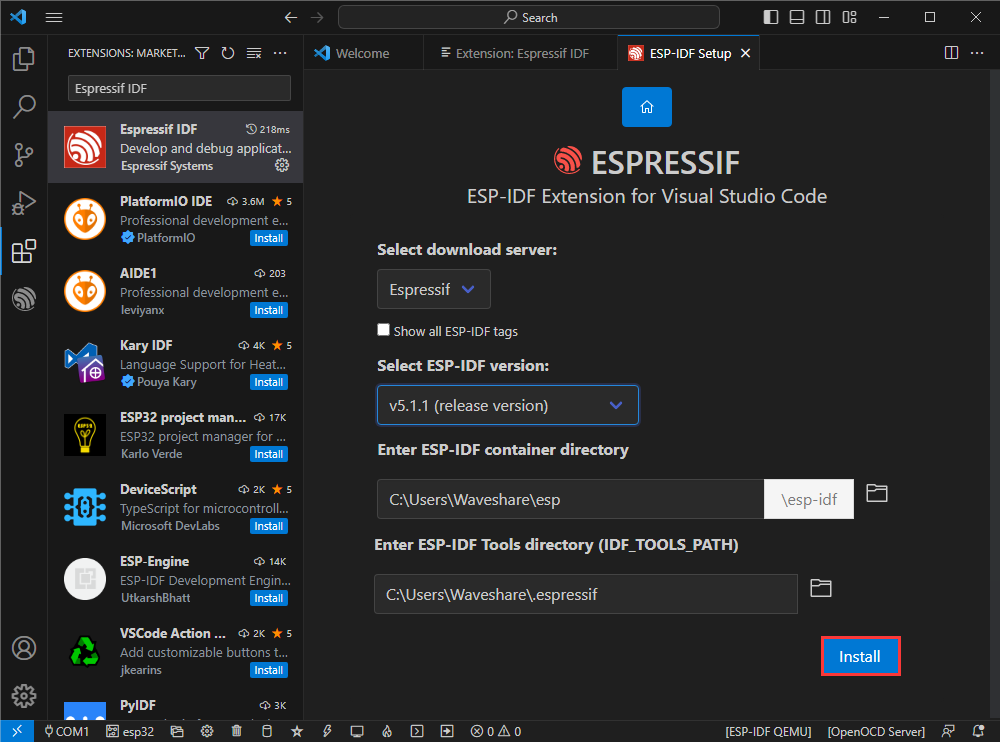
Select the download server. We recommend that domestic users use Espressif as your download server.
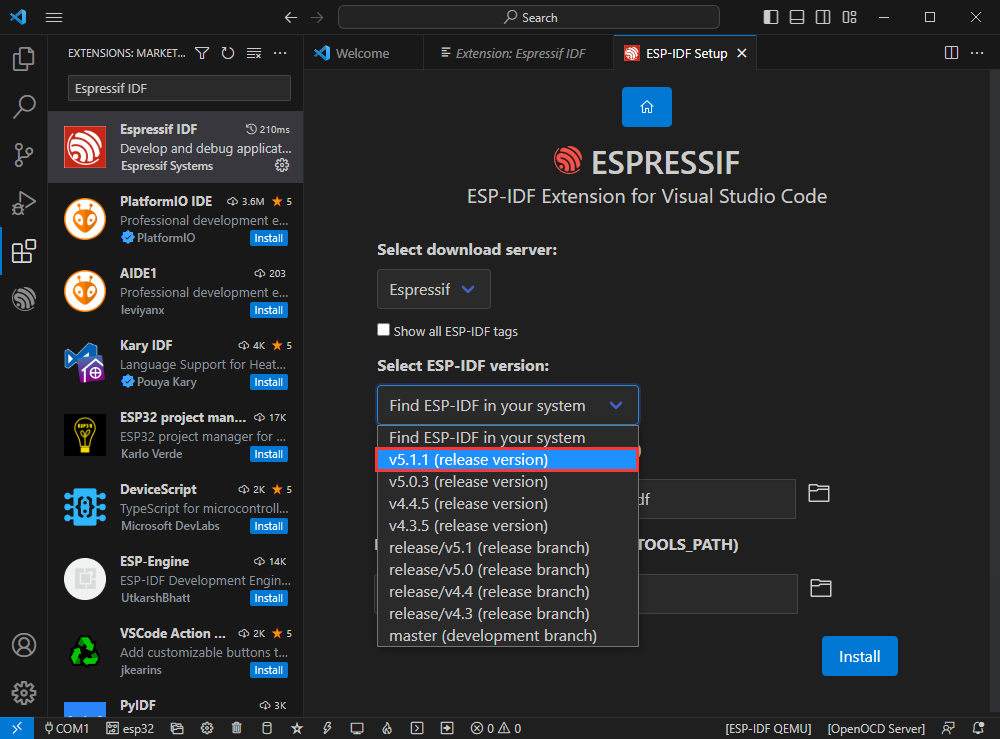
Select the current ESP-IDF version you want, we choose the latest V5.1.1
The following two are respectively the ESP-IDF container installation address and the tool installation address required for ESP-IDF.
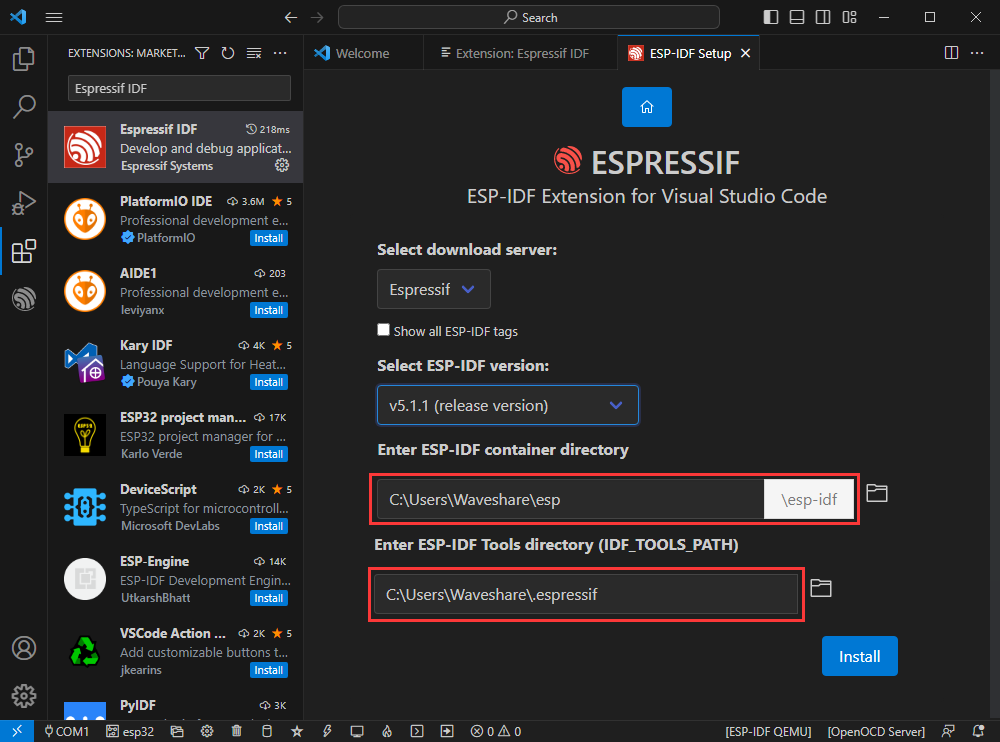
Note: If ESP-IDF has been installed before or failed, please be sure to completely delete the file or create a new non-Chinese path.
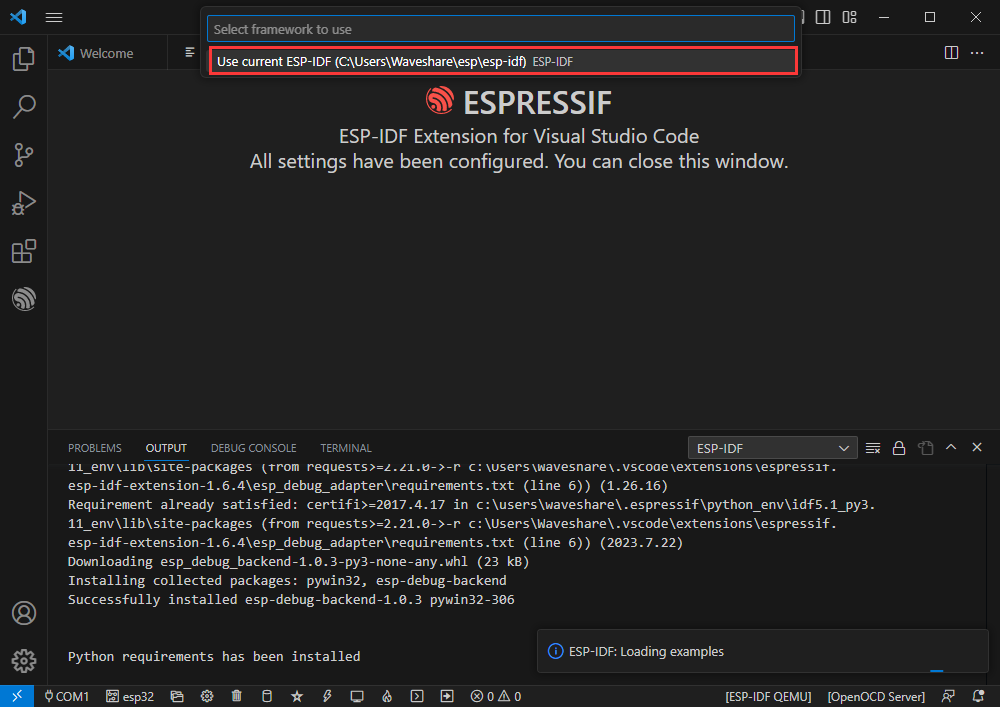
After the configuration is complete, click install to download
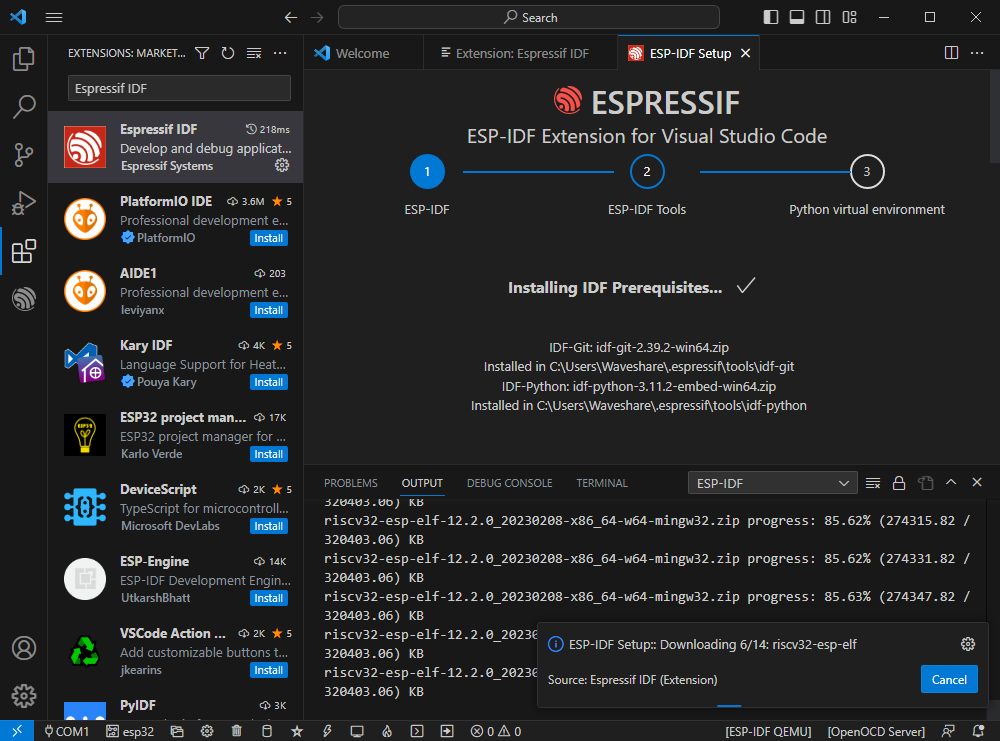
Enter the download page, which will automatically install the corresponding tools and environment, just wait a moment.
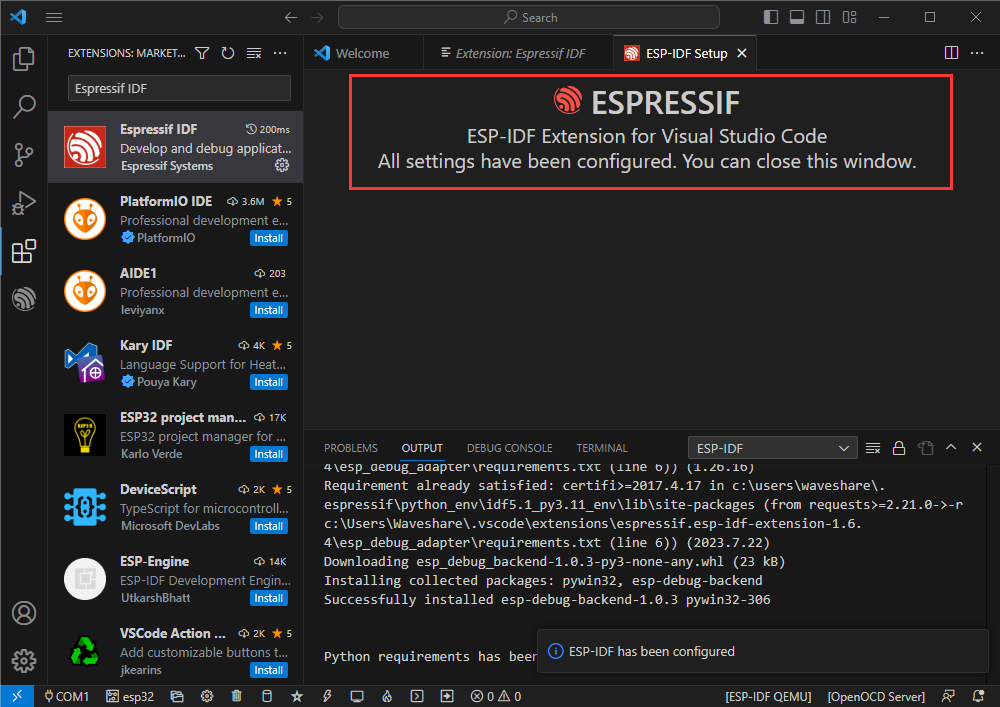
After the installation is completed, you will enter the following interface, indicating that the installation is complete.
Official routine usage tutorial
Create a routine
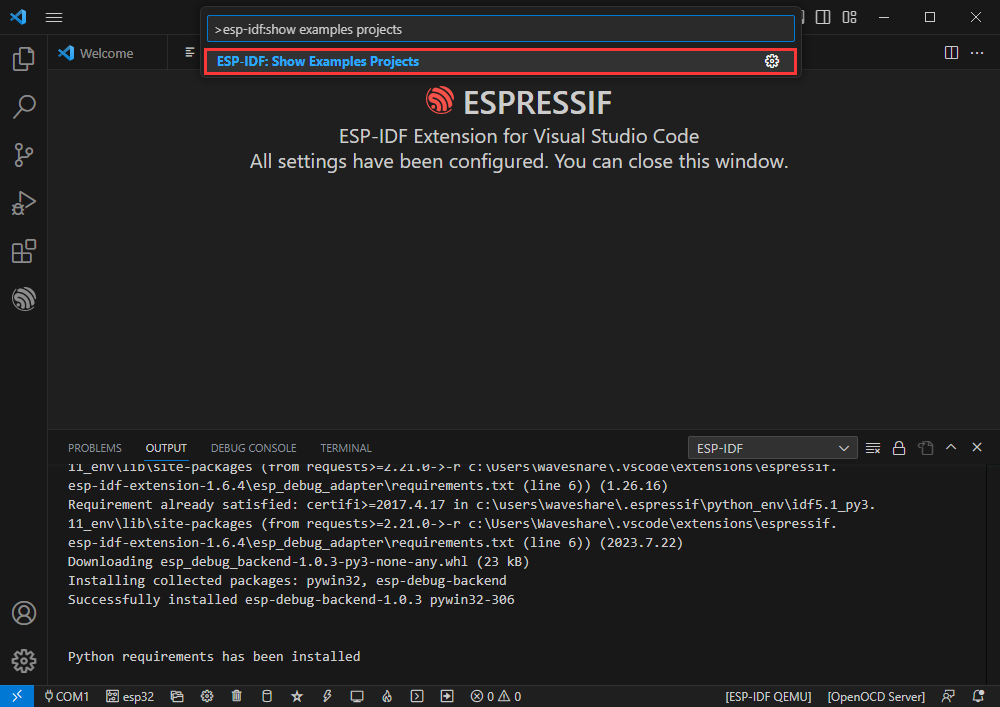
Use the shortcut key F1 and enter
esp-idf:show examples projects
Select your current IDF version
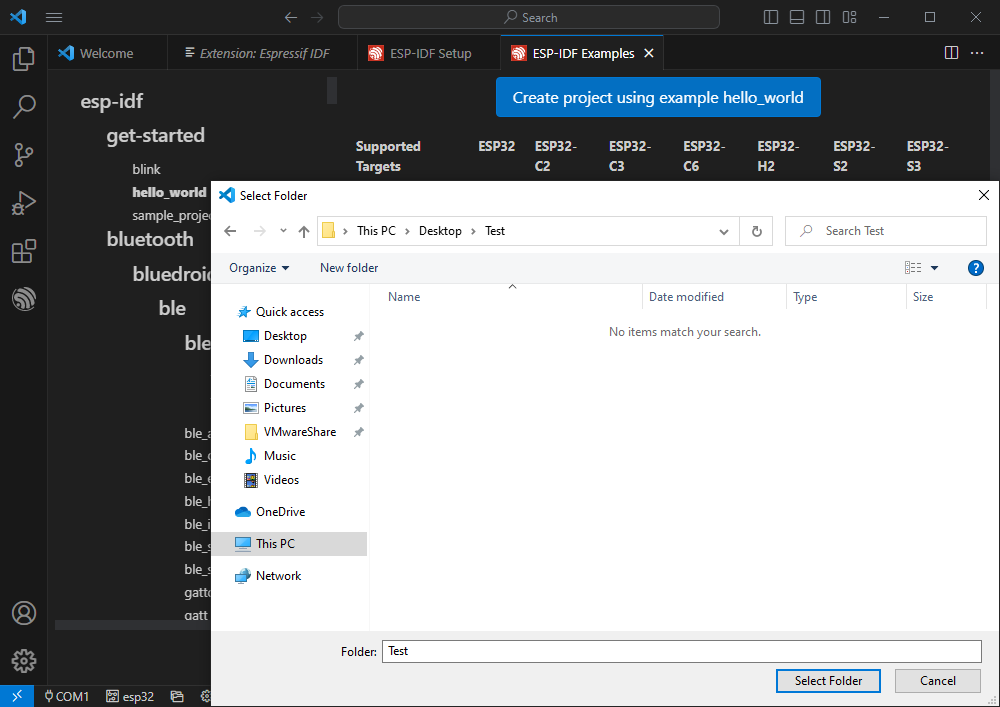
Take the Hello world routine as an example
①Select the corresponding routine
②The readme will explain what chip the routine is suitable for (how to use the routine and the file structure are introduced below, which is omitted here)
③Click to create a routine

Select the path to place the routine. It is required that there is no folder with the same name as the routine.
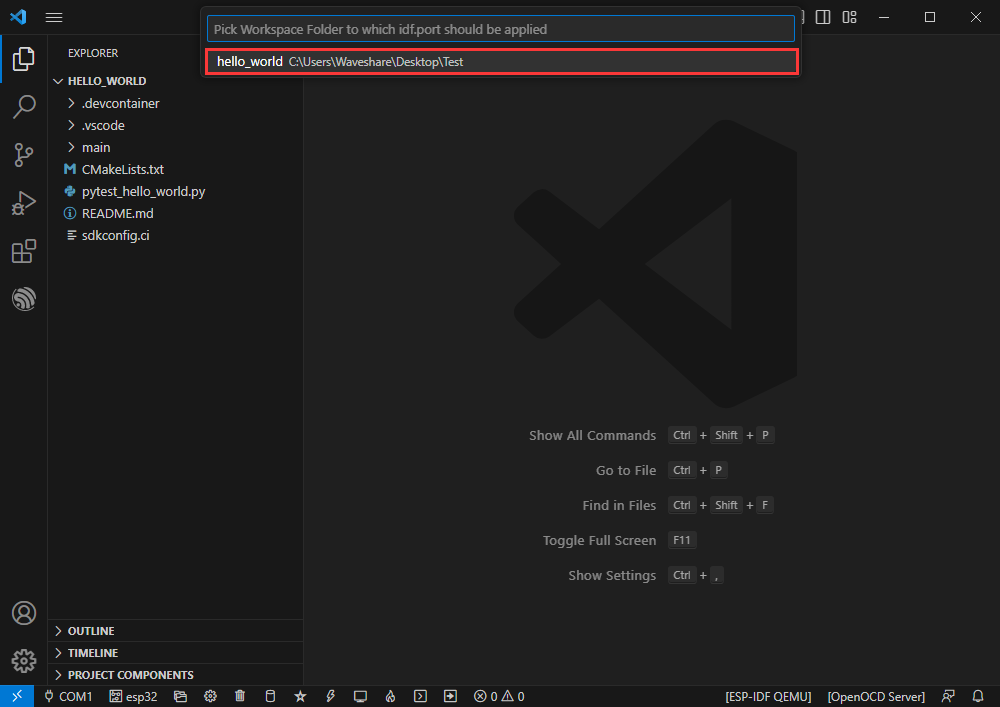
Modify COM port
The corresponding COM port is displayed here. Click to modify the corresponding COM port.
Please select according to the COM port corresponding to the device (can be viewed through the device manager)
If the download fails, please click the reset button for more than 1 second or enter the download mode and wait for the PC to re-recognize the device before downloading again.

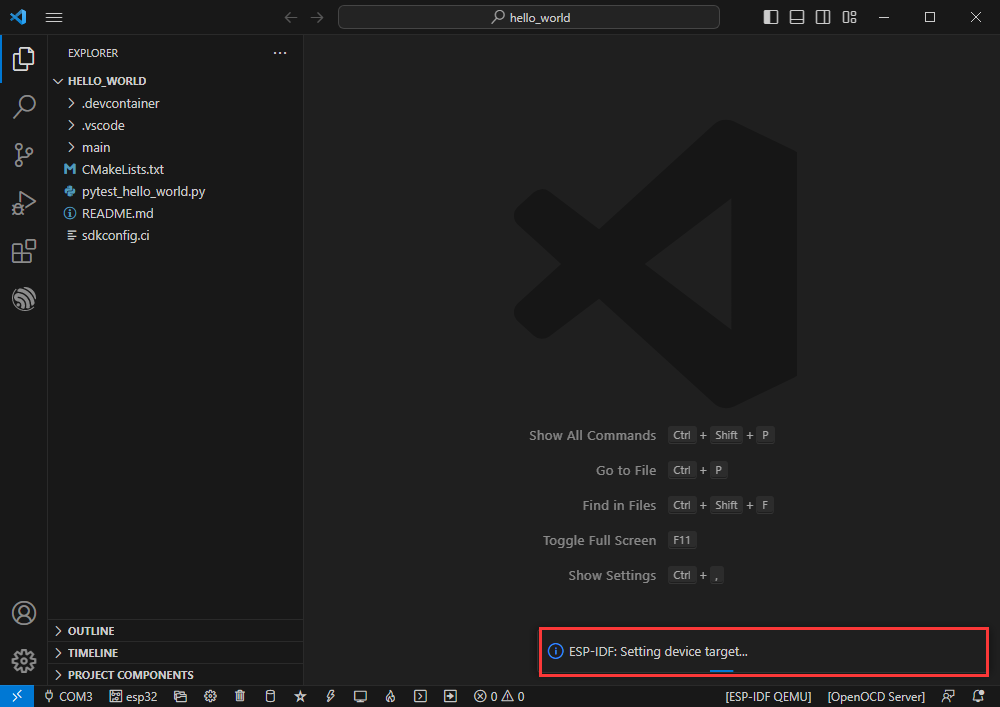
Select the project or routine to use
Then our COM port will be modified.
Modify driver object
Shown here is the driver object used. Click to modify the corresponding driver object.
Select the project or routine to use
.png)
Please wait for a while after clicking
Select the object we need to drive, that is, our main chip is ESP32S3
.png)
Select the path of openocd. It has no effect on us here, so we can choose any one.

Introduction to other status bars
①SDK configuration editor, many functions and configurations of ESP-IDF can be modified in it
② Clean all, clear all compiled files,
③Compile
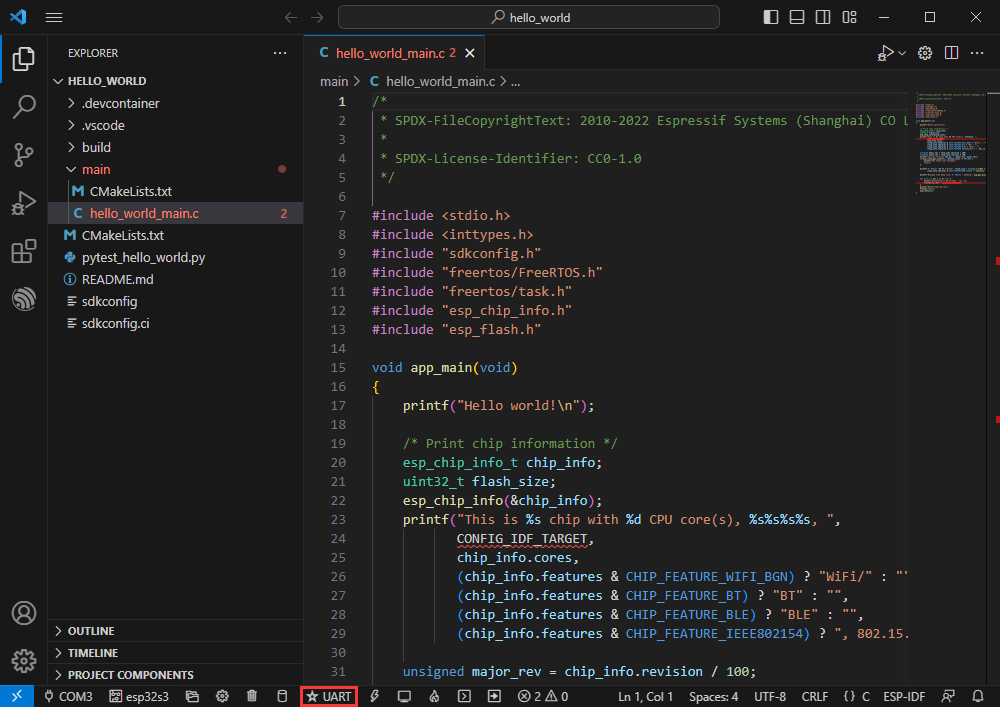
④Current download method, default is UART
⑤ Burn the current firmware, please do it after compilation
⑥Open the serial port monitor to view serial port information
⑦ Compile, burn, and open the serial monitor integrated button (most commonly used during debugging)

Compilation, burning, serial port monitoring
Click the compile, burn, and open serial monitor buttons we introduced earlier
Compilation may take a long time to complete, especially the first time.
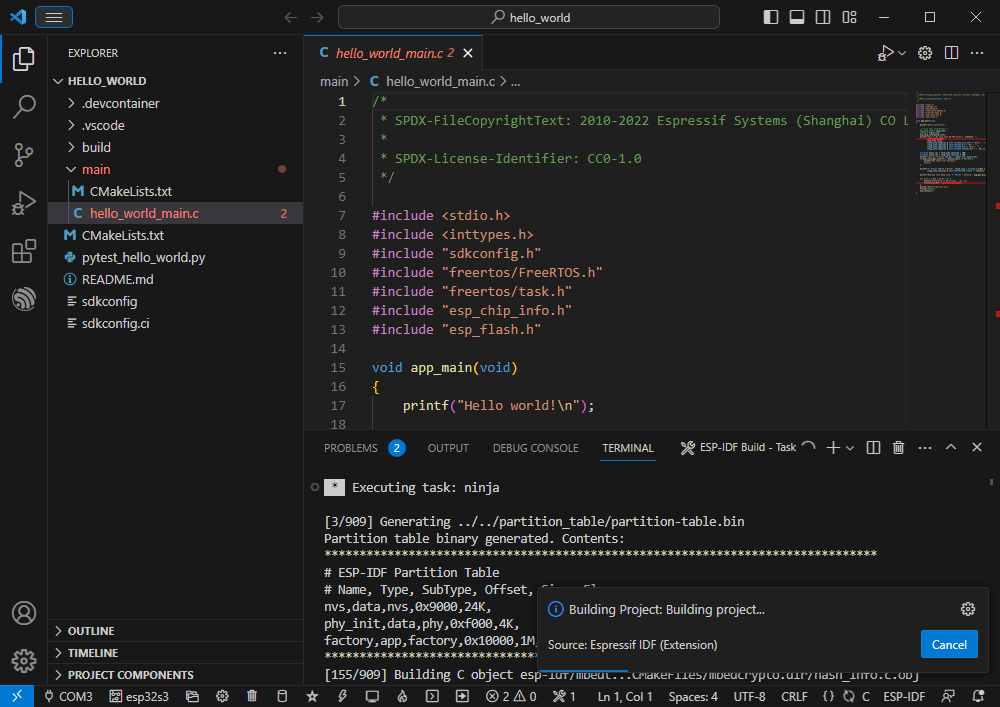
During this process, ESP-IDF may occupy a large amount of CPU resources and therefore may cause system lags.
If it is the first time to burn a program for a new project, you will need to choose the download method and select UART.
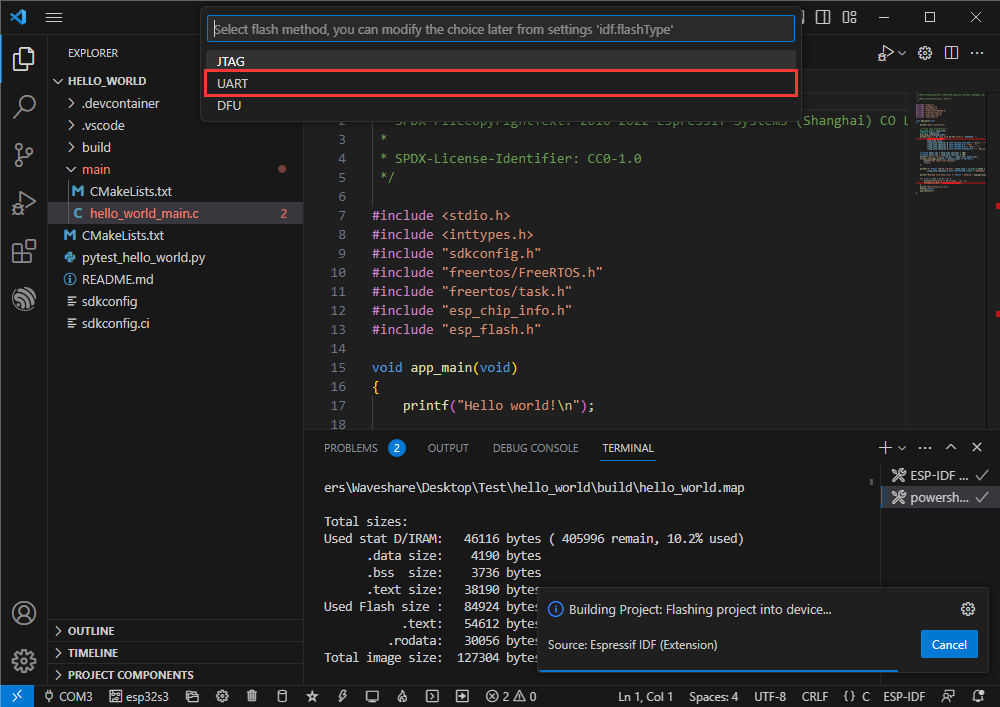
You can also modify the download method later (click to pop up options)
Because of the onboard automatic download circuit, automatic downloading is possible without manual operation.
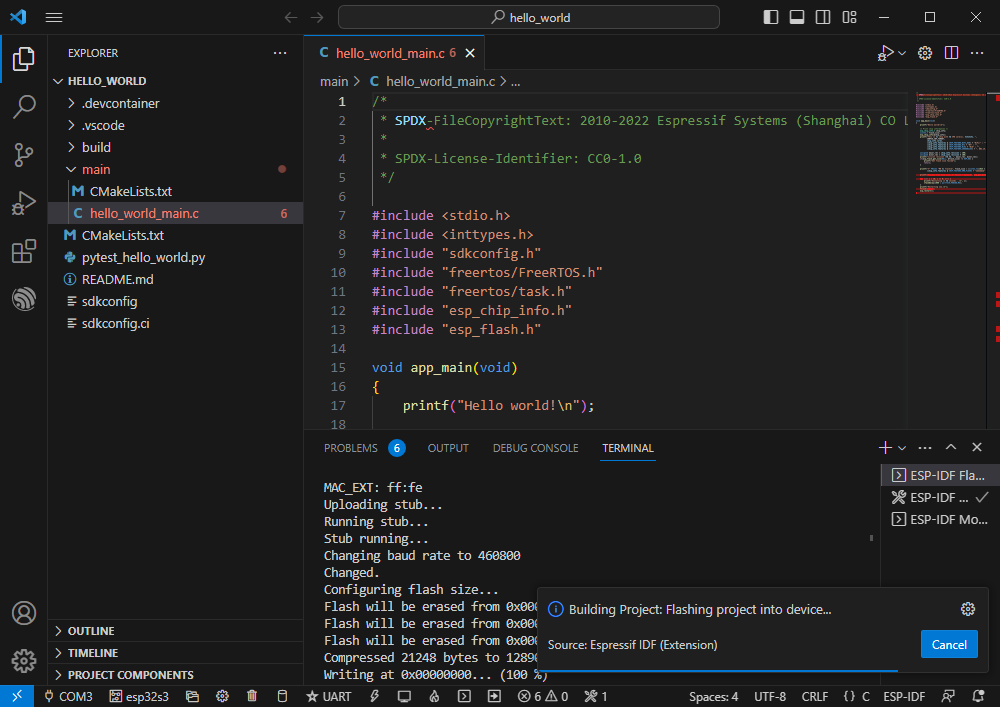
After the download is successful, it automatically enters the serial port monitor. You can see the corresponding information output by the chip and prompts to restart after 10 seconds.

Wipe device Flash
Unzip the software resource package ( Flash debugging software )
Open the flash_download_tool_3.9.5.exe software and select ESP32-S3 and USB
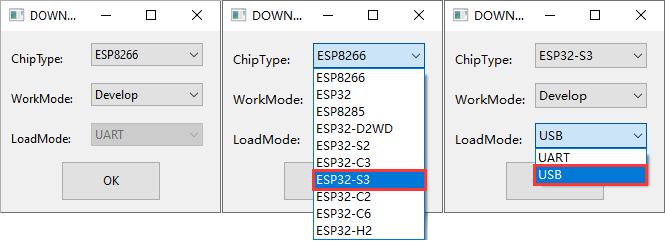
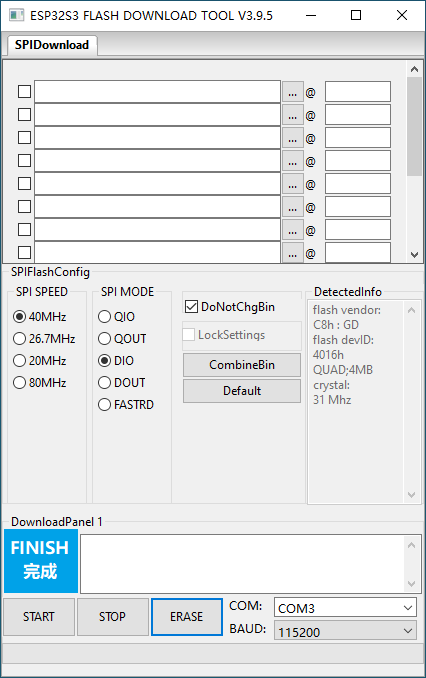
Select the UART port number and click START (do not select any bin file)

Wait for burning to complete, click Erase

Wait for erasure to complete
】Use under Arduino
】Build environment
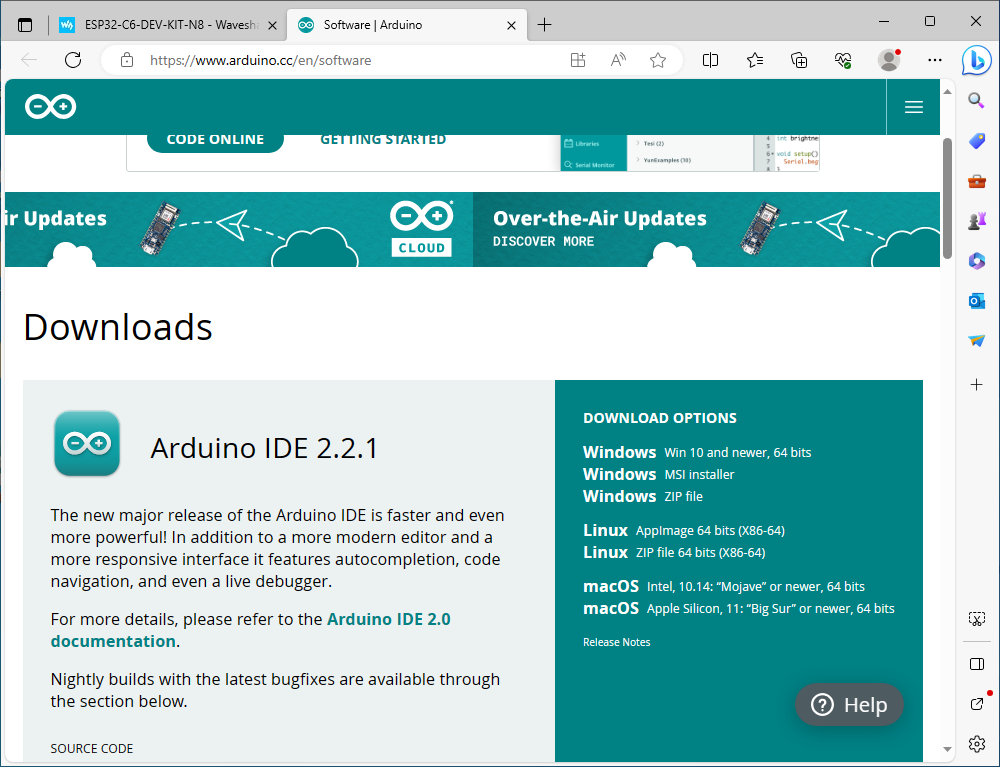
Install Arduino IDE
After the installation is complete, open the Arduino IDE

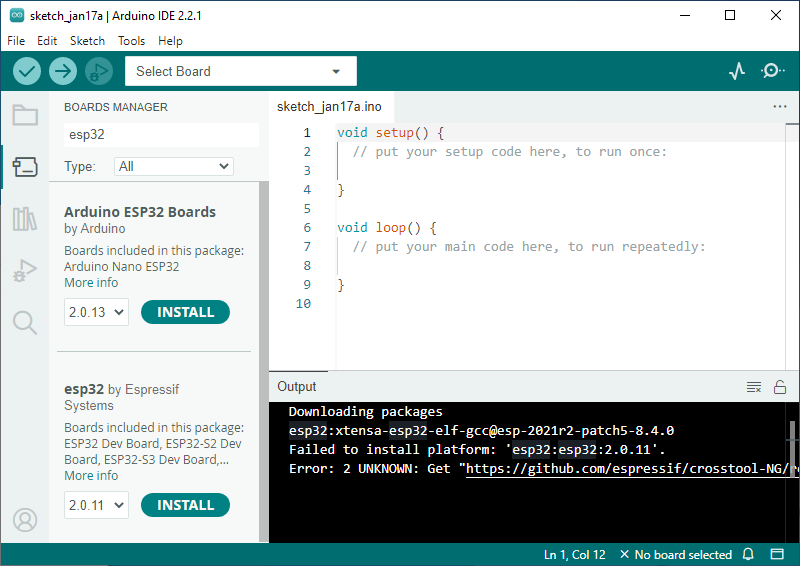
Enter the development board manager, search for esp32, select the latest version in esp32 by Espressif Systems below and click to install (if it cannot be installed normally, you can try using a mobile phone hotspot)
After the installation is complete, restart the Arduino IDE and it will be ready to use.

If the installation fails then
Installation of version 2.0.11 failed
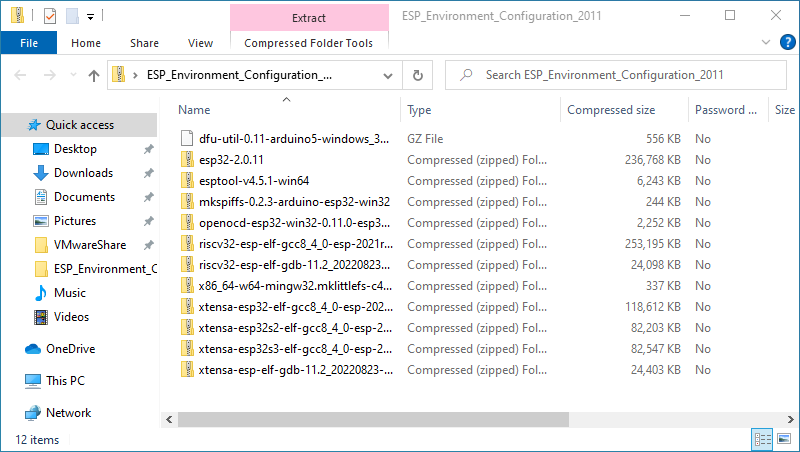
Download resource file
Extraction code: 0755
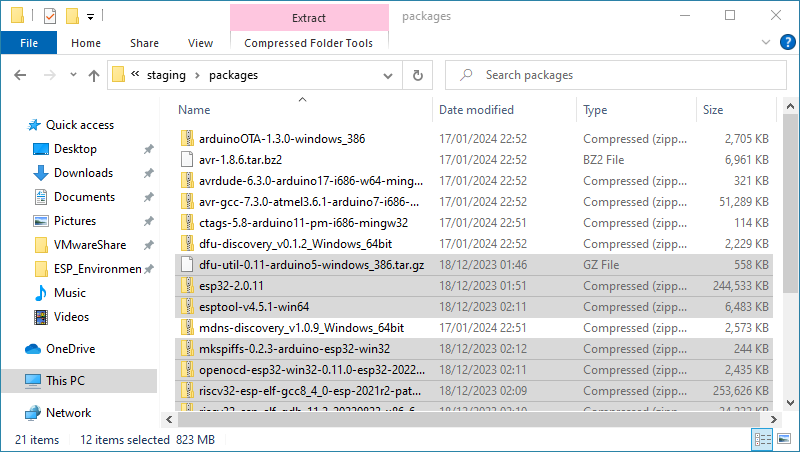
From the resource manager, press the path "c:\Users\Waveshare\AppData\Local\Arduino15\packages" to enter (where Waveshare is the computer username, you need to turn on the display of hidden files)

Unzip the file downloaded above into the packages folder
Re-execute the installation operation

After the installation is complete, restart the Arduino IDE and it will be ready to use.

】Run the example
Create an example
Change the project folder above to c:\Users\Waveshare\AppData\Local\Arduino15\packages (where Waveshare is the computer user name)
Restart Arduino IDE
Routine creation is available from the examples in the project folder under Files
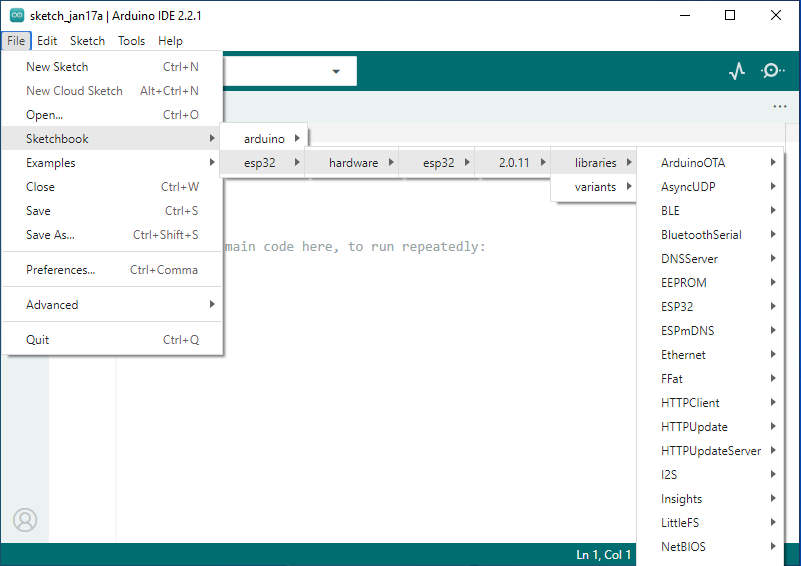
The following demo creates an example of RGB blinking (BlinkRGB under File -> Sketchbook -> esp32 -> hardware -> esp32 -> 2.0.11 -> libraries -> ESP32 -> examples -> GPIO )
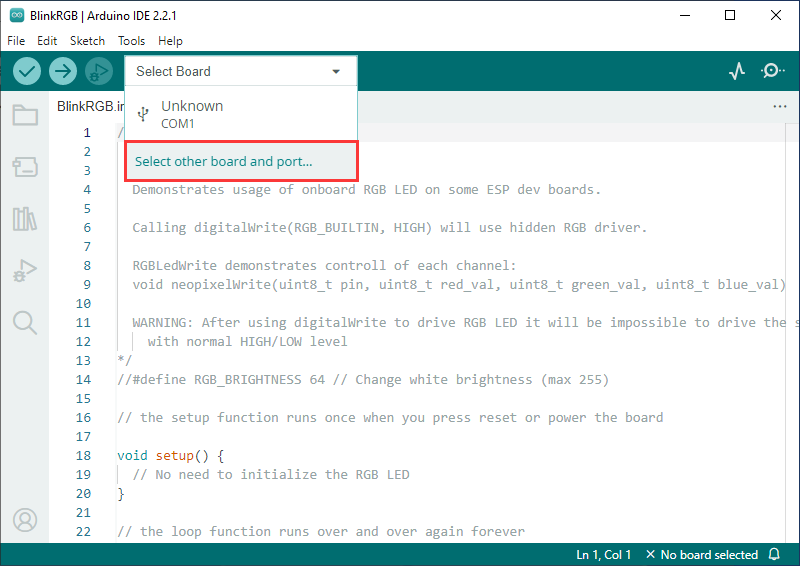
Program burning
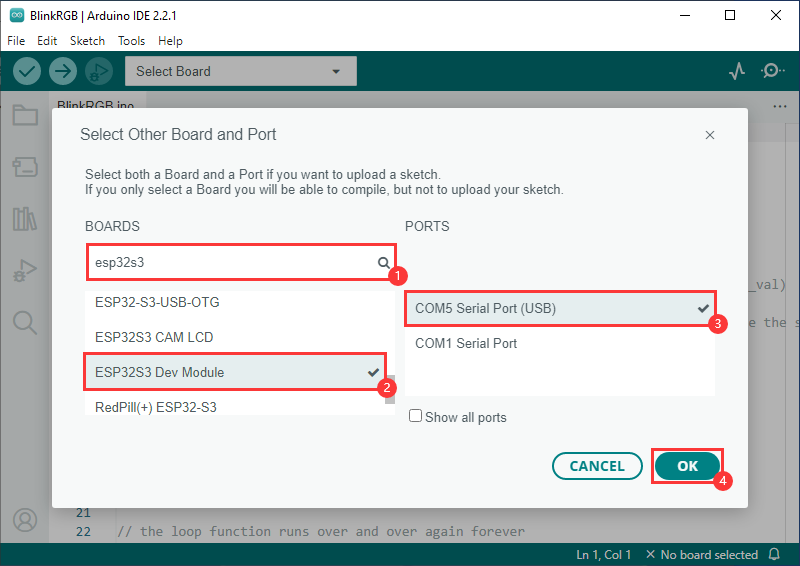
Select development board and port
Search esp32c6, select ESP32C6 Dev Module and download port
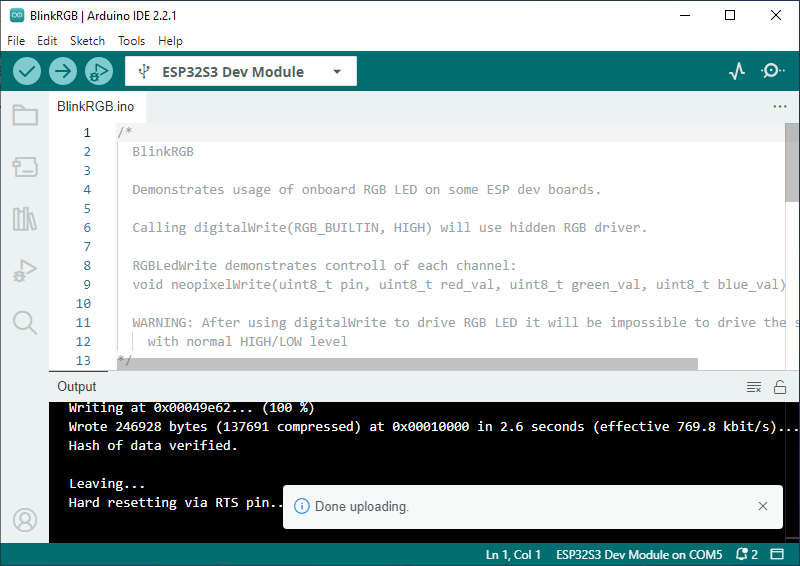
Select Finish, click Upload, Arduino IDE will compile and burn the program

After the upload is completed, you can see the phenomenon on the development board


TAG:
Pi5
SpotPear
ESP32-C6
ADXL354CZ EVAL BOARD
Raspberry Pi 5 ABS Case
Raspberry Pi Thermal imaging
ESP32 Thermal imaging
Arduino MLX90640
Raspberry Pi Pico
NV3030B
Raspberry Pi Transparent LCD
Raspberry Pi 1.3inch LCD
Raspberry Pi Game
PC Secondary Screen
Raspberry Pi Screen
Raspberry Pi Pico HDMI
Luckfox Pico Camera User Guide
USB Camera
SpotPear
SP485EN
Price:
$4.49/5.49
Part Number:
ESP32-S3-Tiny
Brand:
Spotpear
SKU:
0101613
TAG:
ADXL354C Sensor
ESP32 C3 MINI TV
Raspberry Pi
Raspberry Pi 5 Case
For Display
Raspberry Pi 5 5V5A
HDMI to RGB
Rockchip
Jetson Nano Module
Raspberry Pi RP2040 LoRa-HF
Raspberry Pi 5 SSD
Core3566102032
ESP32 S3 ST7701S
Pi5
Serial Server
Mechanical Keyboard
Raspberry Pi 5
Raspberry Pi
RS485 to Ethernet
Jetson 64MP Camera