- sales/support
Google Chat:---
- sales
+86-0755-88291180
- sales01
sales@spotpear.com
- sales02
dragon_manager@163.com
- support
tech-support@spotpear.com
- CEO-Complaints
zhoujie@spotpear.com
- Only Tech-Support
WhatsApp:13246739196
- Purchase/Shipping/Refund
WhatsApp:13424403025
Install NAS System
Overview
- Click to see official tutorial.
- You can choose the pre-installed image or the official image.
Pre-install Image
1. Here is a pre-configured image, decompress and write the image to the TF card (open Win32DiskImager, choose ".img" document and click "write" to program.)
2. After programming, you can insert the card into the Raspberry Pi. Turn on it and the system can be booted normally.
- You can enter the following command after powering on:
sudo omv-firstaid
#choose:
Configure network interface -> OK -> YES -> YES -> YES -> YES -> NO
#Wait for configuration to complete
sudo reboot
3. After normal startup, you can skip to setting up OpenMediaVault.
Image Programming
Only the Raspberry Pi OS lite system can be installed, and the NAS system cannot be installed with a desktop.
If you cannot burn, please click the link below to provide two burning methods:
After the installation is complete, do not directly connect to the host (Raspberry Pi/CM4), open the file manager, find the BOOT disk, create a file named SSH, and then connect to the host (Raspberry Pi/CM4) to boot.
How to Debug Your RPI
1. Your host (Raspberry Pi/CM4) needs to be connected to a monitor, keyboard, and Ethernet, otherwise users cannot be created.
2. Enter "ifconfig " in the terminal to query the IP address of the host. The following figure is about how to identify the IP address: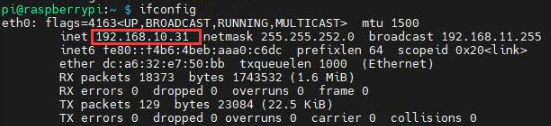
3.Connect your RPI or CM4 with SSH.
- Xshell
- Computer command prompt:
WIN+R
cmd
ssh user@xxx.xxx.xxx.xxx # user is the username, the default pi xxx.xxx.xxx.xxx is the IP address
There are many ways to operate, so I won't introduce them one by one.
4. Install OpenMediaVault
wget https://www.waveshare.com/w/upload/d/de/Install.zip
unzip Install.zip
sudo chmod +x install
sudo ./install
Please wait for finishing the installation. If it appears as shown in the figure below, it means that the installation has been successful. If it does not appear and fails, please run the "install" again (the process is long, please wait patiently).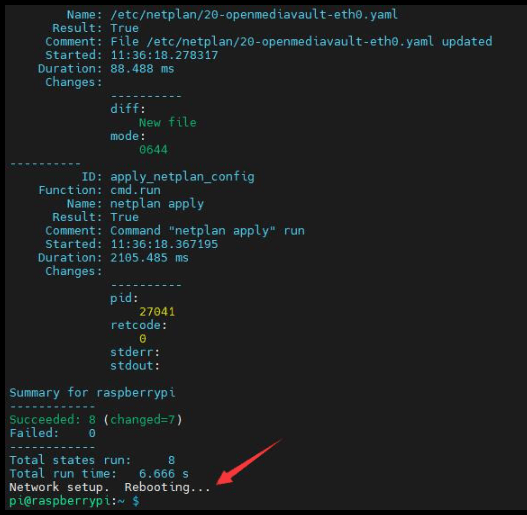
Set up OpenMediaVault
Open an Internet browser on your computer and enter your Raspberry Pi's IP address in the address bar.
The interface is as follows: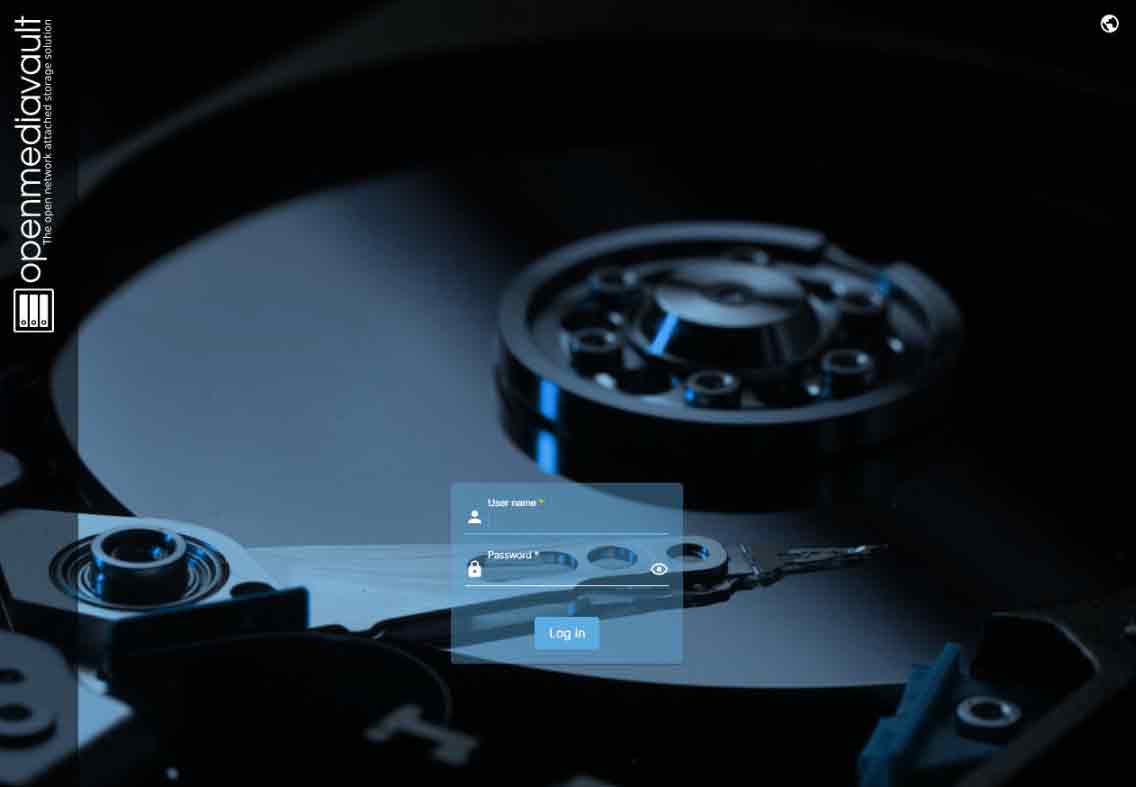
Log in to OpenMediaVault with the following credentials:
User name: admin
Password*: openmediavault
Note: The default password can be changed, but the username cannot be changed.
Set up Network Access
1. Select "Storage", then Disks. All attached storage, including SD cards, should be displayed. If not, double check that everything is plugged in correctly and reboot the system.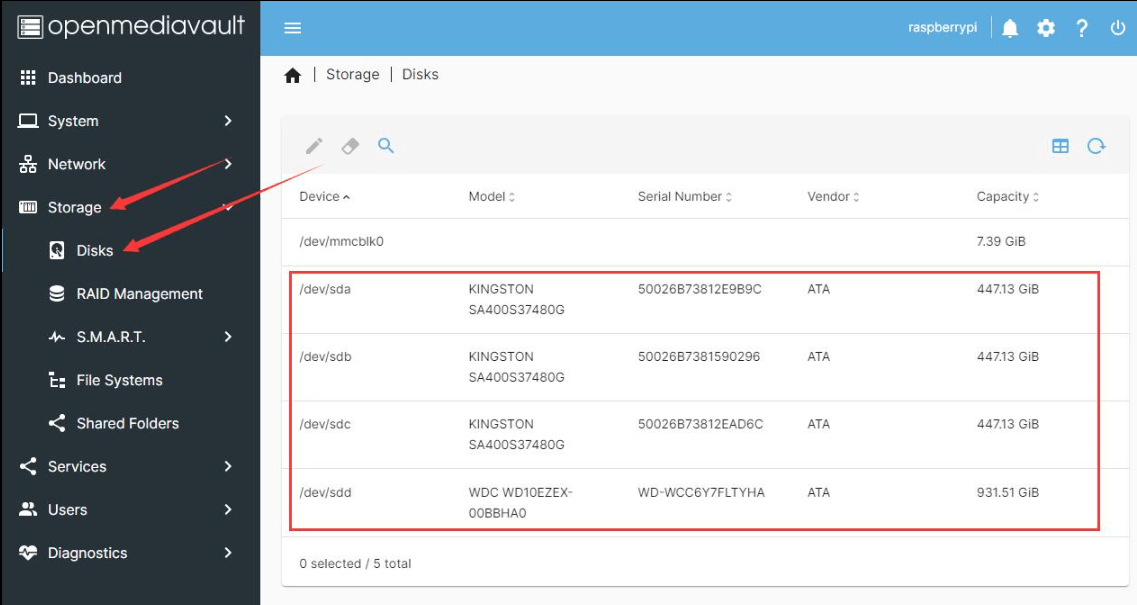
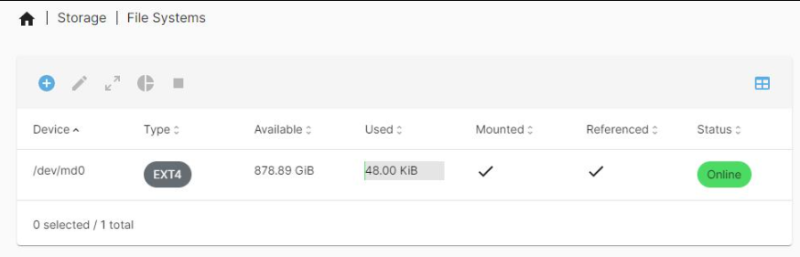
2. Select File Systems, you probably won't see anything here, so select Create. Here you can choose your storage device. We recommend choosing the EXT4 drive format. Select OK and close.
The creation is completed as follows: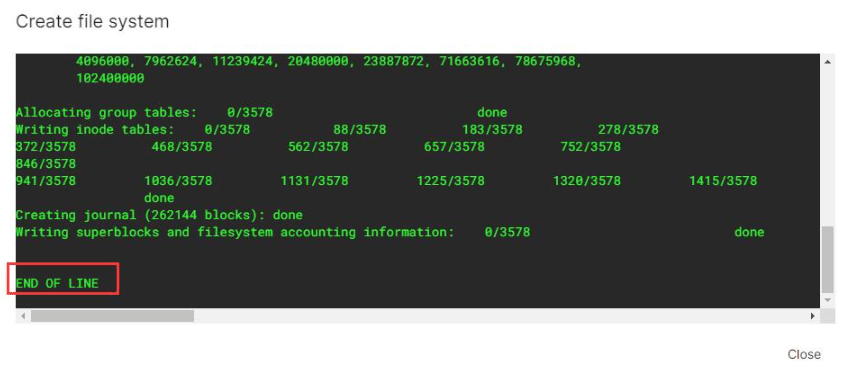
Click Close, and then mount the drive letter. You can select the disk to be mounted and the capacity exceeds the threshold, and a warning will be issued. After the setting is completed, click "Save" to wait for the mounting to complete, as shown below: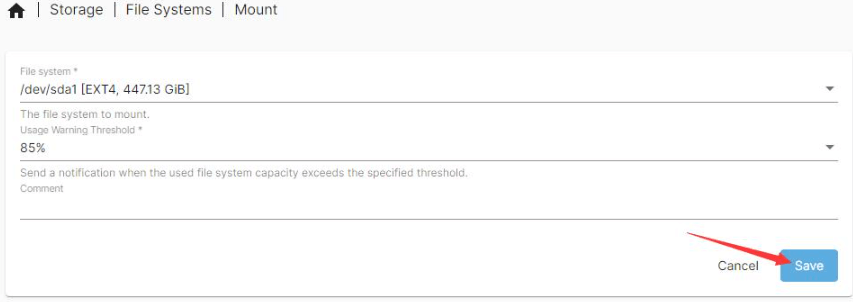
The most critical step is to click the tick in the yellow area first, and then select YES, otherwise the mount will not be considered successful.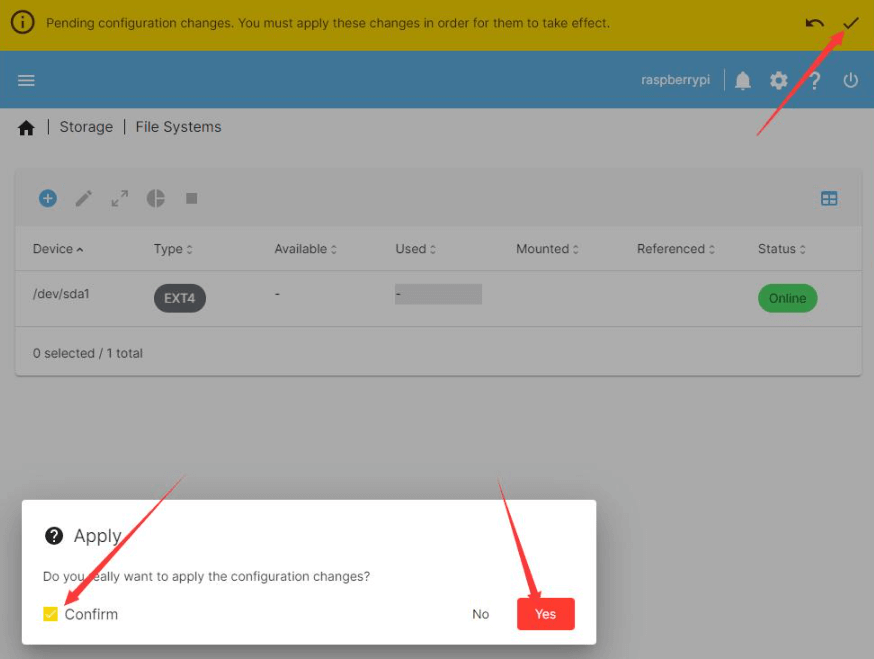
When there is a tick under Mounted, it means that the mount is complete.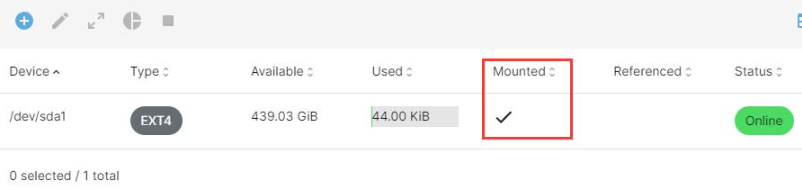
3. Select "Shared Folders", click the plus sign, and create a shared folder where you can name the folder, choose the drive where it should exist, and grant permissions to the user. By default, the permissions should be correct, but if you like the different options for your network preferences, you can adjust them, save and apply the changes.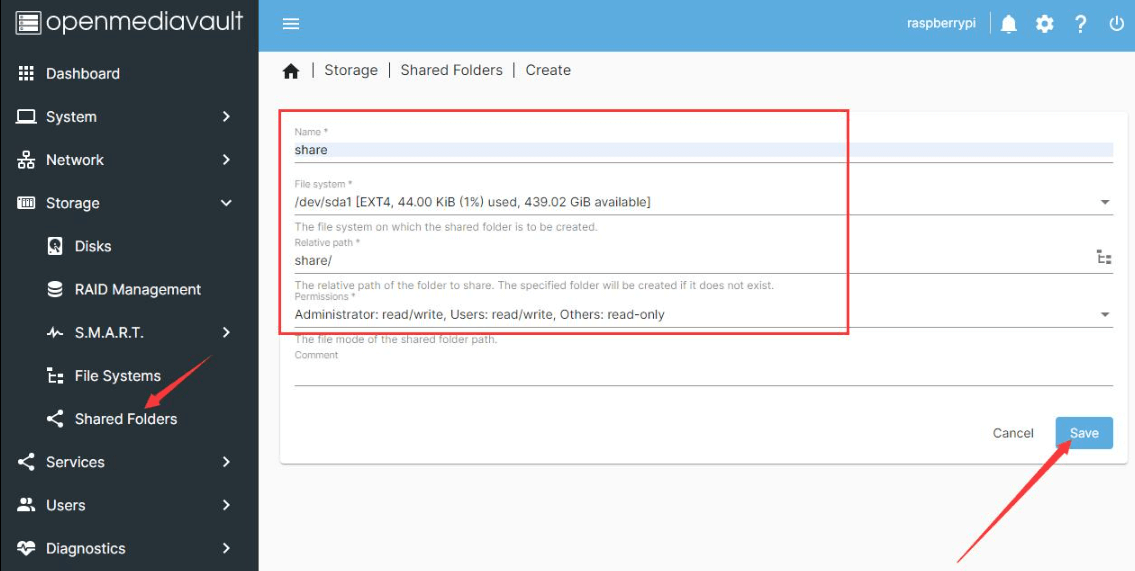
4. Select Services -> SMB/CIFS -> Settings, check the topmost Enabled, and then click Save.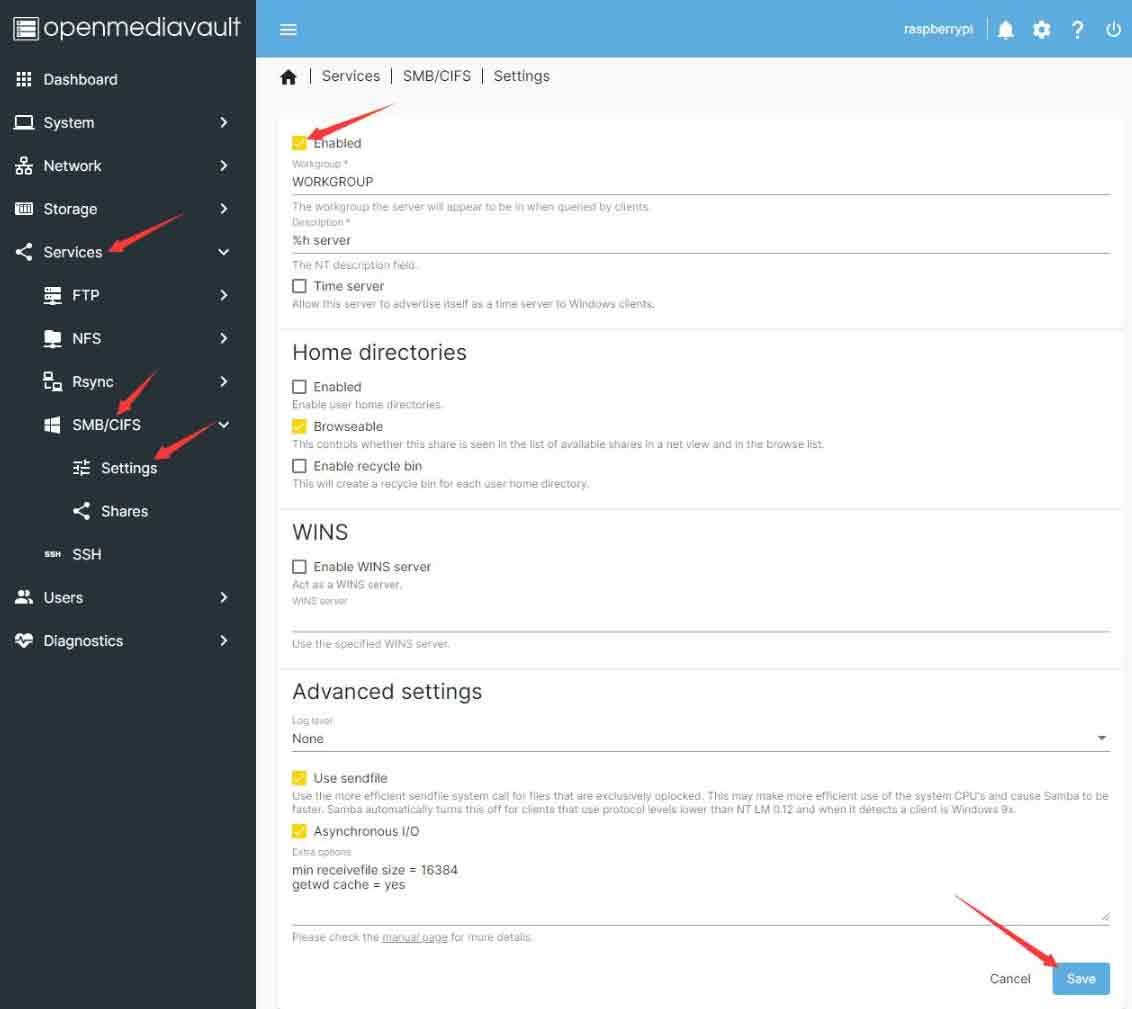
5. Select Shares under SMB/CIFS, click the plus sign and select the folder created before in the first box. After selecting, scroll to the bottom and click Save and apply the changes.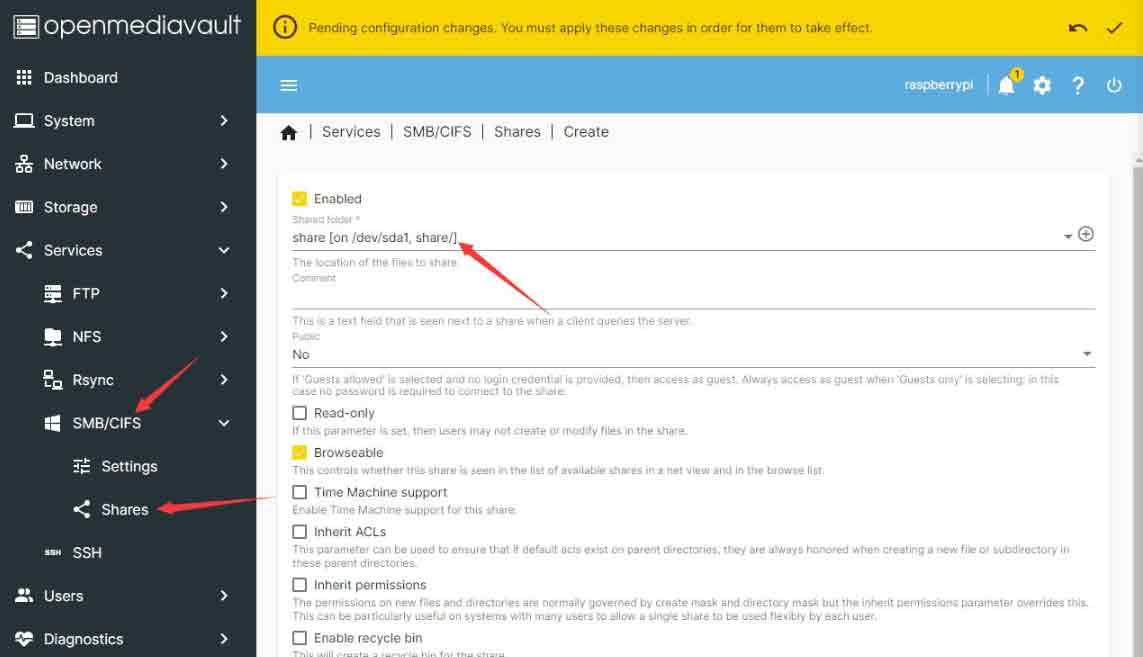
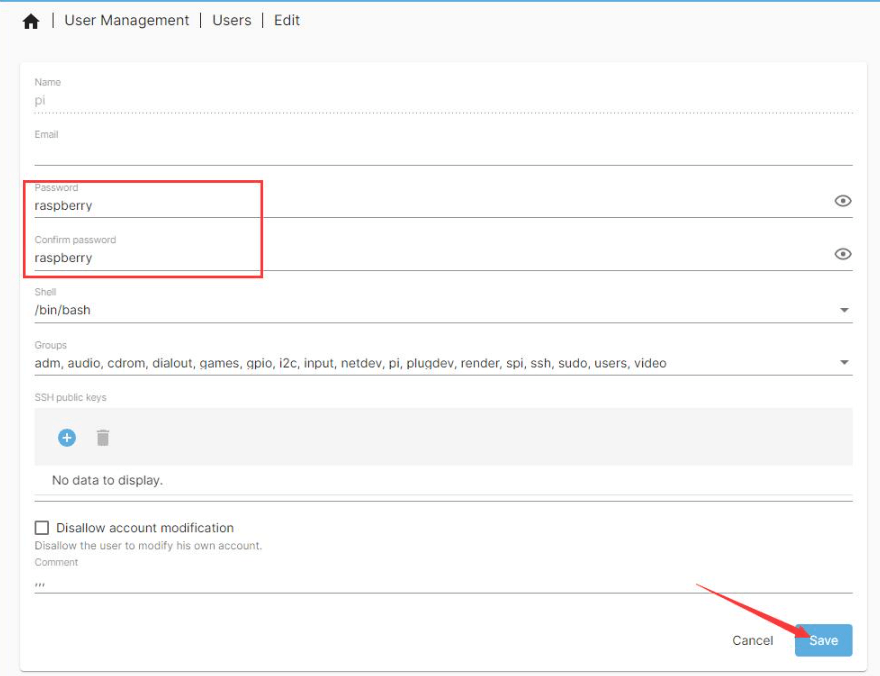
6. Select Users -> Users -> click pi -> Edit, set the access password, save and apply the changes.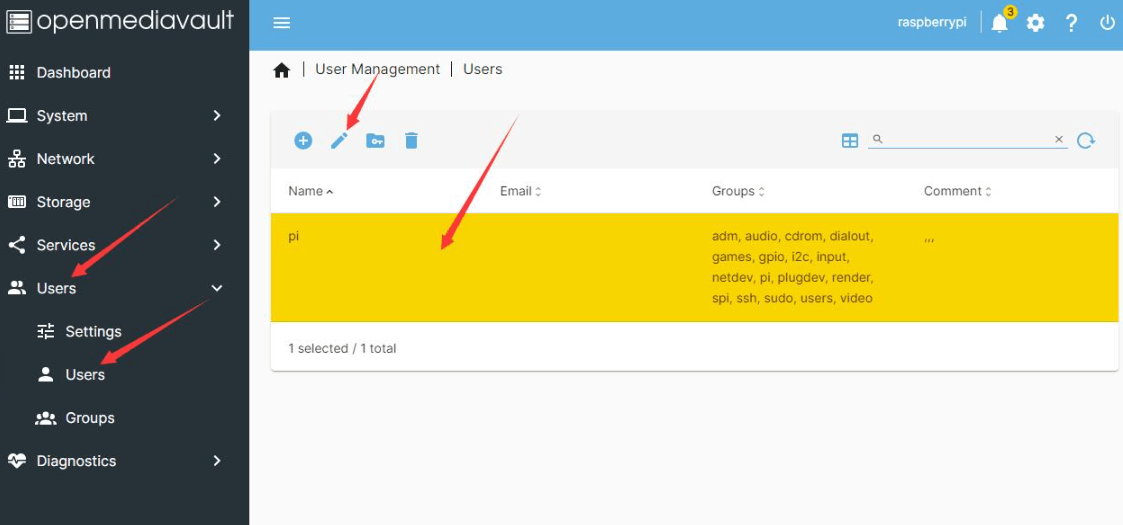
7. You can now access your shared folders over the network.
- Access your shared folders from macOS.
- On your desktop, press Command+K. Type smb://XXX.XXX.XXXX.XXX (replace XXX.XXX.XXXX.XXX with the IP address of your NAS Raspberry Pi).
- Enter the username and the previously set password.
- Your shared folders will now appear in the finder window.
- Access your shared folders from Windows.
- Open Windows Explorer. In the Path bar, enter \\XXX.XXX.XXX.XXX (replace XXX.XXX.XXX.XXX with the IP address of your Raspberry Pi NAS).
- This should create a new entry under Network in the left nav and display its content. Double-click the share you want and enter the username and password you set earlier when prompted.
- Access your shared folders from iPhone
- You can connect your iPhone to shared folders using the iOS Files app.
- Open the app, navigate to Browse, and select the "three dots" icon in the upper right corner of the screen.
- Here you will see Connect to Server. Enter the IP address of the NAS Raspberry Pi, and when prompted, enter the username and password you set earlier and hit Enter.
8. Help and Support
If you find yourself having trouble with OpenMediaVault, it is best to visit the Forum. For official Raspberry Pi product support, visit the Pi Forum.
RAID
- openmediavault uses the linux software RAID driver (MD) and the mdadm utility to create arrays[1]. The server should immediately recognize arrays created in any other linux distribution. In most cases, you can skip to the filesystem array and continue mounting to integrate the filesystem into the database.
- create
- The table below indicates the RAID available under the Web
| Level | Name | Min. Disks | Redundancy | Growable |
| Linear | JBOD | 2 | NO | NO |
| 0 | Stripe | 2 | NO | NO |
| 1 | Mirror | 2 | Yes | Yes |
| 5 | RAID5 | 3 | Yes | Yes |
| 6 | RAID6 | 4 | Yes | Yes |
| 10 | RAID10 | 4 | Yes | NO |
- The web interface does not support RAID4 and FAULTY levels.
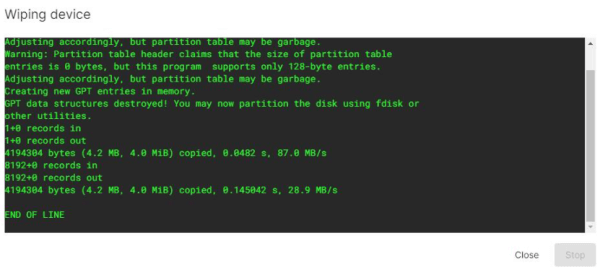
- Mdadm works better with unpartitioned disks, normal raw block devices. Before creating MD RAID in your system, please make sure the previous disk is clean. In the physical disk section, you can perform a quick or full erase. A quick wipe is enough to delete the partition table.
- It is not possible to create a degraded array in the web interface, but if you want to convert RAID from level 1 to 5 or 6, you can use mdadm to create the array in the terminal.
- mdadm integrates email notifications that are sent each time the array enters a degraded state.
- It is best to clean up the partition table of the new disk before adding RAID, especially if the disk was previously used in another mdadm array, also wipe.
- The resync process will start immediately after adding the disk to the array. Depending on the size of the disk, this process can take hours or even days as mdadm tries to balance resources and keep the system available without using high CPU and RAM. To speed up the process:
- Start group RAID, here we take RAID 10 as an example.
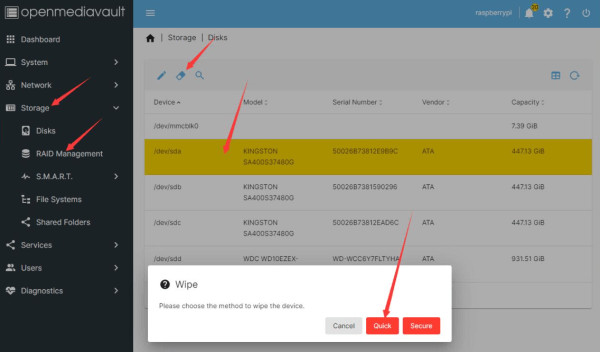
2. Wipe complete
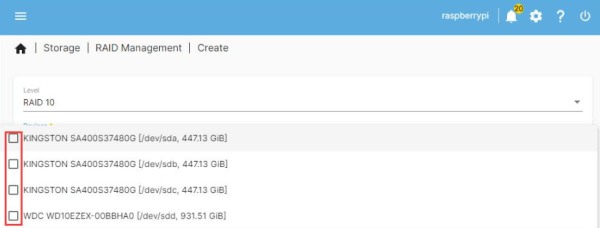
3. To create a RAID, select Storage -> RAID Management -> plus sign, select the disks that need to be grouped in RAID, and finally save and apply the changes.
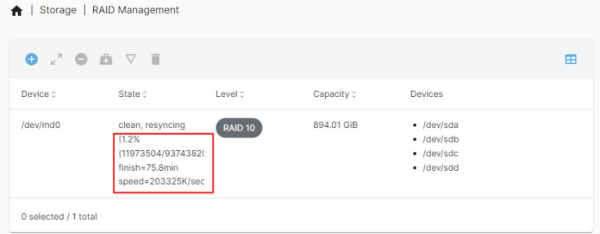
4. Wait for the synchronization to complete before use, the process will be long, please be patient.
5. After the synchronization is complete, you can create a file system, mount it, and set up a shared folder.