


- sales/support
Google Chat: zj734465502@gmail.com
- sales
+86-0755-88291180
- sales01
sales01@spotpear.com
- sales02
dragon_manager@163.com
- support
services01@spotpear.com
- CEO-Complaints
manager01@spotpear.com
- sales/support
WhatsApp:13246739196
Raspberry Pi Pico UPS Module User Guide
Overview
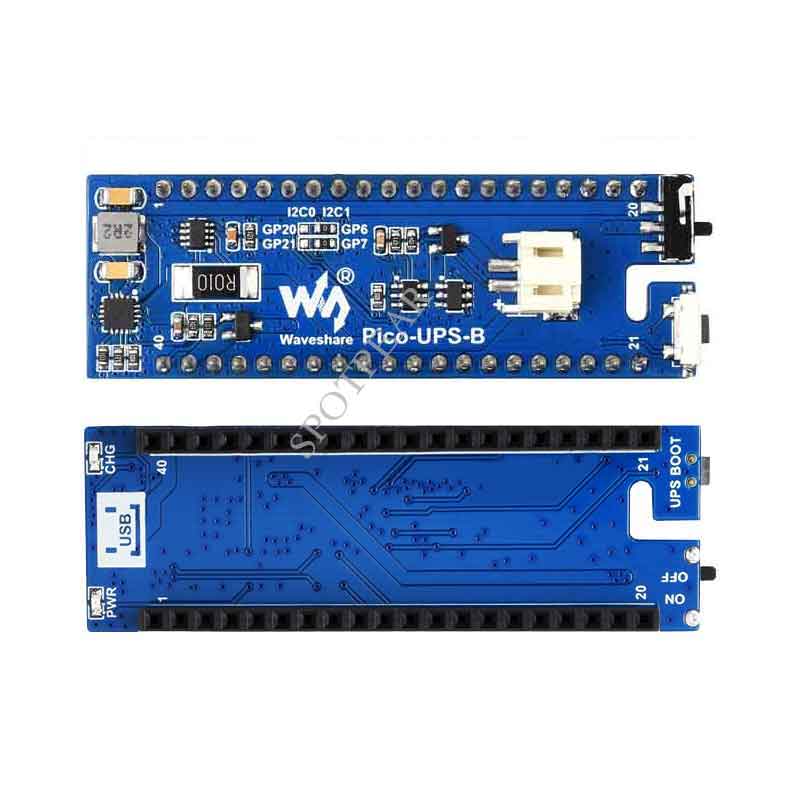
The Pico-UPS-B is a dedicated UPS (Uninterruptible Power Supply) module designed for Raspberry Pi Pico. It incorporates a Li-po battery switching charger with power path management, and a voltage/current monitoring chip that allows monitoring the battery operating status via the I2C bus. What's more, the male pin header makes it possible to "stack" other modules on top.
Features
- Standard Raspberry Pi Pico header supports Raspberry Pi Pico series boards
- Incorporates Li-po battery switching charger with dynamic power path management, more stable power supply
- I2C bus communication, monitoring the battery voltage, current, power, and remaining capacity in real-time
- Multi battery protection circuits: over charge/discharge protection, over current protection, short circuit protection, and reverse protection, more safe and stable
- Onboard recharging indicator, power indicator, easy to check the battery status
Specifications
- Recharge voltage: 5V
- Control bus: I2C
- Battery support: 600mAh 3.7V Li-po battery
- Dimensions: 60 × 21mm
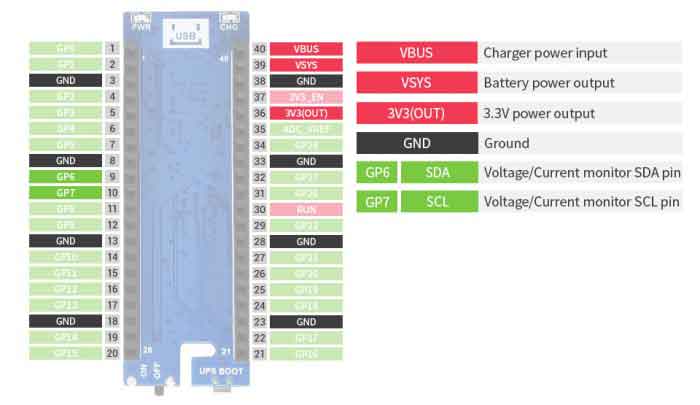
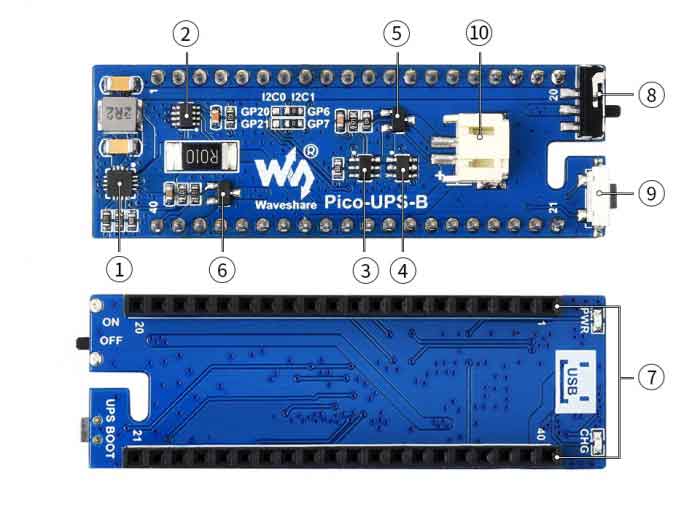
Pinout
Dimension
Setup Environment
You can refer to the guides of Raspberry Pi: https://www.raspberrypi.org/documentation/rp2040/getting-started/
Working with Raspberry Pi
- Access Raspberry Pi and open the terminal
- Download the download and unzip it to the Pico C/C++ directory. You need to follow the guides of Raspberry Pi to install SDK first.
wget -P ~/pico https://www.waveshare.com/w/upload/9/92/Pico-UPS-A.zip
cd ~/pico
unzip Pico-UPS-A.zip
C examples
- Press the BOOTSEL button of Pico and connect the Pico to your Raspberry Pi by USB cable and then release it.
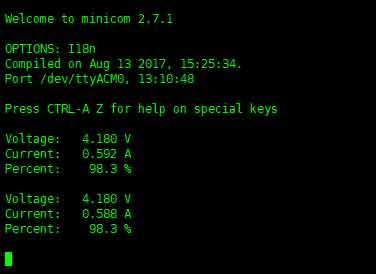
- Build and run the C examples
cd ~/pico/Pico-UPS-A/c/build/
cmake ..
make
sudo mount /dev/sda1 /mnt && sudo cp Pico_UPS.uf2 /mnt && sudo sync && sudo umount /mnt && sleep 2 && sudo minicom -b 115200 -o -D /dev/ttyACM0
- The expected result should be as figure below:
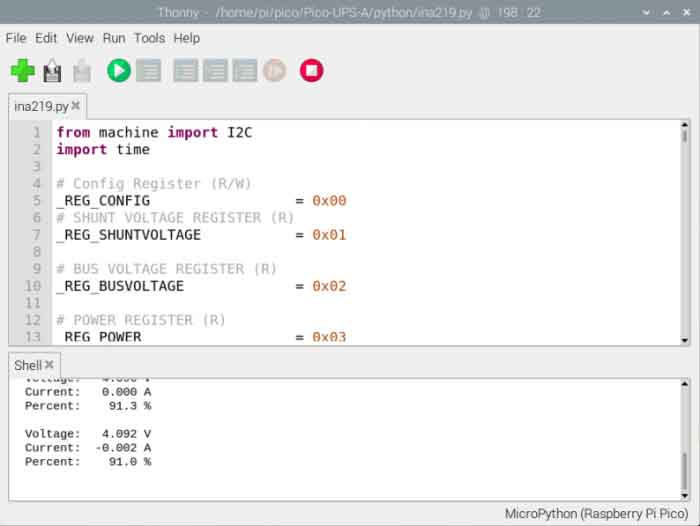
Python examples
- Access Raspberry Pi and open the Thonny.
- Open the example by the IDE and save
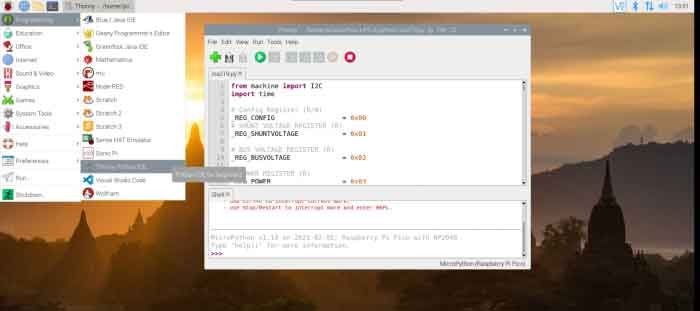
- Click the Run button to run the codes
TAG:
7inch Monitor LCD
BPI
ESP32 1.44inch LCD
Raspberry Pi 5 Case
Raspberry Pi 5
ESP32 MLX90640
Core3566004032
ESP32-C6-MINI-1Support WiFi 6 Bluetooth 5 Zigbee Thread
0.85inch Screen
Milk-V Duo
Milk V Duo UART
ESP32 ST7789 configuration
SpotPear
Raspberry Pi 5
Raspberry Pi 5 Audio hat
ESP32-C6-MINI-1Support WiFi 6 Bluetooth 5 Zigbee Thread
Luckfox Pico Pro
Raspberry Pi Game
Raspberry Pi 3 display HAT
Raspberry Pi Mini
Price:
$15.89
Part Number:
Pico-UPS-B
Brand:
Spotpear
SKU:
0101546
TAG:
Raspberry Pi 5 PD Induction
STM32 e-paper
spotpear
ESP32 S3
Arduino Thermal imaging
NVIDIA
Raspberry Pi Zero USB HUB
Raspberry Pi 5 CSI Cable
Raspberry Pi 5
Raspberry Pi 5
Raspberry Pi PICO
ESP32-H2 Thread
Raspberry Pi 5 Pure-Copper Cooler
Raspberry Pi 5 Rainbow Acrylic Case Colorful Translucent Acrylic Case Supports Installing Official Active Cooler
NUCLEO
Milk-V RJ45
Raspberry Pi 5
First-level Agency
Raspberry Pi 5 RTC Battery
Raspberry Pi 5 Camera Cable