- sales/support
Google Chat:---
- sales
+86-0755-88291180
- sales01
sales@spotpear.com
- sales02
dragon_manager@163.com
- support
tech-support@spotpear.com
- CEO-Complaints
zhoujie@spotpear.com
- Only Tech-Support
WhatsApp:13246739196
- Purchase/Shipping/Refund
WhatsApp:13424403025
Raspberry Pi ------ 4.1 Using of RGB Cooling HAT User Guide
1-1 Temperature control switch version
The Raspberry Pi RGB_Cooling_HAT needs to be properly plugged into the GPIO port of the Raspberry Pi and open the Raspberry Pi system I2C function.
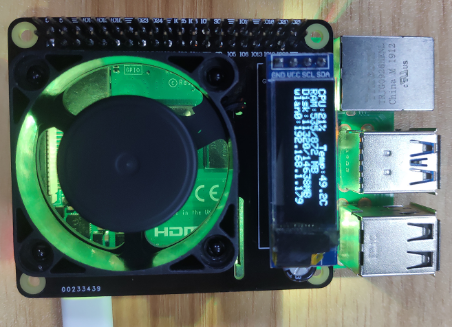
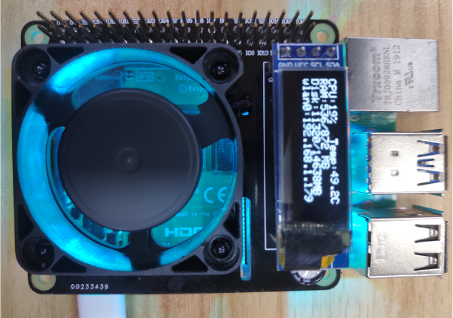
This experimental phenomenon shows that the OLED displays the CPU usage, CPU temperature, running memory usage, disk usage and IP address of the Raspberry Pi. The RGB light turns on the special effect. When the CPU temperature of the Raspberry Pi reaches a certain level, the fan will automatically turn on, cooling the Raspberry Pi. When the temperature drops, the fan will automatically turn off.
1. File transfer
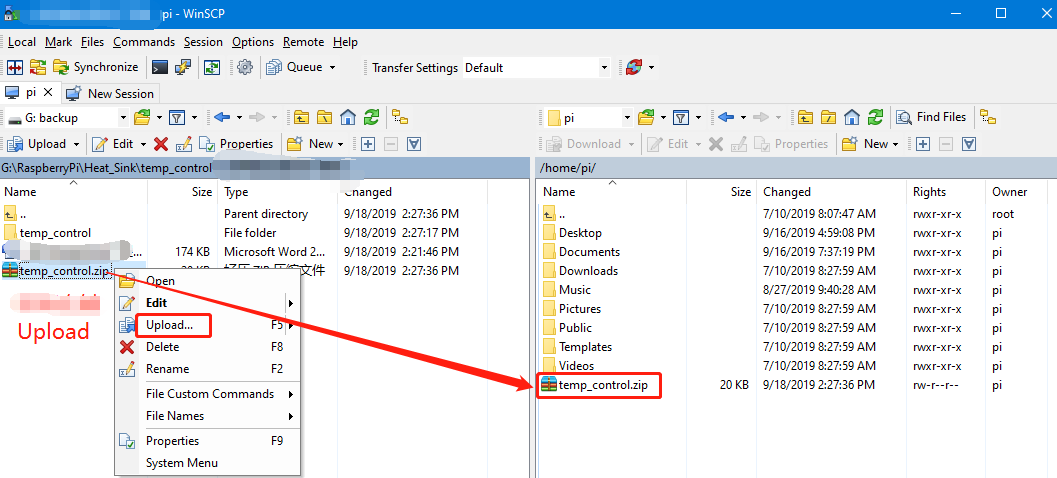
1.1 Install WinSCP tool on the computer side, connect the Raspberry Pi and transfer the temp_control.zip package to the pi directory of the Raspberry Pi.
Path of WinSCP:[Raspberry Pi RGB_Cooling_HAT]---[Tools]---[winscp556_setup.1416364912.exe]
1.2 Extract file
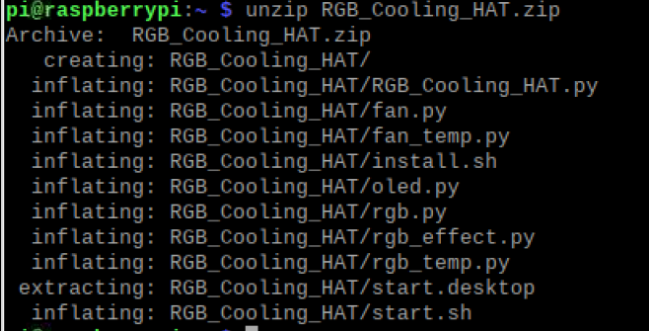
Open the Raspberry Pi terminal and input command ls to find the RGB_Cooling_HAT.zip file.
As shown below:

Input command to extract file:
unzip RGB_Cooling_HAT.zip
2.Compiling and running program
2.1 Input command to enter temp_control find file:
cd RGB_Cooling_HAT/
ls

2.2 Input command to run program
python RGB_Cooling_HAT.py

After the program is running, the RGB light will display special effects.
At the same time, the OLED screen displays the CPU usage, CPU temperature, operating memory usage, disk usage, and IP address of the Raspberry Pi.
When the CPU temperature reaches 55℃, the fan will automatically turn on to cool the Raspberry Pi.
When the temperature drops to 48℃, the fan will be automatically turned off.
Press Ctrl+C to exit the program.
3. Add boot self-starting
3.1 Input command to enter relate folder
cd /home/pi/RGB_Cooling_HAT
3.2 Input command t view script file
ls

3.3 Run script command to install
sudo sh install.sh
Finally, system will prompt “install ok!”
As shown below.
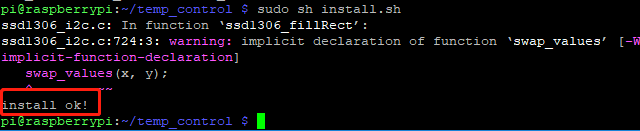
!Note: If you already have the autostart folder, it will be prompt can not create the autostart folder, which will not affect our use.
4.Restart Raspberry pi
Input command to restart Raspberry Pi:
sudo reboot