- sales/support
Google Chat:---
- sales
+86-0755-88291180
- sales01
sales@spotpear.com
- sales02
dragon_manager@163.com
- support
tech-support@spotpear.com
- CEO-Complaints
zhoujie@spotpear.com
- Only Tech-Support
WhatsApp:13246739196
- Purchase/Shipping/Refund
WhatsApp:13424403025
Raspberry Pi ------ 3.3 Get CPU temperature,Adjust fan speed User Guide
3 Get CPU temperature,Adjust fan speed
The Raspberry Pi RGB_Cooling_HAT needs to be properly plugged into the GPIO port of the Raspberry Pi and open the Raspberry Pi system I2C function.
The experimental phenomenon is to read and print the Raspberry Pi CPU temperature, and adjust the speed of the fan rotation according to the temperature. The higher the temperature, the faster the rotation speed.
1. File transfer
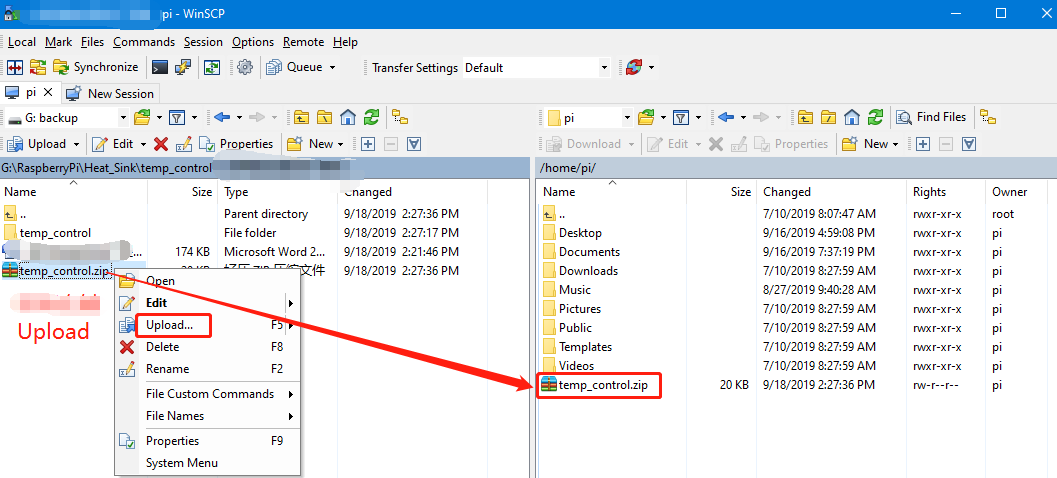
1.1 Install WinSCP tool on the computer side, connect the Raspberry Pi and transfer the temp_control.zip package to the pi directory of the Raspberry Pi.
Path of WinSCP:[Raspberry Pi RGB_Cooling_HAT]---[Tools]---[winscp556_setup.1416364912.exe]
1.2 Extract file
Open the Raspberry Pi terminal and input command ls to find the temp_control.zip file.
As shown below:

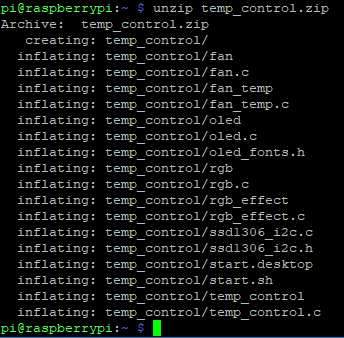
Input command to extract file:
unzip temp_control.zip
2. Compiling and running program
2.1 Input command to enter temp_control find file:
cd temp_control/
ls

2.2 Input command to compile:
gcc -o fan_temp fan_temp.c -lwiringPi
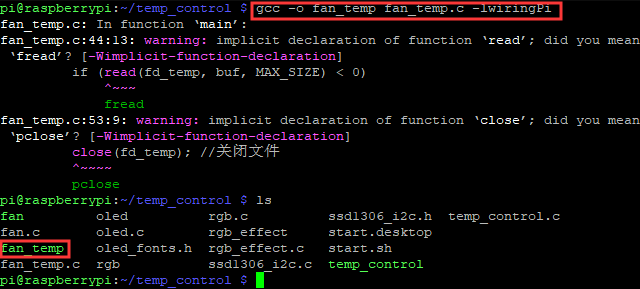
Among them, the gcc compiler is called, -o means to generate the file, fan_temp is the generated file name, fan_temp.c is the source program, -lwiringPi is the wiringPi library that references the Raspberry Pi.
2.3 Input command to run the program
./fan_temp
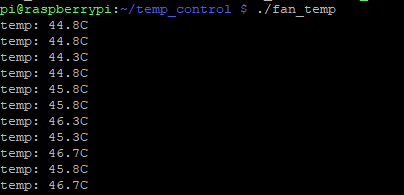
We can see the Raspberry Pi CPU temperature will be printed, and adjust the speed of the fan rotation according to the temperature. The higher the temperature, the faster the rotation speed.
3. About code
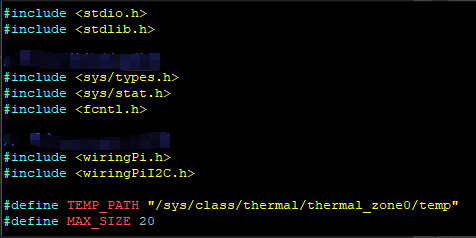
3.1 First, import the file control library and the I2C library. The path of the Raspberry Pi to view the CPU temperature is defined as TEMP_PATH.
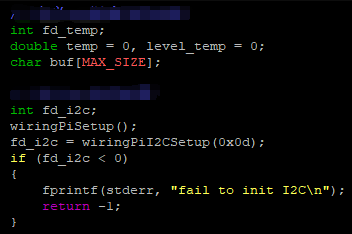
3.2 Define CPU temperature related parameters and I2C related parameters in the main function
3.3 Cycle through the CPU temperature file and save fd_temp, if the open fails it will return -1 . Then, read the temperature, save it to buf, and return -1 if it fails.
When the temperature reading is successfully saved to the buf, since the value is relatively large, divide by 1000 to get the current temperature, the unit is Celsius, and save to temp. Run the close() function to close the file each time the file is read.
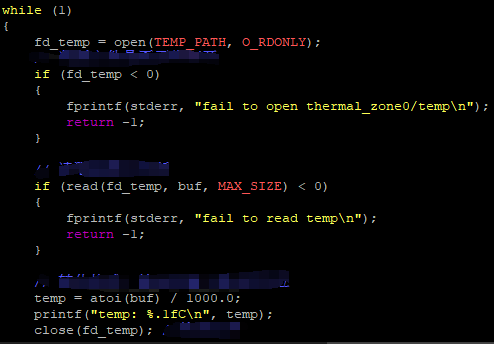
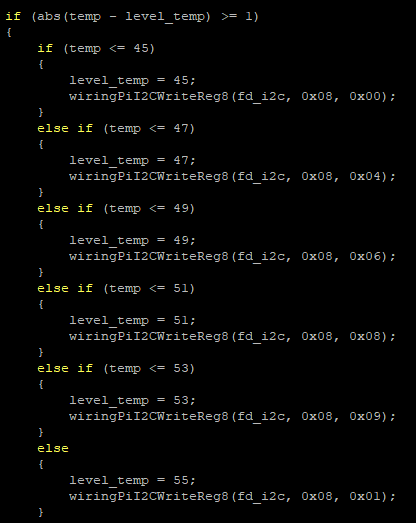
3.4 Get the temperature. Next, judge the temperature value and modify the fan speed. Can be modified according to actual needs.